


Creating Audio and Data Discs
149
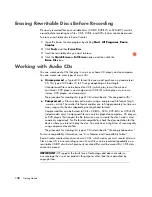
Audio CD tips
When recording music files, it is important to note that:
As you add music files in the recording session, the software calculates and displays
the amount of recording time available to record additional music files. If you try to
record more than a standard CD can hold, a message displays warning you that all
the tracks may not fit on your disc.
If your recording fails, manually select a slower recording speed, if available, each
time you make a recording. Refer to the Help menu in your selected software program
for more information about selecting a slower recording speed.
Before you begin creating discs
Save all work and close all open programs.
Turn off your screen saver.
Creating audio CDs
This section provides instructions for burning an audio CD that can be played in most
home and car CD players. For instructions on creating a compressed, jukebox CD, see
“Creating jukebox discs.”
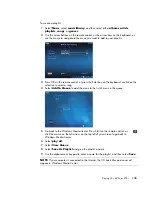
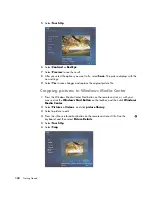
To create an audio CD:
1
Insert a writable CD into the disc-burning drive.
CD-R discs play in most home and car stereos, DVD players, and computers. CD-RW
discs play only in some stereos, DVD players, and computers.
2
Open the Roxio Creator program by clicking the
Windows Start Button
,
All
Programs
,
Roxio
, and then click
Creator
.
3
Click the
Audio
tab.
4
Click
Audio CD
.
5
Click
Add Music
, and add audio files from the computer hard disk drive.
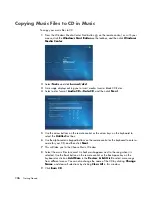
6
When done adding files, click the
Burn
button.
When the process is complete, you are prompted to create a disc label. For
more information on creating a disc label, refer to “Making a disc label using
LightScribe,” or “Making a paper disc label.”
For more help using Roxio Creator, refer to the Help menu in the program.
NOTE:
HP supports the lawful use of technology and does not endorse
or encourage the use of our products for purposes other than those permitted by
copyright law.
Summary of Contents for A1710n - Pavilion - 1 GB RAM
Page 1: ...Getting Started ...
Page 10: ...x Getting Started ...
Page 26: ...16 Getting Started ...
Page 66: ...56 Getting Started ...
Page 74: ...64 Getting Started ...
Page 84: ...74 Getting Started ...
Page 102: ...92 Getting Started ...
Page 108: ...98 Getting Started ...
Page 134: ...124 Getting Started ...
Page 156: ...146 Getting Started ...
Page 188: ...178 Getting Started ...
Page 194: ...Part Number 5991 6837 ...