160 ENGLISH
<Select Receivers>:
Select the receiver. Up to 3 receivers can be configured.
<Receiver>:
The name of the user that is to be notified.
<Receiver’s Address>:
The Email address of the user that is to be notified.
<Enable Attached Picture>:
Check the checkbox of <Enable Attached Picture> if you want to send the
Email with attached <Alarm> images. The <Interval> is the time of two adjacent <Alarm> images. You
can also set the <SMTP Port> and enable <SSL> here.
<Interval>:
The interval refers to the time between two actions of sending attached pictures.
6.
Click the <Apply> button to save the <Email Settings>.
7.
You can click the <Test> button to test whether your <Email Settings> work.
12.2.7 Configuring the NAT
Two ways are provided for port mapping to realize the remote access via the <Cross-segment
Network>, <UPnP™> and <Manual Mapping>.
UPnPTM
<Universal Plug and Play (UPnP™)> can permit the device to seamlessly discover the presence of other
network devices on the network and establish functional network services for data sharing,
communications, etc. You can use the <UPnP™>function to enable the <Fast Connection> of the device
to the <WAN> via a router without <Port Mapping>.
Before you start:
If you want to enable the <UPnP™> function of the device, you must enable the <UPnP™> function of
the router to which your device is connected. When the <Network> working mode of the device is set
as <Multi-address>, then the <Default Route> of the device should be in the same network segment as
that of the <LAN IP Address> of the router.
Steps:
1.
Enter the <Network Settings> interface: Menu > Configuration > Network
2.
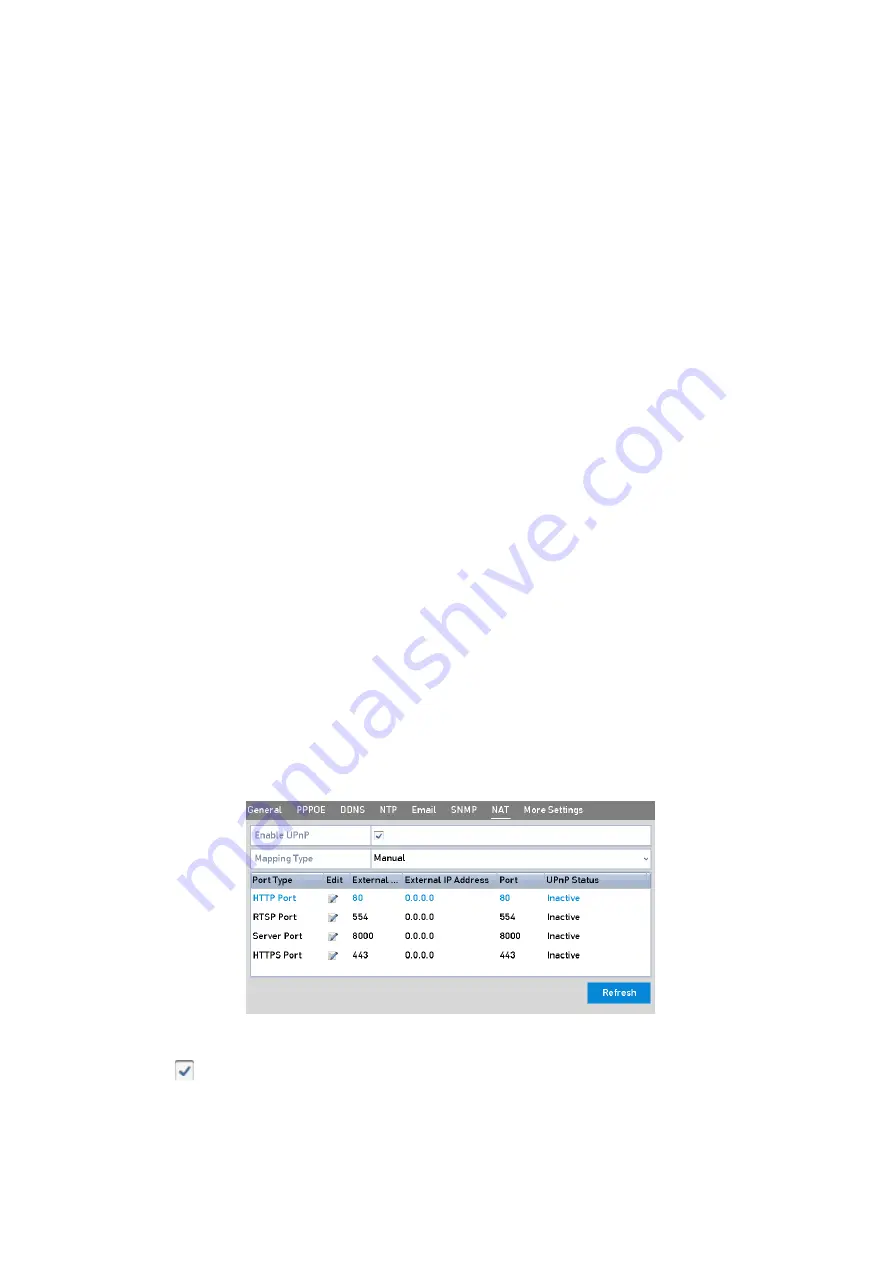
Select the <NAT> tab to enter the <Port Mapping> interface.
UPnP™ Settings Interface
3.
Check
the checkbox to enable <UPnP™> .
4.
Select the <Mapping Type> as <Manual> or <Auto> in the drop-down list.


