5.5 Replacing Consumables
142
Ma
int
enanc
e
5
5.5.4
Replacing the Waste Toner Container [B]
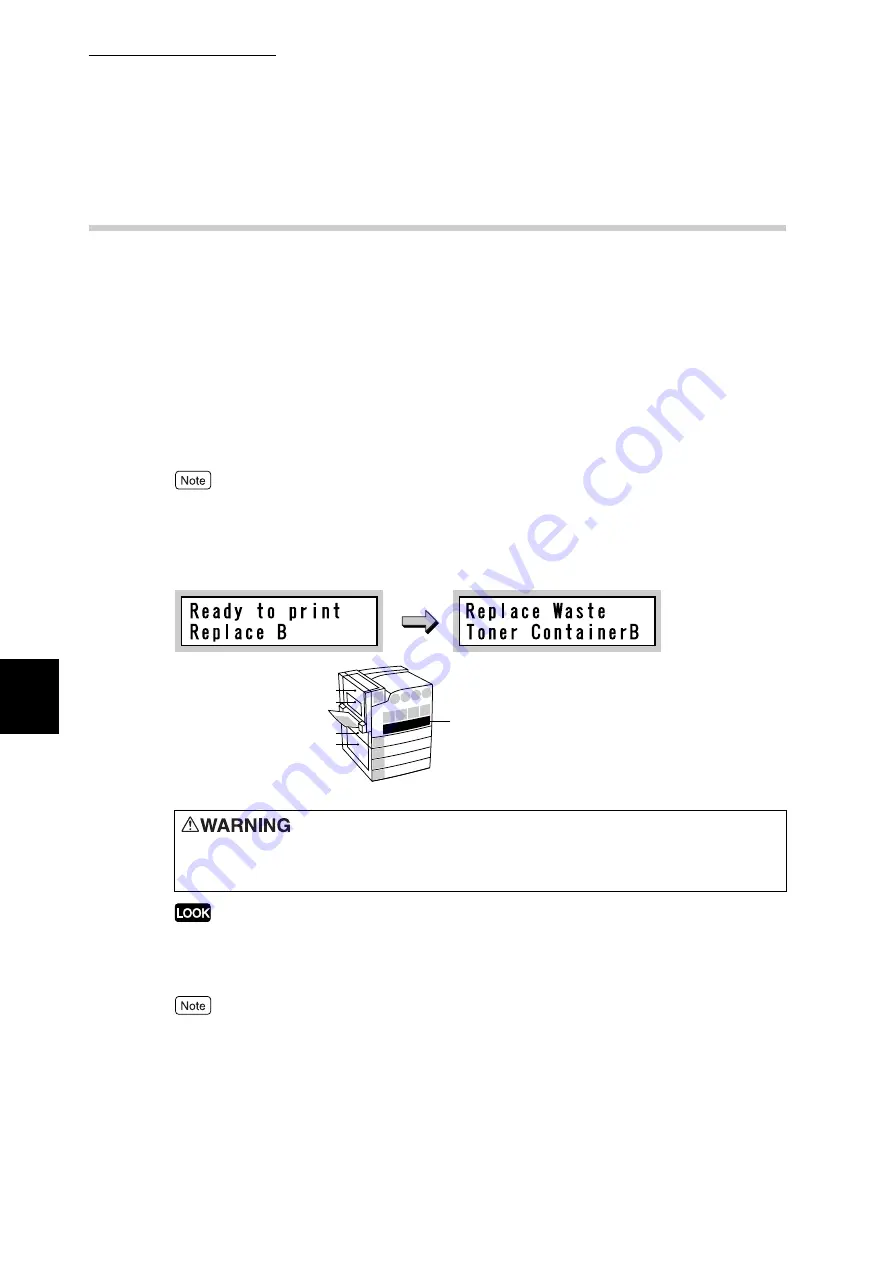
Toner remaining on the drum after printing is gathered in the waste toner con-
tainer. When it is almost the time to replace the waste toner container, the mes-
sage [Ready to print Replace Bottle B] appears. Even after the message
appears, you can print about 900 pages normally. Check that a new waste toner
container is in stock during this time.
The replacement time of the waste toner container comes after printing about
22,000 pages. The printing stops until the waste toner container is replaced with
a new one. Confirm the waste toner container position on the Indicator at the left
of control panel and replace it.
●
The number of pages that can be printed varies depending on documents.
●
When replacing the waste toner container, use the cleaning rod packaged in the waste toner con-
tainer box to clean the Raster Output Scanners (D1, D2, D3, and D4) to prevent uneven color den-
sity during printing.
●
Return used waste toner containers to our Customer Support Center for disposal.
●
Replace the waste toner container while the printer is on. Otherwise, print data remaining in the
printer and the information stored on the printer memory will be erased.
When replacing the waste toner container, toner may spill and dirty the floor. We recommend laying
paper on the floor beforehand.
Never throw toner, a waste toner container, or a toner container into an
open flame. It can cause an explosion and you can get burnt.
L4
E K C
B
M Y
A1 A2 A3
A4
1
5
2
3
4
L3
L2
L1
Waste toner container
Summary of Contents for DocuPrint C4350
Page 1: ...DocuPrint C4350 User Guide...
Page 4: ...ii DocuPrint C4350 Features The DocuPrint C4350 has the following features...
Page 30: ...xxviii...
Page 42: ...1 3 Setting the IP Address 12 Setting up the Printer Environment 1 Setting the IP Address...
Page 44: ...1 3 Setting the IP Address 14 Setting up the Printer Environment 1...
Page 47: ...1 4 Setting the Port 17 Setting up the Printer Environment 1...
Page 49: ...1 4 Setting the Port 19 Setting up the Printer Environment 1...
Page 74: ...3 5 Loading Configuration of Options and Paper Settings for Trays 44 Basic Operations 3...
Page 88: ...4 5 Printing on Non Standard Size Long size Paper 58 Printing 4...
Page 124: ...4 13 Sending a Document to the Printer by E Mail E mail Printing 94 Printing 4...
Page 161: ...5 4 Loading Paper 131 Maintenance 5...
Page 183: ...5 6 Printing Report List 153 Maintenance 5 Print example...
Page 197: ...5 8 Using Power Saver Mode 167 Maintenance 5...
Page 198: ...5 8 Using Power Saver Mode 168 Maintenance 5...
Page 212: ...5 10 Cleaning the Printer 182 Maintenance 5...
Page 282: ...6 8 Troubleshooting When Using E mail Services 252 Troubleshooting 6...
Page 322: ...7 4 List of Common Menu 292 Setting Common Menu 7 From the previous page To the next page...
Page 323: ...7 4 List of Common Menu 293 Setting Common Menu 7 From the previous page To the next page...
Page 324: ...7 4 List of Common Menu 294 Setting Common Menu 7 From the previous page To the next page...
Page 325: ...7 4 List of Common Menu 295 Setting Common Menu 7 From the previous page To the next page...
Page 326: ...7 4 List of Common Menu 296 Setting Common Menu 7 From the previous page...
Page 339: ...A Main Specifications 309 Appendix Simpli fied Chi nese PCL5 and ESC P ShuSong Optional...
Page 368: ...338 Index...


