background image

11 Setups

312

Setu

ps

11

„

Read Status (MDN)

An e-mail is received confirming whether the e-mail reached the addressee.

Incoming iFax Print Options

When an e-mail is received from an iFax supporting machine addressed to the e-mail 
address of the machine, you can select the print operation.

„

Print Attachment

The attached document only is printed.

„

Print All Headers and Contents

This prints the e-mail headers and body of the e-mail.

„

Print Basic Headers and Contents

This prints some e-mail headers (From/To/Subject/Date) and the e-mail body.

„

Auto Print

If the e-mail body is non-empty, this prints the e-mail headers and e-mail body.

Incoming iFax Output Destination

Set the output tray to be used for printed iFax received documents.

Note

This feature does not appear for some models. An optional package is necessary. For more 
information, contact our Customer Support Center.

Fax Transfer from Address Book

Set whether to set restrictions when forwarding e-mail received in SMTP format by iFax 
to fax addresses not in the address book.

„

Off

Forwarding is not restricted.

„

On

When received by SMTP, check if the recipient telephone number is listed in the 
address book, and if not refuse the received e-mail, and destroy the data.

Fax Transfer - Add Sender Header

When forwarding received e-mail from iFax by fax, select whether to add a send 
header.

The document received at the other end has added the time of starting transmission, 
sender name, recipient, G3 ID, and number of pages.

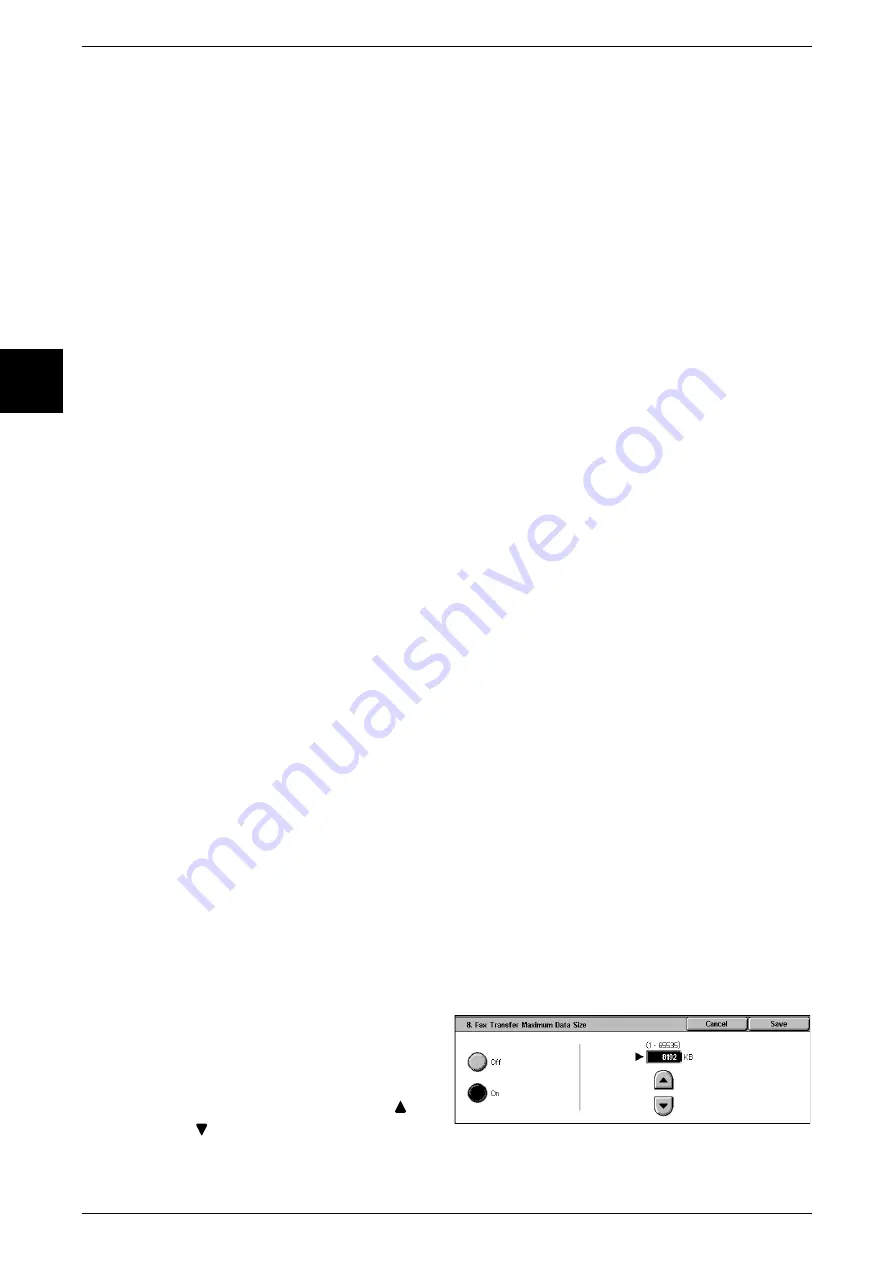
Fax Transfer Maximum Data Size

When sending a received e-mail from iFax to a fax, set the maximum data size.

1

Select [Fax Transfer Maximum 
Data Size].

2

Select [Off] or [On].

3

If you selected [On], select [

], 

[

], or the numeric keypad to 

enter a numeric quantity.

Summary of Contents for Document Centre C250

Page 1: ...Document Centre C450 C360 C250 User Guide ...

Page 2: ...due to external shocks or if the power is accidentally cut off in a manner not following the methods listed in manuals or other documentations Fuji Xerox is not responsible for such data loss and any consequence caused by such data loss Damage related to computer virus Fuji Xerox is not responsible for any breakdown of machines due to infection of computer virus Important 1 This manual is copyrigh...

Page 3: ...adio Frequency Emissions 22 Product Safety Certification 23 The Objectives of the International Energy Star Program 24 2 Sided Feature for models with the 2 sided feature installed 24 Power saving feature Lower Power mode Sleep mode 24 About License 25 OpenSSL 25 SSLeay 26 Heimdal 27 JPEG Code 27 Illegal Copies and Printouts 28 2 Product Overview 29 Machine Components 30 Main Body 30 Power On Off ...

Page 4: ...alance 65 Color Shift Adjusting Color Tone 65 Scan Options 66 2 Sided Making 2 sided Copies 66 Bound Originals Copying Facing Pages onto Separate Sheets 67 2 Sided Book Copy Making 2 Sided Copies of Facing Pages 68 Original Size Specifying the Scan Size for the Document 69 Mixed Size Originals Scanning Different Size Documents Simultaneously 70 Border Erase Erasing Edges and Margin Shadows of the ...

Page 5: ...d Sending iFax 108 Useful Features 109 Basic Features 113 iFax Fax Selecting iFax Fax 113 Next Destination Sending Faxes to Multiple Recipients 113 Specifying Destination Using the Address Book 114 Speed Dialing Entering Numbers Using Address Number 115 Specifying Destination Using One Touch Buttons 115 Specifying Destination Using the Keyboard Screen 116 Entering Specific Symbols 116 2 Sided Orig...

Page 6: ...ve Documents from Your Machine 137 On hook Confirming Remote Machine Response Prior to Transmission 139 Broadcast 140 Broadcast Send Transmitting to Multiple Recipients 140 Relay Broadcast Transmitting Documents Through a Relay Station 140 Remote Relay Broadcast Performing Relay Broadcast to Remote Locations 143 About Models Available for Relay Broadcast Send 147 About Receiving Faxes 149 Switchin...

Page 7: ...ing the Document Background 176 Color Space Specifying Color Space 176 Scan Options 177 Scan Resolution Specifying a Scanning Resolution 177 2 Sided Originals Scanning Both Sides of the Document 177 Bound Originals Scanning Facing Pages onto Separate Sheets 178 Scan Size Specifying a Scanning Size 179 Mixed Size Originals Scanning Different Size Documents Simultaneously 179 Border Erase Erasing Ed...

Page 8: ...b Flow 201 8 Stored Programming 203 Stored Programming Overview 204 Registering Deleting Renaming Stored Programming 205 Registering Stored Programming 205 Deleting Stored Programming 206 Naming Renaming Stored Programming 206 Recalling Stored Programming 207 9 Computer Operations 209 Overview of Features 210 Print Driver 210 Network Scanner Utility 2 211 CentreWare Internet Services 212 Printing ...

Page 9: ...ature 242 Step 6 Exiting System Administration Mode 242 System Settings Menu List 243 Entering Text 252 Common Settings 253 Machine Clock Timers 253 Audio Tones 256 Screen Defaults 258 Paper Tray Attributes 259 Set Numbering 263 Image Quality Adjustment 264 Reports 266 Maintenance 268 Other Settings 269 Copy Mode Settings 275 Basic Copying Tab 275 Copy Defaults 277 Copy Control 281 Original Size D...

Page 10: ...al Information 309 iFax Control 311 E mail iFax Settings 314 E mail Defaults 314 Address Search Directory Service 315 Other Settings 318 Mailbox Stored Document Settings 320 Mailbox Settings 320 Stored Document Settings 321 Setup Menu 323 Mailbox 323 Job Flow Sheets 326 Content Check 333 Address Book 334 Group Send 340 Comments 341 Paper Type 341 System Administrator Settings 342 System Administra...

Page 11: ...view of Machine Status 368 Machine Status 369 Machine Information 369 Paper Tray 370 Overwrite Hard Disk 371 Print Mode 371 Fax Receiving Mode 373 Billing Meter Print Report 374 Billing Meter 374 User Account Billing Meter 375 Print Report List 376 Automatically Printed Reports Lists 382 Consumables 384 Faults 385 14 Authentication and Auditron Administration 387 Overview of Authentication 388 Use...

Page 12: ...a Report 427 16 Problem Solving 429 Troubleshooting 430 Machine Trouble 432 Image Quality Problems 437 Trouble during Copying 443 Unable to Copy 443 The Copy Result is not What was Expected 444 Trouble during Printing 448 Unable to Print 448 The Printed Result is not what was Expected 449 Trouble during Fax 451 Problems Sending 451 Receiving Trouble 453 Trouble during Scanning 455 Unable to Scan w...

Page 13: ...rint 502 Setting Items for the PDF Direct Print Feature 502 PCL Emulation 504 HP GL2 Emulation 507 HP GL Settings List 507 Hard Clip Area 511 Printable Area 512 Auto Layout 514 List of Options 521 Cautions and Limitations 522 Notes and Restrictions on the Use of the Machine 522 Notes and Restrictions on the Use of the iFax Feature 523 Using the Telephone 526 Placing a Call 526 Simple Procedures 52...

Page 14: ......

Page 15: ...use this document as well as cautions on using the product safely and legally z Preface 14 z Related Information Sources 15 z Using This Guide 16 z Safety Notes 19 z The Objectives of the International Energy Star Program 24 z About License 25 z Illegal Copies and Printouts 28 ...

Page 16: ... to copy In this manual safety instructions are preceded by the symbol Always read and follow the instructions before performing the required procedures As a member of the International Energy Star Program Fuji Xerox confirms this product satisfies the requirements for International Energy Star Program standards Fuji Xerox shares the global concern about environmental conservation and has integrat...

Page 17: ...Network Administrator Guide This document is aimed toward network administrators as a guide to setting up the network environment Quick Reference Guide Introduces the main features of the machine as well as simple operating instructions Manual HTML A guide to installing print driver configuring the printer environment etc This manual is included in the CentreWare Utilities CD ROM Guides for Option...

Page 18: ...puter refer to the manuals provided with the personal computer operating system and network system Organization of this Guide This guide consists of the following chapters 1 Before Using the Machine Describes how to use this document as well as cautions on using the product safely and legally 2 Product Overview Describes basic information such as identifying the major components how to switch the ...

Page 19: ...14 Authentication and Auditron Administration The machine comes equipped with an authorization feature for restricting use of the machine as well as administration features to monitor usage statuses A system administrator can use the procedure described in this section to change parameters 15 Maintenance Describes procedures for replacing consumables cleaning the machine auto gradation adjustment ...

Page 20: ...ng conventions are used in this guide The cross reference is within this manual Refers to names of features and touch screen messages and input text Refers to folders files applications button or menu names displayed in the touch screen as well as the names of menus commands windows or dialog boxes displayed on the computer screen and their button and menu names button Indicates a hardware button ...

Page 21: ... earth circuit This product is supplied with a plug that has a protective earth pin This plug will fit only into an earthed electrical outlet This is a safety feature To avoid risk of electric shock contact your electrician to replace the electrical outlet if you are unable to insert the plug into it Never use an earthed adapter plug to connect the product to an electrical outlet that lacks an ear...

Page 22: ...h objects of any kind into slots or openings on the equipment z If any of the following conditions occur switch off the power to the machine immediately and disconnect the power cord from the electrical outlet Call an authorized local service representative to correct the problem The equipment emits unusual noises or odors The power cord is damaged or frayed A wall panel circuit breaker fuse or ot...

Page 23: ... Always locate the equipment in an area that has adequate ventilation and space for servicing See installation instructions for minimum dimensions z Always use materials and supplies specifically designed for your Fuji Xerox equipment Use of unsuitable materials may result in poor performance z Always unplug this equipment from the electrical outlet before cleaning Do Not Do These z Never use a pl...

Page 24: ...tration levels meet safe limits For Consumables Store all consumables in accordance with the instructions given on the package or container z Keep all consumables away from the reach of children z Never throw toner toner cartridges or toner containers into an open flame z Never use a vacuum cleaner when you clean spilled toner It can cause explosion as the toner fills the vacuum cleaner and gets s...

Page 25: ...ine 1 Product Safety Certification This product is certified by the following Agency using the Safety standards listed This product was manufactured under a registered ISO9001 Quality system Agency Standard NEMKO IEC60950 1 Edition 1 2001 ...

Page 26: ...for the machine You can copy two 1 sided originals on both sides of a sheet of paper You can also make 1 sided copies For information about this feature refer to 2 Sided Making 2 sided Copies P 66 Power saving feature Lower Power mode Sleep mode This product has a power saving feature which switches the machine to the Low Power mode automatically if the machine is on and not operated for a certain...

Page 27: ...enssl org 5 Products derived from this software may not be called OpenSSL nor may OpenSSL appear in their names without prior written permission of the OpenSSL Project 6 Redistributions of any form whatsoever must retain the following acknowledgment This product includes software developed by the OpenSSL Project for use in the OpenSSL Toolkit http www openssl org THIS SOFTWARE IS PROVIDED BY THE O...

Page 28: ...conditions and the following disclaimer in the documentation and or other materials provided with the distribution 3 All advertising materials mentioning features or use of this software must display the following acknowledgement This product includes cryptographic software written by Eric Young eay cryptsoft com The word cryptographic can be left out if the rouines from the library being used are...

Page 29: ...o endorse or promote products derived from this software without specific prior written permission THIS SOFTWARE IS PROVIDED BY THE INSTITUTE AND CONTRIBUTORS AS IS AND ANY EXPRESS OR IMPLIED WARRANTIES INCLUDING BUT NOT LIMITED TO THE IMPLIED WARRANTIES OF MERCHANTABILITY AND FITNESS FOR A PARTICULAR PURPOSE ARE DISCLAIMED IN NO EVENT SHALL THE INSTITUTE OR CONTRIBUTORS BE LIABLE FOR ANY DIRECT I...

Page 30: ...Copyright material or trademarks without the consent of the owner z Postage stamps and other negotiable instruments This list is not inclusive and no liability is assumed for either its completeness or accuracy In case of doubt contact your legal counsel Notice This machine is provided with the recognition function to prevent the copying of currency Also in case currency or securities are copied t...

Page 31: ...t the machine such as the names of each component switching on and off of the machine and the operation of the touch screen and power saving settings z Machine Components 30 z Power On Off 36 z About the Circuit Breaker 38 z Power Saver Mode 39 z Control Panel 42 ...

Page 32: ... 42 4 Center output tray Output tray Copies and prints are delivered here facing down 5 Paper stopper Set upright for use when making copies or prints 6 Power switch Switches the power of the machine on off 7 Front cover Open this cover to access the insides of the machine to replace consumables 8 Tray 1 2 3 4 Load papers here for copying 9 Tray 5 Bypass Used for loading non standard paper thick s...

Page 33: ...to clear paper jams 14 Bottom left cover Open this cover to access the insides of the machine to clear paper jams 15 RESET button This button automatically turns the machine off when a current leakage is detected 16 Parallel interface connector Use this interface to connect to a computer using a centronics standard interface cable 17 10Base T 100Base TX connector Use to connect a network cable 18 ...

Page 34: ...press this down when replacing the drum cartridges 24 Drum cartridges A1 A2 A3 A4 A drum cartridge comprises of photosensitive elements Drum cartridges are arranged in order A1 A2 A3 and A4 from the left as you face the main body 25 Toner collection bottle cover Toner collection bottles B for collecting used toner are located on the other side of this cover Open this cover to access the insides of...

Page 35: ...n this wheel to clear paper jams 3 Left cover Open this cover to access the insides of the machine to clear paper jams 4 Inner cover Open this cover to access the insides of the machine to clear paper jams 5 Document guides Use this guides to align the edges of the document 6 Document feeder tray Load documents here 7 Document output tray Receives scanned documents 8 Document feeder glass This par...

Page 36: ...1 OP TEL Use this interface to connect an external telephone receiver fitted with an extra G3 kit optional Do not connect to the TEL connector external telephones cannot be connected to the TEL connector 2 TEL Use this interface to connect an external telephone Do not use this interface for external telephones when they are fitted with an extra G3 kit optional 3 LINE 1 Line 1 Connect to a public t...

Page 37: ... to this tray 3 Front cover Open this cover to replace staples and clear staple jams 4 Staple cartridge This cartridge contains staples Remove this cartridge to replace staples and clear staple jams 5 Stand This stand connects the finisher section to the main body 6 Finisher interface top cover Open this cover to access the insides of the machine to clear paper jams Before opening this cover be su...

Page 38: ... on the power is as follows 1 Press the power switch to the position to turn the power on Note The Please wait message indicates that the machine is warming up The machine cannot be used while it is warming up After about 45 seconds the machine becomes ready for use Note When the power does not come on check if the RESET button is in a reset state button pressed in Powering Off The procedure for t...

Page 39: ...s performed internally on the machine for a while after the power switch is turned off Therefore do not unplug the power cord from the power outlet immediately after turning the power switch off Note Before you turn the power back on after turning it off first make sure that the touch screen has gone out ...

Page 40: ...pped object to cancel the pressed in state of the RESET button Once a month check the breaker for correct operation Also make sure that it is earthed If not the breaker cannot detect current leakage which can cause electric shock If you notice any unusual conditions contact our Customer Support Center Note The RESET button automatically turns the power off when current leakage is detected Normally...

Page 41: ...wer Saver feature is canceled Sleep Mode power consumption 10W In this mode the power is lowered more than in the Low Power mode The touch screen goes out and the Power Saver button on the control panel lights To use the machine press the Power Saver button The Power Saver button goes out to indicate that the Power Saver feature is canceled Changing the Power Saver Mode Change Interval The procedu...

Page 42: ...ode after the last operation Note The default for From Last Selection to Low Power Mode is 15 minutes The Low Power Mode cannot be set to Disabled From Last Selection to Sleep Mode Set the time to move to the Sleep Mode after the last operation Note The default for From Last Selection to Sleep Mode is 60 minutes Configure the From Last Selection to Sleep Mode time to be longer than the From Last S...

Page 43: ...how to exit the Power Saver mode The Power Saver mode is exited in the following instances z By pressing the Power Saver button z Receiving Print Data z Select Apply New Settings or Refresh in CentreWare Internet Services 1 Press the Power Saver button 1 2 3 4 5 6 7 8 9 0 C Power Saver button ...

Page 44: ...button to open the Review screen In this screen you can check a list of the status of copy fax and scan features whose settings have changed from the defaults You can also check the destination information for sending faxes and e mail In text descriptions this button is indicated as the Review button 7 Machine Status Pressing this button allows you to confirm the machine status and meters check th...

Page 45: ...s are indicated as the numeric keypad 15 Speed Dial Used to specify a destination phone number for fax or e mail In text descriptions this button is indicated as the Speed Dial 16 C Clear Press this button if you have entered the wrong numerical value with the numeric keypad In text descriptions this button is indicated as the C button 17 Dial Pause Used to insert a pause into a destination number...

Page 46: ...ature for which no label is provided use a blank label and write down the feature using a permanent marker and attach it to the appropriate Custom button Customizing the Menu Screen You can customize the types of features and the location of buttons on the Menu screen The following shows the factory default settings For about procedure to assign features refer to Screen Defaults P 258 Note When th...

Page 47: ...Copy This chapter describes the Copy screen and copy features z Copying Procedure 46 z Stopping the Copy Job 51 z Basic Copying 52 z Image Quality 61 z Scan Options 66 z Output Format 76 z Job Assembly 91 ...

Page 48: ...8 6 210mm A5 A5 to a maximum of 297 432mm A3 11 17 inches The document feeder can auto detect only documents of standard sizes For non standard size documents input the size in the Original Size field The document feeder can accept the following number of sheets For information about entering a custom size refer to Original Size Specifying the Scan Size for the Document P 69 For information about ...

Page 49: ...ce a single sheet or a book or other similar document up to 297 432 mm A3 11 17 inches On the document glass only standard size documents can be detected automatically For non standard size documents enter a custom size in Original Size For information about entering a custom size refer to Original Size Specifying the Scan Size for the Document P 69 1 Open the document cover 2 Place the document f...

Page 50: ...ormation about UserIDs and Passwords contact the System Administrator 1 Press the All Services button 2 Select Copy 3 If the previous settings remain press the Clear All button 4 Select the features to set from each tab as necessary For information about each of these features refer to the following sections Basic Copying P 52 Image Quality P 61 Scan Options P 66 Output Format P 76 Job Assembly P ...

Page 51: ... message You can set the next job during copying If You Have More Documents If you have another document select the Next Original on the touch screen while the current document is being scanned You can scan multiple documents for later output 1 Select Next Original while scanning is in progress Note When using the document feeder load the next document after the machine has finished scanning the f...

Page 52: ...ent and press the Start button 4 When all documents have been scanned select Last Original Step 5 Confirming the Copy Job in the Job Status 1 Press the Job Status button 2 Confirm the job status Note Select to display the previous screen and select to display the next screen 1 2 3 4 5 6 7 8 9 0 C Job Status button ...

Page 53: ...e below 1 Select Stop on the touch screen or press the Stop button on the control panel 2 Select Stop 3 If the screen of step 1 does not appear press the Job Status button 4 Select the job to cancel and then select Stop 1 2 3 4 5 6 7 8 9 0 C Stop button 1 2 3 4 5 6 7 8 9 0 C Job Status button ...

Page 54: ...irst Reduce Enlarge Making Enlarged Reduced Copies You can select a ratio to make enlarged or reduced copies 1 Select the copy ratio 100 Copies are made at the same size as the original Auto The copy ratio is automatically set based on the original size and paper sizes and the document is copied to fit in the selected paper Note If you select Auto specify a value other than Auto for Paper Supply R...

Page 55: ...ts P 284 Copy All Full Screen To prevent image loss at the edge of the original the document is reduced to just below 100 when it is copied If this option is selected a check mark is added When Variable is Selected You can enter any ratio for copying Set the ratio within the range from 25 to 400 in 1 increments 1 Select Variable 2 Specify the ratio with the numeric keypad or and Note If you enter ...

Page 56: ...tered The calculation results are indicated by copy ratios within the range from 25 to 400 1 Select Calculator 2 Enter the value for the original document width in Original Size of X width using the numeric keypad and select Next 3 Enter the value for the copy size width in Copy Size of X width using the numeric keypad and select Next 4 In the same way enter the original document height value and ...

Page 57: ...t paper trays You can change the paper trays to display For information about the setting procedures refer to Paper Supply 2nd Button P 276 Paper Supply 3rd Button P 276 and Paper Supply 4th Button P 276 More The Paper Supply screen is displayed Paper Supply Screen You can select a paper tray that does not appear on the Basic Copying screen 1 Select More 2 Select the paper tray Auto Based on the o...

Page 58: ...han Side 2 Paper Transparency Lightweight and Labels 1 Select Standard Size 2 Select the paper size and paper type Note Select to display the previous screen and select to display the next screen When Non standard Size is Selected Set the width X within the range from 100 to 483 mm and the height Y within the range from 100 to 305 mm in increments of 1 mm 1 Select Non standard Size 2 Enter the pap...

Page 59: ... cyan and black Black The machine makes copies in black and white regardless of the colors in the original document Dual Red Black The machine makes copies of color documents in two preset colors You can change the colors to display For information about the setting procedures refer to Dual Target Color Target Area P 278 and Dual Target Color Non target Area P 278 More Display the Output Color scr...

Page 60: ...ection screen is displayed Source Color Screen Select the color to scan extract from the document 1 Select Dual Color 2 Select Source Color 3 Select Other than Black or Color Selection 4 If you selected Color Selection select the color to scan Other than Black Colors other than black are scanned Color Selection From six fixed colors you can specify one color or multiple colors to scan Target Color...

Page 61: ...85 1 Select Single Color 2 Select Color Selection 3 Select a color Copy Position Margin Shift Shifting the Image Copy Position Copies can be made with the document image position shifted to the left right top or bottom of the paper or with the document center shifted to the center of the paper This feature is the same as Margin Shift of the Scan Options screen For more information refer to Copy Po...

Page 62: ...y density to one of seven levels Copying is darker when you move to the left and lighter when you move it to the right Note Copy Density of the Basic Copying screen and Copy Density of Lighten Darken Contrast of the Image Quality screen are the same 1 Adjust the density using and ...

Page 63: ...or perform auto gradation adjustment For information about auto gradation adjustment refer to Executing Auto Gradation Adjustment P 424 Image Quality Presets Selecting Image Quality If you select an image quality of Image Quality Preset the Auto Exposure Lighten Darken Contrast Sharpness Color Saturation Color Shift and Color Balance settings are automatically adjusted and copies are made at a qua...

Page 64: ...g copies of photographs text and other documents you can make copies at the image quality corresponding to each type of document Copies of the document can be reproduced at a more faithful image quality by selecting the document type that matches the document 1 Select Original Type 2 Select the type of image quality Auto This item sets Output Color of the Basic Copying screen according to the docu...

Page 65: ...olor Copies Map Select this item for making copies of documents that have text on colored backgrounds such as maps Lighten Darken Contrast Adjusting the Copy Density and Contrast You can adjust the copy density and contrast Note Lighten Darken of Lighten Darken Contrast and Lighten Darken of Basic Copying are the same If Lighten Darken or Contrast is selected when Image Quality Preset is set the I...

Page 66: ...ive color saturation levels between Lower and Higher The brightness of color in documents increases the nearer the level is to Higher and the brightness of color in documents decreases the nearer the level is to Lower Auto Exposure Erasing the Background Color of Documents When copies are made with Black of Output Color selected the background color of documents such as newspapers and colored pape...

Page 67: ... left or right The bottom bar of the Color Shift screen indicates the tone of the document and the upper bar indicates the tone after adjustment If you press a color shift button you can move the lower bar to change the overall tone of the document to the tone of the upper bar For example if Y yellow on the lower bar is moved to the left towards R red on the upper bar the yellow in fruit becomes r...

Page 68: ...e Image Making Reversed Copies of Images 74 Original Orientation Specify the Orientation of Loaded Documents 75 1 On the All Services screen select Copy 2 Select the Scan Options tab and then select a feature on the Scan Options screen that appears 2 Sided Making 2 sided Copies Copies of 1 sided and 2 sided documents can be made on one side or both sides Important Confirm that the orientation of t...

Page 69: ...ed is selected Bound Originals Copying Facing Pages onto Separate Sheets The Bound documents feature allows you to copy facing pages of a document onto separate sheets of paper in page order This feature is useful if you need to make separate copies from facing pages of bound documents such as a booklet Important You cannot use the document feeder with this feature A document of non standard size ...

Page 70: ...hen making copies of facing pages in a bound document so that pages face each other in the same way as the document A blank sheet is inserted automatically as the first page You can also specify the start page and the end page from the left and right facing pages Note This feature does not appear for some models An optional package is necessary For more information contact our Customer Support Cen...

Page 71: ...tems when Top Page then Bottom is selected End Page Select the copy end page from the following items z Left Page Right Page You can select these items when Left Page then Right or Right Page then Left is selected z Top Page Bottom Page You can select these items when Top Page then Bottom is selected Original Size Specifying the Scan Size for the Document You can set the scan size for the document...

Page 72: ...s of the documents You can also specify the size of the paper to make copies on so that copies are made on the same size of paper Important Confirm that the orientation of the document and the Original Orientation setting of the Scan Options screen are the same Be sure to load A5 documents vertically When loading a B5 size document with A3 or A4 size documents in a vertical direction place the B5 ...

Page 73: ...rder erase width within the range from 0 to 50 mm in 1 mm increments z L R erase Shadows on the left and right of the document are erased Edges on the left and right are erased in accordance with the direction that the document was loaded You can set the border erase width within the range from 0 to 50 mm in 1 mm increments z Center Erase Shadows in the center of documents such as booklets or docu...

Page 74: ...ide 1 screen z Side 2 Displays the Margin Shift Side 2 screen Margin Shift Side 1 Screen You can set the copy position margin shift of Side 1 1 Select Side 1 2 Select any item No Shift Copies are made without the position of the document image being shifted Auto Center Copies are made so that the center of the document matches the center of the paper Corner Shift Copies are made with the document ...

Page 75: ...rror Shift Select this item when you want the positioning of Side 2 to match the positioning of Side 1 Image Rotation Making Copies with the Image Rotated Vertically or Horizontally If the orientation of the paper currently loaded in the tray differs from that of the document that is loaded the machine automatically rotates the document image to make copies with the document and paper orientations...

Page 76: ...re settings Portrait Original Left Edge If documents are of mixed orientations images will be rotated so that the top edge of a landscape document is aligned with the left edge of a portrait document Portrait Original Right Edge If documents are of mixed orientations the image will be rotated so that the top edge of a landscape document is aligned with the right edge of a portrait document Mirror ...

Page 77: ...ntify the top of the document the orientation of the set document must be configured Note If the Original Orientation differs from the actual document orientation then the machine may mistakenly detect the head of the document 1 Select Original Orientation 2 Select Head to Top or Head to Left in accordance with the orientation that the document is loaded Head to Top Select this item when placing t...

Page 78: ... On the All Services screen select Copy 2 Select the Output Format tab and then select a feature on the Output Format screen that appears Copy Output Stapling Specifying Copy Output Stapling for Output You can specify the copy output method When Stapling is specified each set of copies can be stapled and then output When the Offset Stacking Module is installed the output position of copies is offs...

Page 79: ...ositions One Staple Top Left Two Staples Left Two Staples Top One Staple Top Right and Two Staples Right Important In the following cases the staple direction appearing on the screen and the direction in which staples are actually stapled differ When the document is placed in the direction it is read top side up and one staple was stapled on the top left When the document is placed in the left dir...

Page 80: ...ast Original as Back Cover The last page of the original is used as the back cover of the booklet Select the check box to use the last page as the back cover When using Subsets to separate booklets the cover will be made on the last page of the last subset Note Depending on the number of pages in the original a blank sheet may be inserted before the last page Booklet Creation Gutter Screen You can...

Page 81: ...n half and overlaid to form a booklet This feature can be set to from 1 to 50 pages in 1 page increments 1 Select On 2 Set the number of copies using and or with the numeric keypad Covers Attaching a Cover to Copies You can make copies with a cover attached The front and back cover can be output before the first page of the document on a different type of paper e g colored paper or heavyweight pap...

Page 82: ...paper and the cover When Bypass is selected the Tray 5 Bypass screen appears For more information refer to Tray 5 Bypass Screen P 56 Transparency Separators Inserting Blank Sheets between Transparencies A blank sheet can be output inserted as a separator between copied transparencies At the same time only the required number of copies for distribution is printed When loading transparencies in Tray...

Page 83: ...kes copies of the images so that they fit on the selected paper Important Confirm that the orientation of the document and the Original Orientation setting of the Scan Options screen are the same Note When anything other than Auto is selected for Reduce Enlarge image loss may occur at edges depending on the image size of the document When Border Erase is set border erase is executed for each docum...

Page 84: ...et of copies for a poster 1 Select Poster 2 Select Output Size or Enlargement Off Poster is not applied to copies Output Size You can select from seven paper sizes Paper Tray Settings Displays the Poster Paper Tray Settings screen Select the paper tray to use When Bypass is selected the Tray 5 Bypass screen appears For more information refer to Tray 5 Bypass Screen P 56 When Enlargement is Selecte...

Page 85: ...ch of the long and short sides of the paper You can specify from 1 to 23 repeats along the long side Y and from 1 to 33 repeats along the short side X Image Layout z Even Images are copied on the paper with the paper evenly divided up by the repeated number of images z Bias The repeat images are copied to the paper consecutively Annotation Adding Stamp Date Page Number to Copies You can add a stam...

Page 86: ... Off or On Off No stamp is added On A stamp is added Text Displays the Annotation Stamp Text screen You can select from eight character types for the stamp Position Displays the Annotation Stamp Position screen You can select from nine positions for the stamp Print On Displays the Annotation Stamp Print On screen You can select the page s to print the stamp from First Page Only and All Pages Color...

Page 87: ...can select the page s to print the date from First Page Only and All Pages Position Displays the Annotation Date Position screen You can select from six positions for printing the date Annotation Page Number Screen You can add a page number to copies 1 Select Page Number 2 Select Off or On Off No page number is added On A page number is added Style Displays the Annotation Page Number Style screen ...

Page 88: ...ent is automatically counted as the total number of pages z Enter Number You can specify the total number of pages within the range from 1 to 999 Page1 Page2 Page3 Page is added in front of the page number Example Page1 Page2 Annotation Page Number Print On Screen You can specify the page s to add a page number 1 Select Print On All Pages A page number is added to all pages Include Covers Separato...

Page 89: ...he second set To prevent for instance the duplication of confidential documents for distribution at conferences you can use sequential numbering to associate distribution copies to people Note This feature does not appear for some models An optional package is necessary For more information contact our Customer Support Center 1 Select Set Numbering 2 Select any item Control Number Displays the Set...

Page 90: ... Numbering Text Screen Select the text to print on the copy 1 Select Off or On 2 If you selected On select any text Off No text is printed On Text is printed You can select from three character types for the set numbering Set Numbering User Account Number Screen When using User Administration or Auditron Administration a user account number is printed 1 Select Off or On Off The user account number...

Page 91: ... Select Off or On Off No serial number is printed On The serial number is printed Set Numbering Text Effect Screen You can set the text effect If you set a text effect and make a copy text is embedded in the background The embedded text on the output copy is either printed in an embossed or outline state 1 Select Off 2 Select Off Embossed or Outline On A text effect is applied Embossed The text on...

Page 92: ... advanced settings refer to Other Settings P 269 Double Copy Making Several Copies of the Same Image on one Sheet of Paper Repeatedly copies one original onto equally divided areas according to the specified number of copies Note When anything other than Auto is selected for Reduce Enlarge image loss may occur at edges depending on the image size of the document ÅB 1 Select Double Copy 2 Select an...

Page 93: ...and then select a feature on the Job Assembly screen that appears Build Job Making Copies of Documents with Different Settings in a Single Operation This feature allows you to change and save settings individually for each document page or stack and then to finally make copies of documents with different settings as one job Note This feature does not appear for some models An optional package is n...

Page 94: ...t This is on when using the Build Job feature Start You can load the next document and configure the settings for the document Note The same operation is performed if you press the Start button on the control panel Build Job Chapter Division Separators Screen You can set the chapter division and separators Off The next stack of documents is copied after the previous stack Chapter Division The next...

Page 95: ...pied To output the remaining sets select Start To stop the job select Stop To change the number of sets select Change Quantity and use the numeric keypad to input the number of sets Document 50 sheets Adding Originals Use this feature if you have a stack of originals too large for the Document Feeder or want to scan multiple originals on the Document Glass and copy them as one job The Next Origina...

Page 96: ...n is performed if you press the Start button on the control panel Delete Outside Delete Inside Deleting Outside Inside of the Selected Area when Copying Specify an area to delete everything outside or inside of when copying Up to 3 areas can be specified Note This feature does not appear for some models An optional package is necessary For more information contact our Customer Support Center 1 Sel...

Page 97: ... at the document When specifying multiple areas the specified areas may overlap When Reduce Enlarge is enabled the specified area will be reduced enlarged accordingly The setting can be changed from delete outside to delete inside without changing the specified area 1 Select Area X Note X represents the number of the area displayed 2 Enter the value for X1 in X1 using the numeric keypad and select...

Page 98: ......

Page 99: ...essories are required to use these features For more information contact our Customer Support Center z Fax Procedure 98 z Stopping the Fax 104 z About Internet Fax 105 z Basic Features 113 z Image Quality 120 z Scan Options 121 z Send Options 124 z On hook Others 136 z Broadcast 140 z About Receiving Faxes 149 z About Facsimile Information Services 151 ...

Page 100: ...only auto detect documents of standard size widths Note Size of document that can be detected vary depending on Paper Size Settings in the System Administration mode For information about Paper Size Settings refer to Paper Size Settings P 271 The sizes on the left are converted into sizes shown on the right z 8 inch wide document J B5 width document z 10 inch wide document J B4 width document The ...

Page 101: ...ts single sheet or book form documents of sizes up to 297 432mm A3 11 17 inches The document glass can auto detect only documents of standard sizes Note The sizes of documents that can be detected vary depending on Paper Size Settings in the System Administration mode For information about Paper Size Settings refer to Paper Size Settings P 271 1 Open the document cover 2 Place the document face do...

Page 102: ...on about UserIDs and Passwords contact our Customer Support Center 1 Press the All Services button 2 Select Fax Internet Fax 3 If the previous settings remain press the Clear All button 4 Select the features to set from each tab as necessary For information about each of these features refer to the following sections Basic Features P 113 Image Quality P 120 Scan Options P 121 Send Options P 124 On...

Page 103: ...rocessed when there are redialing resending or delayed start jobs Important Confirm the recipient before sending a fax For information about Broadcast Send refer to Broadcast Send Transmitting to Multiple Recipients P 140 This section describes specifying a recipient using the numeric keypad 1 Enter the fax number using the numeric keypad 2 To specify multiple recipients select Next Recipient on t...

Page 104: ...ge You can set the next job during faxing If You Have More Documents If you have another document select the Next Original on the touch screen while the current document is being scanned This allows you to transmit multiple documents as one set of data 1 Select Next Original while scanning is in progress Note When using the document feeder load the next document after the machine has finished scan...

Page 105: ... Step 5 Confirming the Fax Job in the Job Status 1 Press the Job Status button 2 Confirm the job status Note Select to display the previous screen and select to display the next screen 1 2 3 4 5 6 7 8 9 0 C Job Status button ...

Page 106: ...1 Select Stop on the screen or press the Stop button on the control panel 2 Select Stop 3 If the screen of step 1 does not appear press the Job Status button 4 Select the job to cancel and then select Stop 1 2 3 4 5 6 7 8 9 0 C Stop button 1 2 3 4 5 6 7 8 9 0 C Job Status button ...

Page 107: ...compatible machine of the recipient can process For more information refer to Sending iFax P 105 For information about profiles refer to iFax Profile Specifying iFax Profiles P 134 Important If an iFax transmission is directly sent to a computer the document cannot be opened on the computer in some cases Use Scanner Mail Transmission when sending a document to a computer Receiving iFax Printing iF...

Page 108: ...adcast Send Feature An iFax can be sent to multiple destinations by specifying multiple e mail addresses for its recipients Also you can mix normal fax recipients and iFax recipients to send a broadcast transmission for fax and iFax For information about how to specify recipients refer to Step 3 Specifying the Destination P 101 and Specifying Destination Using the Address Book P 114 Precautions Wh...

Page 109: ...to print the file Also if a TIFF C profile is received the file will be printed in black and white For information about profiles refer to iFax Profiles Specifying iFax Profiles P131 Differences between iFax and Regular Fax Features This section describes the differences between iFax and regular fax features Reduction in Communication Charges As the iFax feature transmits data via an existing intr...

Page 110: ...tering Numbers Using Address Number P 115 Specifying Destination Using One Touch Buttons P 115 and Specifying Destination Using the Address Book P 114 If the hard disk of the machine becomes full during scanning of a document a screen appears to prompt you to select whether to send the job up to the stored pages or to cancel the job Choose one of the processes If the hard disk of the machine becom...

Page 111: ... problem in the Job History Report z Mailbox Operations If the machine runs out of hard disk space while printing e mail or storing e mail to the mailbox the page being processed will be deleted at the point in time when the machine runs out of hard disk space Restricting Incoming E Mail The machine can be configured to receive e mail from approved domains only This feature is known as the Domain ...

Page 112: ...ot support the iFax feature This feature sends faxes as e mail to iFax compatible machines fax gateways that are connected to a network via the Internet The fax is converted from an e mail to a fax document on the iFax compatible machine and forwarded to a specified fax machine When using this configuration fax transmission costs can be reduced by locating the fax gateway and fax machines within a...

Page 113: ...uments received in the mailbox refer to Printing Deleting Documents in Mailbox P 190 Forwarding iFax The machine can receive faxes sent from the mailbox or automatically forward the faxes which are stored by the Box Selector feature in the mailbox by e mail to the forwarding address specified for the mailbox As you can use the e mail forwarding feature to forward received fax documents you do not ...

Page 114: ...ving an iFax the reception is cancelled and the partly received file is deleted If there is a problem with the data during iFax forwarding the forwarding is canceled and the document is saved to the mailbox If forwarding using SMTP fails the document is stored in the mailbox You can confirm the forwarding result in the Job History Report For information about setting the mailbox forwarding feature...

Page 115: ...t to multiple recipients with a single operation There is no need to repeat the same operation for each recipient When an extra G3 Kit optional is installed you can use the extra lines to make multiple transmissions simultaneously with Broadcast Send If you specify Broadcast Send the machine prints a Broadcast Multi Poll Report after the Broadcast Send operation finishes Note The maximum number of...

Page 116: ... can change the initial number of the Address Number For information about how to change the Address Number refer to Address Search Directory Service P 315 Address List This shows a list of all registered addresses Select to display the previous screen and select to display the next screen Select Select to Enter Number and enter a 3 digit Address Number 001 to 500 using the numeric keypad to displ...

Page 117: ...on and enter a 3 digit Address Number Repeat this procedure for each additional recipient Specifying Destination Using One Touch Buttons You can use the one touch buttons to specify recipients One touch buttons correspond to the numbers registered for the Address Numbers from 001 to 070 For example when the number you want to dial is registered to the Address Number 001 press the one touch button ...

Page 118: ...ction Input method Enter pause or pause One pause is 3 seconds You can enter pauses of 6 seconds 9 seconds etc by additional button presses Press the Pause button Example 0 123 0 123 Transmit using a password S Use a password to prevent transmission errors When a password has been set transmission will only start if the password matches the ID number on the remote terminal 1 Select the Keyboard bu...

Page 119: ...d documents head to head 2 Sided H to T Select this to transmit 2 sided documents head to toe 2 Sided Originals Screen 1 Select Detailed Settings 2 Select 1 Sided 2 Sided 2 Sided First Page 1 Sided or Originals in accordance with the document to be transmitted 2 Sided Select this to use the 2 sided feature to transmit all pages 2 Sided First Page 1 Sided Select this when you do not want to transmi...

Page 120: ... Photo Select this when transmitting documents that contain only photos Note We recommend selecting same scale scanning for documents that contain photos Stripes etc may appear in the photo image sections if a setting such as scanning at a reduced size was specified Resolution Specify the Scanning Resolution You can set the resolution for scanning documents Standard Select this when transmitting d...

Page 121: ...334 The machine scans a document at the specified resolution but if the machine of the recipient does not support the resolution the machine automatically changes the resolution to one supported by the other machine and there is a corresponding loss in quality The higher the resolution the lower the transmission speed Usually we recommend using Super fine 400dpi or lower ...

Page 122: ...al Type Selecting the Original Type This procedure is the same as that for selecting the Original Type of Basic Features For information about Basic Features refer to Original Type Selecting the Image Quality Type for the Document P 118 Density Level Adjusting Density Level Set the density level 1 Select Lighten Darken on the Image Quality screen 2 Use and to select from seven density levels ...

Page 123: ...ting 2 Sided Originals This procedure is the same as that for selecting the Original Type of Basic Features For information about Basic Features refer to 2 Sided Originals Transmitting 2 Sided Documents P 117 Bound Originals Transmitting Facing Pages on Separate Sheets You can transmit the left and right pages of a bound document on separate sheets Important You cannot use the document feeder with...

Page 124: ...anning Different Size Originals Simultaneously You can simultaneously scan different size documents at their respective sizes Important You can only use this feature when documents are loaded in the document feeder Originals may not be scanned correctly if the top left corners are not aligned properly Always load the A5 size documents vertically When loading a B5 size document with A3 or A4 size d...

Page 125: ...fied ratio prior to transmission Important Some machines may not be able to receive faxes at the specified ratio Note Except for the 100 button and the Auto button the scan ratios can be changed for the Preset buttons in the System Administration mode For information about how to change the default values refer to Reduce Enlarge Presets P 308 1 Select Reduce Enlarge on the Scan Options screen 2 Sp...

Page 126: ...134 1 Select Fax Internet Fax on the All Services screen 2 Select the Send Options tab Communication Mode Selecting a Communication Mode You can select a communication mode based on the features of the remote machine G3 is the international standard for facsimile transmissions established by the ITU T Important When the Address Number One Touch buttons Group Dialing or Address Book is used to dial...

Page 127: ...ompany exchanges etc Note The international telephone networks are originally designed for voice communications Noise that does not really affect voice communications causes a problem with fax communications It may result in the deterioration of images quality the inability to transmit a fax or even terminate the transmission Regardless of whether transmission is successful you are charged for the...

Page 128: ...curs or the power is turned off when the Delayed Start feature is set the setting is cleared and transmission begins as soon as the power is turned on Note You can specify a time within 24 hours in 1 minute increments You cannot specify a date You can set Delayed Start separately for each Address Number For information about how to register Address Numbers refer to Address Book P 334 If Address Nu...

Page 129: ...e System Administration mode For information about how to change the default value refer to Send Header P 303 1 Select Send Header on the Send Options screen 2 Select On Cover Note Transmitting Documents With a Cover Page Cover Note is a feature for attaching a cover page to the document It includes the recipient name comment sender name machine fax number number of pages date and time and note No...

Page 130: ...he number of pages is printed Send Date and Time The transmission start date and time is printed Remarks This section is printed when using Broadcast Mailbox Relay Broadcast Indication and Redial Mode iFax Comment Inserting Comments in Body Text You can insert a pre registered comment in the body text of e mail You can specify up to two comments Note This feature may not be displayed depending on ...

Page 131: ...port Center You can only use the Read Status feature if the recipient s machine supports MDN You can only use the Send Status feature if the recipient s machine supports DSN A Xerox customer engineer will set the DSN feature You can only use the Send Status DSN feature to check the delivery of e mail to servers that support this feature Furthermore if any of the e mail servers along the transmissi...

Page 132: ...es with fax function z DocuCentre Color 400 320 240 with fax function z DocuCentre 401 351 251 series with fax function z DocuCentre 400 350 250 series with fax function z DocumentCentre 400 350 250 series with fax function z DocumentCentre 285 235 series with fax function z DocuCentre 280 230 series with fax function z Able 3180 z Able 1180 with fax function z Able 3405 3351 3350 3250 with fax fu...

Page 133: ...e DTMF method is possible but the only signals that can be received are numerals and It may be possible to automatically print a document received in the mailbox depending on the mailbox settings For information about setting the mailbox refer to Mailbox P 323 Depending on the report print settings the Mailbox Documents Report may not be printed even if e mail is received in the mailbox For inform...

Page 134: ...be used with transmission among F Code compatible machines manufactured by different companies When using F Code transmission use an F Code and password The F Code which is also called a sub address by other companies must be registered entered Set the password if necessary Note To use the F Code feature you need to confirm the F Code of the recipient s machine in advance You can set the F Code an...

Page 135: ...Furthermore notify the recipient of the following information for using the F Code method to receive e mail from the mailbox F Code sub address 0 Display F Code transmission and the storage mailbox number Password if necessary Password of the mailbox in which e mail is stored Note Mailbox reception using the DTMF method is possible but the only signals that can be received are numerals and It may ...

Page 136: ...epending on the iFax compatible machine of the recipient Before specifying a profile confirm the profiles the iFax compatible machine of the recipient can process If inconsistencies occur between the profile and the stored document size and resolution combination priority is given to the settings specified in the profile If the profile differs for each recipient when using Relay Broadcast the smal...

Page 137: ... machine that does not support TIFF F the recipient machine will not be able to display or print the images TIFF J Select this profile for sending documents in JBIG z Encoding method JBIG z Stored Document Size A4 B4 A3 z Resolution Standard Fine Super fine 400 dpi Super fine 600 dpi Note When a fax is sent to a machine that does not support TIFF J the recipient machine will not be able to display...

Page 138: ... Note Depending on the remote machine the Polling feature may be unavailable When you specify polling in combination with Delayed Start on the Send Options screen you can retrieve a document at a specified time Polling You can retrieve a document stored on a remote machine by sending instructions from your machine You can retrieve documents from multiple machines This process is known as Multi Pol...

Page 139: ...for polling is to store a document on your machine so as a remote machine can retrieve it from your machine There are the following two storing for polling methods The machine can be set to automatically delete the documents for polling after transmission For information about the setting procedures refer to Doc for Polling Auto Delete P 304 Store for Polling Store documents to be sent in response...

Page 140: ...e the polling documents Note Select to display the previous screen and select to display the next screen You can also directly access a Mailbox by entering a three digit mailbox number in Go to with the numeric keypad When a Private Mailbox that contains documents is selected the number of documents is indicated in Number of Documents on the bottom right of the screen If a password input screen ap...

Page 141: ...en an error occurs from the second page while sending multiple pages the first page may end abnormally The line monitor volume can be changed in the System Administration mode For information about how to change the default values refer to Line Monitor Volume P 257 1 Pick up the telephone or select On hook Manual Send Receive on the On hook Others screen 2 Select Manual Send 3 Select Alphanumeric ...

Page 142: ...touch buttons correspond to Address Numbers 001 090 When using Broadcast Send Cover Note and Remote Mailbox are invalid even if they are selected on the control panel If you want to use Cover Note and Remote Mailbox set them when registering each recipient in Address Number You cannot specify Transmission Report 1 Display the Basic Features screen 2 Select Next Recipient to specify multiple recipi...

Page 143: ...which is already registered at a relay station as a relay station ID for the Relay Broadcast Send operation z Register the Address Numbers or group number of the relay recipients which are registered at a relay station as broadcast recipients The wildcard can be used DTMF Method G3 F Code Method z There is no registration The dialing format can be registered to an Address Number Relay station Fax ...

Page 144: ...ormation about Address Book registration refer to Address Book P 334 F Code Method When the machine is an initiating station you can perform Relay Broadcast Send if the F Code that has been set for the relay station and the password if necessary are registered on the machine When the machine is a relay station you can perform Relay Broadcast Send if the F Code that has been set for the initiating ...

Page 145: ...the initiating station of the results and performing Relay Broadcast Send to relay recipients 200 201 202 and 203 F Code Example 21100200201202203 1 Select F Code on the Send Options screen 2 Select On 3 Enter the F Code with the numeric keypad and select Next You can enter up to 20 digits for the F Code 4 If necessary enter the password using the numeric keypad and select Next You can enter up to...

Page 146: ...ddress Number of the initiating station which is already registered at a primary relay station as a relay station ID z Register the Address Numbers or group number of the secondary relay stations which are registered at a primary relay station as broadcast recipients Primary relay station Assign the initiating station an Address Number from 001 to 099 and set Relay Station Setup of the Address Num...

Page 147: ... Send confirm the F Code and the password if necessary for the primary relay station When using the machine as the primary relay station for performing remote Relay Broadcast Send inform the initiating station of the F Code sub address and the password if necessary and confirm the F Code for the secondary relay station When using the machine as the secondary relay station for performing remote Rel...

Page 148: ...Broadcast Send Where Contents Primary Relay station Assign the initiating station either an Address Number from 001 to 500 when the specification method for the initiating station is 3 digits in F Code or 001 to 099 when the specification method for the initiating station is 2 digits in F Code Then set Relay Station Setup of the Address Number to On Assign the secondary relay station either an Add...

Page 149: ...e 280 230 series with fax function z DocuColor 1250 with document gate fax function z Able 3180 z Able 1180 with fax function z Able 3405 3351 3350 3250 z Able 1405 1351 1350 1251 1250 with fax function z Able 3321 3221 z Able 1321 with fax function z Able 3300 1300 series z Able 3010 3011 3015 3016 z 7030 Telecopier z 7033 Telecopier z 780 Telecopier z Document Centre C450 C360 C250 z DocuCentre ...

Page 150: ...h fax function z Able 3321 3221 z Able 1321 with fax function z Able 3300 1300 series z DocumentCentre 220 230 z Xerox 3010 z Xerox 7033 z DCS 20 z Document Centre C450 C360 C250 z DocuCentre Color f450 f360 f250 a450 a360 a250 Models Available for Use as the Remote Relay Broadcast Secondary Relay Station z Able 3010 3011 3015 3016 z 7030 Telecopier z 7033 Telecopier z 780 Telecopier ...

Page 151: ...n the Machine Status screen 3 Select Manual Receive or Auto Receive Manual Receive Reception of a fax from a remote machine is manual This mode is convenient for confirming the sender or using an external telephone to confirm whether it is a fax before beginning reception Auto Receive Reception of a fax from a remote machine begins automatically Using Auto Receive When the machine is in the Auto R...

Page 152: ...e refer to Line Monitor Volume P 257 1 When the machine rings the screen appears If there is a telephone pick it up If there is no telephone select On hook from the Receiving screen 2 Confirm whether the call is from a telephone or a fax machine If the call is from a telephone use the telephone to talk If the call is from a fax machine you will hear the sound of a fax machine Note If On hook was s...

Page 153: ...or One Touch buttons You cannot use the Address Book Note When the line type is set to a pulse line Tone does not appear When you are using a dial line select Tone if you want to send out touch tones for a service requiring the use of a pulse line Some types of services cannot be used even if you set the machine to send out touch tones 6 When the machine connects to the service you will hear voice...

Page 154: ...ine select Exit Line Cut Important Specify the fax number with the numeric keypad Address Number or One Touch buttons You cannot use the Address Book Note When the line type is set to a pulse line Tone does not appear When you are using a dial line select Tone if you want to send out touch tones for a service requiring the use of a pulse line Some types of services cannot be used even if you set t...

Page 155: ... for some models An optional package is necessary For more information contact our Customer Support Center z Scanning Procedure 154 z Stopping the Scan Job 160 z E mail 161 z Scan to Mailbox 165 z Job Templates 166 z Scan to FTP SMB 167 z Basic Scanning 170 z Image Quality 174 z Scan Options 177 z Output Format 182 ...

Page 156: ...ging from 148 6 210mm A5 A5 to a maximum of 297 432mm A3 11 17 inches The document feeder can auto detect only documents of standard sizes For non standard size documents enter the size in the Scan Size field The document feeder accept the following number of sheets For information about entering a custom size refer to Scan Size Specifying a Scanning Size P 179 For information about scanning docum...

Page 157: ...cument is loaded correctly 3 Adjust the movable document guides to just touch the edge of the document stack Document Glass The document glass accepts single sheet or book form documents of sizes up to 297 432mm A3 11 17 inches The document glass can auto detect only documents of standard sizes For non standard size documents input the size in the Scan Size field For information about entering doc...

Page 158: ...document and sends the scanned data to a network computer via the FTP or SMB protocols For information about each of these modes refer to the sections listed below E mail 161 Scan to Mailbox 165 Job Templates 166 Scan to FTP SMB 167 Note Features displayed may vary depending on the model you are using When using the Auditron mode a UserID and password might be required Ask the machine administrato...

Page 159: ...veyed Note If a problem occurs an error message appears in the touch screen Solve the problem in accordance with the message The following job configurations can be performed while scanning If You Have More Documents If you have more than one stack of documents to scan select the Next Original button on the touch screen while the current stack of documents is being scanned This allows you to scan ...

Page 160: ...here are no more documents to scan and clears the settings 2 Load the next document 3 Press the Start button If you have more documents load the next document and press the Start button 4 When all documents have been scanned select Last Original Step 4 Confirming the Scan Job in the Job Status 1 Press the Job Status button 2 Check job status Note Select button to display the previous screen and se...

Page 161: ...er Importing can be done in the following ways Import from an Application Use a network scan driver Import Using Mailbox Viewer 2 You can import using Fuji Xerox s application software Mailbox Viewer 2 Import Using CentreWare Internet Services Uses CentreWare Internet Services to import For information about each of these modes refer to Importing Scanned Data P 217 ...

Page 162: ...nel 2 Select Stop 3 If the screen in procedure 1 does not appear press the Job Status button 4 Select the job to cancel and then select Stop Note When a scan is cancelled scan data already stored to the mailbox is deleted Scanning of the current page completes before the job is cancelled 1 2 3 4 5 6 7 8 9 0 C Stop button 1 2 3 4 5 6 7 8 9 0 C Job Status button ...

Page 163: ...e All Services screen is not shown press the All Services button 2 In the Mail Recipient Screen choose a recipient from the address book or enter one with your keyboard Address Book This describes entering a recipient using the Address Book You can also enter a recipient directly via the keyboard Searching 1 Select Address Book 2 Once the Address Book screen appears choose either Local Search or R...

Page 164: ...Book screen appears select Local Address List 3 In the Go to use the numeric keypad to enter a 3 digit Address Number 4 The specified number is displayed at the top of the list Specify the recipient from the displayed screen and select either To CC or BCC for the recipient type Note Select to display the previous screen and select to display the next screen Select Name E mail Address and select Sh...

Page 165: ...te 2 Select Delete Change Settings You can confirm or change the recipient 1 Select the E mail Address to confirm change 2 Select Change Settings 3 To change an address use the displayed keyboard to enter a new value Detailed Settings Configures the details of the e mail to send 1 Select the E mail Address to configure and select Sender s Details 2 Select the field to configure and enter a value ...

Page 166: ...automatically set E mail Subject Enter the Subject When using Auto Configuration the Subject is Scan data from XXX where XXX is the host name Auto Configuration is the default setting 128 characters are allowed Reply To Set the e mail address to reply to File Name Select Keyboard and enter a value using the keyboard Clear Field Deletes the From address Enter Sender s Address Sets the Reply To addr...

Page 167: ...tore the scanned data Select the button to display the previous screen and select the button to display the next screen Go to Use the numeric keypad to enter a 3 digit mailbox number That mailbox then appears at the top of the list Document List Select a mailbox and press this button to check or delete documents stored within Document List You can confirm or delete documents stored inside the mail...

Page 168: ... includes in its name 1 Select Network Scanning from the All Services screen Note If the All Services screen is not shown press the All Services button If a created Job Template is not displayed select Refresh 2 Specify a Job Template Job Template Select a Job Template that is configured with the scan parameters you want Select to display the previous screen and select to display the next screen G...

Page 169: ...tems For information on compatible operating systems refer to Scan Feature Specifications P 497 This feature is not displayed for some models An optional package is necessary For more information contact our Customer Support Center 1 Select Scan to FTP SMB from the All Services screen Note If the All Services screen is not shown press the All Services button Fields displayed vary depending on the ...

Page 170: ...en To delete select Clear Field 3 When changing the File Name Conflict select File Name Conflict select Change Settings and then change the settings in the next screen Note Up to 28 characters are allowed for File Name File Name Conflict Screen Cancel Job If a file of the same name already exists in the forwarding destination cancel the job and do not save Change Name and Save If a file of the sam...

Page 171: ...tocol Server Displayed when either FTP or SMB is selected Enter either the server name or server IP address Up to 64 characters are allowed Example Server Name dccf450 fujixerox com dccf450 Host Name fujixerox com Domain Name Shared Name Displayed when SMB is selected Enter the Shared Name Up to 64 characters are allowed Save in Displayed when either FTP or SMB is selected Enter a directory Up to ...

Page 172: ...s to be scanned 1 Select the output color from Output Color Auto The color of the document is determined automatically the machine scans in full color when the document is colored otherwise scans in monochrome Note The features which can be set in the Image Quality screen when Auto is selected are the same as if Full Color is specified for the Output Color when a color document is loaded or the sa...

Page 173: ... Screen Select when you wish to specify the document s orientation and scan both sides 1 Select either 1 Sided or 2 Sided 2 When 2 Sided is selected select Originals 3 Select Original Orientation Originals Displayed when 2 Sided is selected in the Originals screen Select either Head to Head or Head to Toe Head to Head means that both sides of a 2 sided document are in the same orientation while He...

Page 174: ... Color set to Black select the document type 1 Select Original Type Text Photo Select this item when scanning documents that contain both text and photos This setting automatically scans text and photo areas with the optimum document quality per area Text Choose when you wish to scan text clearly Photo Choose to scan photos File Format Select the Scanned Data Type Select the scanned data type Impo...

Page 175: ...ges as 1 TIFF file TIFF 1 Saves each page as a TIFF file JPEG Saves as a JPEG file When either Full Color or Grayscale are selected for Output Color you also configure the image compression method You can also configure the compression ratio with the Image Compression in the Output Format screen ...

Page 176: ...Scan to FTP SMB 2 Select the Image Quality tab and configure each feature Note Color Space is not available for some models An optional package is necessary For more information contact our Customer Support Center A setting must be made in the System Administration mode to activate Color Space For information about how to set features refer to Color Space P 297 Photograph Scanning Scanning a Color...

Page 177: ...hat light portions are scanned as light and dark portions are scanned as dark Lower contrasts decrease the difference between light and dark areas Sharpness Adjusting Document Sharpness The contours of images can be made to look sharper or more blurred Sharpness can be set in five levels from Softer to Sharper 1 Select Sharpness 2 Sharpness can be set in five levels from Softer to Sharper Auto Exp...

Page 178: ...olor Note This feature is not available for some models An optional package is necessary For more information contact our Customer Support Center A setting must be made in the System Administration mode to activate Color Space For information about how to set features refer to Color Space P 297 1 Select Color Space 2 Select either Standard Color Space or Device Standard Color Space Color space for...

Page 179: ...fying a Scanning Ratio 181 1 From the All Services screen select either E mail Scan to Mailbox Network Scanning or Scan to FTP SMB 2 Select the Scan Options tab and configure each feature Scan Resolution Specifying a Scanning Resolution You can set the resolution for the documents to be scanned As the resolution increases the scan becomes more detailed but the data size also increases As the data ...

Page 180: ...riginal type 3 Select the page order 4 Configure the Center Erase Off Do not scan bound originals Left Page then Right Scans are made from the left page of facing pages in a document starting from the left page Right Page then Left Scans are made from the right page of facing pages in a document starting from the right page Top Page then Bottom Scans are made from the top page of facing pages in a...

Page 181: ...ecommend using the scale on the outside of the document glass to help you specify the document size Mixed Size Originals Scanning Different Size Documents Simultaneously When using the document feeder to scan you can match the scan size to use for each document Important When selecting Full Color for Output Color and 2 Sided for 2 Sided Originals set the Scan Resolution to a maximum of 400dpi Alwa...

Page 182: ...e Erase is selected enter each erase value 4 Select Original Orientation Normal The border erase amount is set to 2 mm for the top bottom left and right If you do not wish to perform border erase set each Variable Erase value to 0mm Variable Erase You can erase only the amount necessary T B Erase Shadows at the top and bottom of the document are erased Edges on the top and bottom are erased with r...

Page 183: ...ocuments to be scanned 1 Select Reduce Enlarge 2 Select the desired scanning ratio Preset Select from among 8 preset ratios Variable You can scan by selecting a variable ratio The ratio can be set in increments of 1 within the range 25 400 Auto Automatically sets the scanning ratio based on the document size and specified Output Size Note Default Output Size values when scanning with Auto are A3 A...

Page 184: ...tput Format tab Note Fields displayed vary depending on the selected feature The screen at right is for the e mail feature Image Compression Specifying an Image Compression Ratio When Scanning When scanning a document from the Basic Scan screen with Output Color set to Full Color or Grayscale select the image compression ratio 1 Select Image Compression 2 Set the image compression ratio You can ch...

Page 185: ...On Split Send Sending in Sections This e mail feature allows you to split a large attachment by pages and send as separate e mails You can also configure the machine not to split Note You can only use the Split Send feature when the File Format in the Basic Scanning screen is set to PDF DocuWorks or Multi page TIFF 1 Select Split Send 2 Select Split by page Document Name Specifying a Filename to S...

Page 186: ... Password Use this feature to set the password for the destination server of the scanned files Note The selection for this feature is displayed only when you have selected Network Scanning 1 Select Password on the Output Format screen 2 Perform the necessary operations 3 Select Save For information on keyboard entry refer to Entering Text P 252 Meta Data Use this feature to change the value of the...

Page 187: ...re is not available for some models An optional package is necessary For more information contact our Customer Support Center z Check Mailbox Procedure 186 z Selecting a Mailbox 188 z Checking Selecting Mailbox Documents 189 z Printing Deleting Documents in Mailbox 190 z Configuring Starting Job Flow 191 ...

Page 188: ... configuration 1 Press the All Services button 2 Open the next screen and select Check Mailbox Step 2 Selecting the Mailbox Access to the selected mailbox may be restricted depending on authorization settings For information about selectable mailboxes depending on the authorization feature refer to Types of Mailbox P 394 1 Select a mailbox 2 Select Document List For information about the Check Mai...

Page 189: ...ure 187 Check Mailbox 6 Step 4 Checking Mailbox Documents Operations available in the Check Mailbox screen and their references are listed below Printing Deleting Documents in Mailbox 190 Configuring Starting Job Flow 191 ...

Page 190: ...n and select to display the next screen You can directly access a mailbox by entering a three digit mailbox number in the Go to with the numeric keypad An arrow is displayed next to mailboxes that have a linked Job Flow and which have been configured for Auto Start When a mailbox is selected and it contains documents the number of stored documents is indicated in No of Docs in the lower right area...

Page 191: ...cted Selection will be canceled if the button is selected again You can sort documents in ascending or descending order by pressing either Doc Name or Stored Date To the left of the document name is displayed an icon showing the document contents Scanned Document Documents for Private Polling Fax to Mailbox iFax to Mailbox Up to 9 documents can be selected separately You can also select all docume...

Page 192: ...t Scanned documents cannot be printed Cannot print when multiple documents are selected You can only print when 1 or all documents are selected 2 To print a document select Print To delete a document select Delete Note Pressing Change Doc Name allows you to rename the document However this is unavailable when multiple documents are selected ...

Page 193: ...ob Flow you must first link a mailbox with the Job Flow When set to start automatically documents are automatically processed by the Job Flow when stored in the mailbox Features that can be registered are listed below Forward Multiple forward recipients can be configured for each forwarding method Note The following feature is not available for some models An optional package is necessary For more...

Page 194: ...o JPEG the file cannot be opened by the recipient 1 Press the All Services button 2 Open the next screen and select Check Mailbox 3 Select a mailbox and select Document List 4 Select Job Flow Settings Note To operate a Job Flow on a document select the target document before pressing this button Select to display the previous screen and select to display the next screen You can sort documents in a...

Page 195: ...this button while documents are selected opens the Select Job Flow Sheet screen Link Job Flow Sheet to Mailbox Screen You can cancel the link between a mailbox and its Job Flows Note Creating and canceling links as auto start settings can also be performed when creating a mailbox 1 Select the Job Flow to link and select Close Important Pressing Close without selecting a Job Flow does not create a ...

Page 196: ... Select to display the previous screen and select to display the next screen You can sort documents in ascending or descending order by pressing either Name or Last Updated To the left of the name is displayed an icon showing the target of the Job Flow Mailbox Document Sheet Filtering The Sheet Filtering screen is displayed For more information refer to Sheet Filtering Screen P 194 Create Create N...

Page 197: ... Job Flows can be assigned to an individual shared by many users or only accessible from the specified mailbox to which they are linked Job Flow restrictions may vary depending on authorization features For information about initializing data refer to Job Flow Sheet Types P 391 ...

Page 198: ......

Page 199: ...and registered with the machine The Job Flow Sheets screen is also explained Note The Job Flow feature is not available for some models An optional package is necessary For more information contact our Customer Support Center z Job Flow Procedure 198 z Job Flow List 200 z Confirming Changing Job Flow 201 ...

Page 200: ... screen Note Features displayed may vary from device model to model 1 Press the All Services button 2 Open the next screen and select Job Flow Sheets Step 2 Selecting a Job Flow 1 Select a Job Flow For more information about Job Flow Sheets screen refer to Job Flow List P 200 Step 3 Confirming Changing a Job Flow 1 Select a Job Flow 2 To confirm Job Flow contents select Show Details To change cont...

Page 201: ... Starting a Job Flow 1 Load the original 2 Press the Start button Important Always print the job history report to confirm the results after executing a job flow For information about the job history report refer to Job Status Activity Report P 376 ...

Page 202: ... on a network computer However fields that allow changes can be temporarily changed and used Job Flow Sheet Filtering You can filter the displayed Job Flows Screen display may vary depending on user authorization feature settings Displayed Job Flows may vary depending on authorization features Job Flow Sheet Types P 391 1 Select Sheet Filtering Note Updated information is displayed by selecting Re...

Page 203: ... in ascending or descending order by pressing either Name or Last Updated 2 To confirm Job Flow contents select Show Details To change contents select Edit 3 Select the group to change from the Group of Items and select Change Settings Note Data included in the Job Flow is displayed in the Group of Items 4 Select the items to change and select Change Settings Note A triangle icon appears to the le...

Page 204: ......

Page 205: ...ogramming This chapter describes the Stored Programming features provided by the machine z Stored Programming Overview 204 z Registering Deleting Renaming Stored Programming 205 z Recalling Stored Programming 207 ...

Page 206: ...emembers feature settings but also can record a series of operations This enables you to record the hierarchy of displayed screens for each step For example Stored Programming could be used when you wish to record the following press the Machine Status button and display the screen to print the Report Job Activity Report References for registering and recalling Stored Programming are listed below ...

Page 207: ...red Programming is changed when a job flow job template recipient comments and other registered information is changed or if default values are changed after Stored Programming is registered then the program s content changes Note Job Flow Job Template services using Address Book and System Settings cannot be registered to Stored Programming If the Interrupt button is pressed if the Auto Reset fea...

Page 208: ... Stored Programming cannot be restored No The Stored Programming delete operation is cancelled Naming Renaming Stored Programming Below describes the procedure for naming and renaming Stored Programming Up to 18 characters are allowed in Stored Programming name For information about how to enter characters refer to Entering Text P 252 1 Select Enter Change Name 2 Select the number to add or change...

Page 209: ...the All Services button 2 Open the next screen and select Stored Programming 3 Select the number of Stored Programming containing the features you want to recall Note You can only select registered numbers Select to display the previous screen and select to display the next screen 4 After Stored Programming is recalled select other features if necessary 5 Press the Start button if necessary 1 2 3 ...

Page 210: ......

Page 211: ...ces Note Features described in this section are not available for some models An optional package is necessary For more information contact our Customer Support Center The computer screen images shown in this section are as of October 2004 z Overview of Features 210 z Printing 215 z E mail Print 216 z Importing Scanned Data 217 z Sending a Fax 223 ...

Page 212: ...tures click on Help in the print driver screen and refer to the print driver s online help For information about how to print refer to Printing P 215 Note In the Printer tab there are some features that cannot be used without configuring optional settings Unavailable features are disabled in gray Multiple Up Prints multiple pages onto 1 sheet of paper 2 Sided Print If 2 sided printing is available...

Page 213: ... for a print command from the machine before printing For information about how to setup charge printing refer to Charge Print Settings P 350 For information about how to print refer to Charge Print P 359 E mail Print You can send e mail with TIFF or PDF documents attached from a computer to the machine Received e mail is automatically printed For more information refer to E mail Print P 216 Direc...

Page 214: ...trator Guide The CentreWare Internet Services Screen The CentreWare Internet Services screen is made up of 4 frames divided windows At the top and bottom are frames that occupy the full width of the browser Between those are 2 frames on the left and right The contents displayed in each frame change depending on the feature in use service job status property maintenance support Note You can read ex...

Page 215: ...ttings dialog box set Check for newer versions of stored pages to either Every visit to the page or Every time you start Internet Explorer 4 Click OK Tab name Main features Services z Print Command You can specify a file on your PC for printing Note This feature does not appear for some models An optional package is necessary For more information contact our Customer Support Center Job z Job List ...

Page 216: ...tenance For information about the Setting List refer to Settings List Common Items P 377 Note If communications are encrypted you must specify an address that starts with https instead of http to access CentreWare Internet Services Starting CentreWare Internet Services To use this service perform the following procedure on your computer 1 Start up the computer and the browser 2 Enter the device IP...

Page 217: ...e application software you are using For more information refer to the documentation provided with each application 1 Select Print from the application s File menu 2 Confirm the Printer Name and click Properties if necessary 3 Configure the properties if necessary 4 Click OK 5 Click OK in the Print dialog box ...

Page 218: ...l client to create the e mail body and then attach a TIFF or PDF document if available Important Only plain text is permitted in the e mail body Change the body text format to plain text from within your e mail client Note Attached files that do not have the tif or pdf extension may not print correctly Up to 31 documents can be attached 2 Enter the machine s e mail address for the recipient 3 Send...

Page 219: ... box click on Help and refer to the network scan driver s online help 1 Launch the application software to import the document Important The application must support TWAIN TWAIN is a standard for scanners and other input devices Note For information about supported applications refer to the Readme contained in the CentreWare Utilities CD ROM 2 From the File menu select the command used to choose t...

Page 220: ... client Once forwarding ends the document is loaded into the application software and is deleted from the mailbox Note If importing one page at a time documents that have pages not yet imported are shown in the list with a With the exception of DocuWorks for most applications the network scan driver expands the compressed data and passes it to the application as a BMP file It can be configured not...

Page 221: ... the selected mailbox are imported For instructions on installing Mailbox Viewer 2 refer to the manual contained in the CentreWare Utilities CD ROM To learn about fields in the displayed dialog box click on Help and refer to the Mailbox Viewer 2 online help 1 Click Start Programs FujiXerox Utilities Mailbox Viewer 2 Note When a different program folder was specified during installation choose the ...

Page 222: ...lick on Import Note To import documents the Auto Import check box must be checked in Mailbox Viewer 2 For information about Mailbox Viewer 2 settings refer to Configure the Import Method for Scanned Documents P 221 6 Clicking on the Import button removes all stored documents from the mailbox and saves them in the specified directory default C Program Files Fuji Xerox Network Scan Temp Changing Mai...

Page 223: ...he browser 2 Enter the machine s IP address or Internet address in the browser address field and press the Enter key Note If your network uses DNS Domain Name System and the machine s host name is registered with the domain name server you can access the machine using a combination of the host name and the domain name as the URL For example if the host name is dccf450 and the domain name is fujixe...

Page 224: ...to import and input a password up to 20 digits into the Password field 5 Click Document List 6 Place a check next to the documents to import and click Retrieve Note To retrieve a color document as a JPEG place a check next to Retrieve Page and specify the page number 7 Click Save this link To learn about operating details click on the bottom frame Help button and refer to the online help ...

Page 225: ... You can register recipients individually from the machine s control panel For information about registering recipients refer to Address Book P 334 Important Since multiple users can simultaneously access CentreWare Internet Services you should setup an Administrator Password to prevent registered data from being overwritten We recommend that you configure a Administrator Password and have the Adm...

Page 226: ...lick the Properties tab and select Fax Speed Dial Directory in the left frame of the screen that is displayed 4 Click Retrieve All Retrieve in CSV format 5 Specify the save destination to save the files 6 Enter the Document Centre C450 C360 C250 IP address or Internet address in the browser address field and press the Enter key 7 Click the Properties tab and select Fax Speed Dial Directory in the ...

Page 227: ...ter describes the types of paper that can be used on the machine precautions when handling paper and how to load paper in trays z Paper Type 226 z Loading Paper 232 z Changing the Size of Paper in Trays 235 z Changing Paper Settings 237 ...

Page 228: ...non standard paper size from Tray 5 bypass you must manually enter the paper size In addition if you use a non standard paper size often you can preset the size in the device Then the preset size appears under Standard Sizes in the Tray 5 Bypass screen For information about setup refer to Tray 5 Bypass Paper Size Defaults P 262 When using 12 18 inch paper from Tray 5 bypass to copy or print slide ...

Page 229: ...p A3 80 Plain Plain Paper D Pro Explore A4 80 Plain Plain Paper D Business 3R91820 A4 80 Plain Plain Paper D Business 3R91821 A3 80 Plain Plain Paper D Xerox Blue A4 80 Plain Plain Paper D Fine white areas appear when used in the C zone Diplomat A4 80 Plain Plain Paper D Diplomat A3 80 Plain Plain Paper D Small dots appear KX H H803 A4 80 Plain Plain Paper D Small dots appear in solid areas when u...

Page 230: ...ar in solid areas To prevent this switch to Diplomat paper KX New X X703 A3 75 Plain Plain Paper D Small dots appear in solid areas To prevent this switch to KX H paper KX New X X704 A4 75 Plain Plain Paper D Small dots appear when used in the C zone To prevent this switch to KX H paper V705 Letter 70 Plain Plain Paper D Small dots appear in solid areas on side 1 To prevent this switch to Premium ...

Page 231: ... prevent small dots and minor white stripes contact our Customer Support Center for adjustment Colotech Plus Gloss A4 140 Heavyweight 1 Coat 1 Pro Explore A4 100 Heavyweight 1 Heavyweight 1 XEROX ONE A4 80 Plain Plain Paper D Small dots appear in solid areas To prevent this use Diplomat paper XEROX ONE A3 80 Plain Plain Paper D Image wrinkle may occur sporadically To prevent this use Diplomat pape...

Page 232: ...yweight 1 Small dots or white areas may appear To prevent this contact our Customer Support Center for adjustment 3R95809 A4 OHP OHP OHP Solid areas may come out slightly lighter If the paper is double feeding load the sheets one at a time Black Wrapped A4 80 Recycled Plain Paper D Small dots appear in solid black areas To prevent this use Diplomat paper Label 3R97407 A4 Label Label Plain Paper D ...

Page 233: ...warping Please Adhere to the Following When Setting Paper into the Tray z Align the stack of paper neatly before setting it in the tray z Do not use paper that is folded creased or heavily warped z Do not use waved or curled paper z Do not load paper of mixed size together into the tray z Transparency paper and label paper can cause paper jams and multiple sheets can be fed to the printer at once ...

Page 234: ...he paper against the left edge of the tray with the side to be copied or printed on facing up Important Do not load paper exceeding the maximum fill line Doing so might cause paper jams or machine trouble 3 Push the tray in gently until it comes to a stop About Types of Paper Loaded in Trays 1 to 4 Plain paper recycled paper and bond paper of density 64 98g m2 can be loaded in Trays 1 to 4 The mac...

Page 235: ... this operation a tray containing paper of type whose Paper Priority setting is set to Off cannot be switched to For information about setting Paper Type Paper Type Priority Paper Tray Priority and setting the paper substitute feature refer to Paper Tray Attributes P 259 The same settings can also be made from CentreWare Internet Services Loading Paper in Tray 5 Bypass When printing or copying wit...

Page 236: ...tcards and the paper is not fed into the machine apply a curl to the leading edge of the paper as shown in the figure on the right Note however that excessively bending or folder the paper might cause paper jams 4 Lightly push the paper guide against the paper you loaded 5 Select copying or printing Moving the Position of the Paper Guide If using paper for prints or copies whose width exceeds that...

Page 237: ...mation about how to set the paper quality refer to Paper Type P 260 When setting a non standard paper size you must register the paper size For information about registering paper sizes refer to Paper Size P 260 For a description of how to make copies on non standard size paper refer to Paper Supply Selecting the Paper to Use for Copying P 55 For a description of how to print to non standard size ...

Page 238: ...s of the paper Important Exerting excessive pressure when aligning the paper levers against the edges of the paper might cause paper jams Make sure that the paper guides fit flush against the paper If the paper guides are not flush against the paper the device may not be able to auto detect the paper size or a paper jam or other error could result In this case reset the paper guides and realign th...

Page 239: ...me to plain paper bond paper and recycled paper For information about how to set names to custom paper 1 to 5 refer to Custom Paper Name P 260 For information about image quality processing for different paper types refer to Image Quality P 262 1 Press the Log In Out button 2 Enter the User ID with the numeric keypad and select Confirm Note The default UserID value is 11111 When using the Authenti...

Page 240: ...gs at the Items you changed is the newly entered value and select Close 11 Select Image Quality 12 Select the paper type whose image processing is to be changed at Items and select Change Settings 13 Select the image processing value to change and select Save 14 Make sure that the Current Settings at the Items you changed is the newly entered value and select Close 15 Select Close repeatedly until...

Page 241: ... carried out by the system administrator and the procedures for doing so z System Settings Procedure 240 z System Settings Menu List 243 z Entering Text 252 z Common Settings 253 z Copy Mode Settings 275 z Network Settings 286 z Print Mode Settings 290 z Scan Mode Settings 295 z Fax Mode Settings 302 z E mail iFax Settings 314 z Mailbox Stored Document Settings 320 z Setup Menu 323 z System Admini...

Page 242: ...tem Administration Mode 1 Press the Log In Out button Step 2 Entering the System Administrator UserID and Password To enter System Administration mode enter the system administrator UserID If you are using the authentication feature a password may be required It is recommended to change the system administrator UserID and password immediately after installing the machine For information about the ...

Page 243: ...formation refer to Common Settings P 253 Copy Mode Settings You can set the copy feature defaults copy operation control button indications and so on For more information refer to Copy Mode Settings P 275 Network Settings You can set the ports protocols and so on For the items that can be set refer to Network Settings P 286 Print Mode Settings You can set the memory settings print time operation a...

Page 244: ... system administrator password for entering System Administration mode For more information refer to System Administrator Settings P 342 Login Setup Auditron Administration You can set restrictions on users using feature of the machine or set restrictions on individual users For more information refer to Login Setup Auditron Administration P 344 Step 5 Setting the Feature 1 Set any feature 2 After...

Page 245: ...py Job Complete Tone z Fault Tone z Alert Tone z Out of Paper Warning Tone z Low Toner Alert Tone z Line Monitor Volume z Ringing Volume z Stored Programming Tone z Auto Clear Alert Tone z Base Tone Screen Defaults z All Services z Custom Buttons 1 to 3 z Job Type on Job Status screen z Default Language Paper Tray Attributes z Custom Paper Name z Paper Type z Paper Size z Auto Paper by Output Colo...

Page 246: ...k z Delete All Data z Software Options Other Settings z Offset Stacking Center Output Tray z Offset Stacking Finisher Tray z Auto Job Promotion z Default Print Paper Size z Odd Page 2 Sided z Paper Size Settings z Millimetres Inches z Keyboard Input Restriction z Operation of Up Down Buttons z Display Consumables Screen z Overwrite Hard Disk z Data Encryption z Software Download Basic Copying Tab ...

Page 247: ...lt value for Original Orientation in the Scan Options screen z Output Destination z Annotation Stamp Position z Annotation Stamp Color z Annotation Date Position z Annotation Page Number Style z Annotation Page Number Position Copy Control z Memory Full Procedure z Maximum Stored Pages z Auto Paper Off z Mixed Size Originals Copy to Side 2 z Fine tune 100 z Auto Exposure Text Photo z Auto Exposure...

Page 248: ...achine E mail Address Host Name z E mail Address z Host name z Domain name POP3 Server Settings z POP3 Server Setup z POP3 Server IP Address z POP3 Server Server Name z POP3 Server Port Number z POP3 Server Check Interval z POP3 Server Login Name z POP3 Server Password z POP Password Encryption SMTP Server Settings z SMTP Server Setup z SMTP Server IP Address z SMTP Server Server Name z SMTP Serve...

Page 249: ... Buffer Port 9100 Other Settings z Print Area z Substitute Tray z Paper Attributes Mismatch z Unregistered Forms z Print ID z Banner Sheet z Banner Sheet Tray z PostScript Default Color z PostScript Paper Supply z PostScript Font Absence z PostScript Font Substitution Basic Scanning Tab z Feature in 2nd Column z Reduce Enlarge 2nd Button z Reduce Enlarge 3rd Button z Reduce Enlarge 4th Button Scan...

Page 250: ...ead Status z iFax Profile Fax Control z Send Header Polling z Doc for Polling Auto Delete z Rotate 90 degrees z Sender ID z Redial Attempt z Redial Interval z Transmission Interval z Batch Send z Manual Send Receive Default z Auto Switch Attempts z Fax Receiving Mode z Border Limit z Auto Reduce on Receipt z Receiving Paper Size z 2 Up On Receipt z 2 Sided Printing z Border Erase Top Bottom z Bord...

Page 251: ...rver z Primary Server Port Number z Secondary Server z Secondary Server Port Number z Login Name z Password z Search Root Entry DN z Scope of Search from Root Entry z Object Class of Search Target z Server Application z Attribute Type of Recipient Name z Attribute Type of Last Name z Attribute Type of First Name z Attribute Type of E mail Address z Attribute Type of Custom Items 1 to 3 z Attribute...

Page 252: ...l z Transfer via FTP 1 Transfer via FTP 2 z Transfer via SMB 1 Transfer via SMB 2 z Print Content Check Address Book z Address Type z Fax Number z Recipient Name z Index z Communication Mode z Resolution z Cover Note z Maximum Image Size z Delayed Start z Remote Mailbox z F Code z Relay Broadcast z iFax Profile z Last Name z First Name z Custom Item 1 z Custom Item 2 z Custom Item 3 z Transfer Pro...

Page 253: ...ounts z All User Accounts z All Color Access Settings z All Account Limits z Total Impressions z Print Meters System Administrator Copy Meter User Details Setup z UserID Characters z Hide User ID z Account ID Characters z Hide Account ID z Failed Access Log z Checking Authentication information z Store User Details Charge Print Settings z Receive Control Login Setup Auditron Mode z Off z Local Mac...

Page 254: ...xt you can enter the following characters numerals letters and symbols Item Description Entering letters and numerals Select Alphanumeric If you select Shift capital letters appear To return to lowercase select Shift once more Entering symbols Select Symbol Entering a space Select Space Deleting characters Select Backspace This deletes characters one at a time ...

Page 255: ...System Settings For the method of displaying the System Settings screen refer to System Settings Procedure P 240 2 Select Common Settings 3 Select the item to be set Machine Clock Timers You can set the clock time or the timer interval until power saving or reset features take effect 1 Select Machine Clock Timers 2 Select the item to be set or changed and select Change Settings Note Select to disp...

Page 256: ...e Synchronization You can get the time from a time server NTP Network Time Protocol to synchronize the machine to the time server time 1 Select NTP Time Synchronization and select Change Settings 2 Select any item and select Change Settings Connection to Time Server Select whether to connect to a time server If you select No it is not possible to get the time from a time server Connection Interval...

Page 257: ...machine not affected by the error Set the value in the range 4 to 99 minutes in 1 minute increments In order not to set this select No 1 Select Auto Job Release and select Change Settings 2 Select Off or On 3 If you selected On set the time Auto Print When a certain time has elapsed with no operation a print job can be automatically started Set this time Set the value from 1 to 240 seconds in one ...

Page 258: ...o display the previous screen and select to display the next screen 3 Select the setting value 4 Select Save Control Panel Select Tone Select the sound to be made when a button displayed on the screen is correctly selected You can select the volume from High Medium and Low To disable the sound select Off Control Panel Alert Tone Select the sound to be made when a button that cannot be selected is ...

Page 259: ...r cartridge is due to be replaced You can select the volume from High Medium and Low To disable the sound select Off Line Monitor Volume You can relay the sound on the telephone circuit in the interval from dialing until the connection is made through the speakers on the machine This is convenient for using FAX information services without using the telephone You can select the volume from High Me...

Page 260: ...out of buttons shown on the Button Layout on the Menu Screen screen shows the layout of buttons on the Menu screen Note It is not possible to assign the same feature to more than one button 1 Select All Services and select Change Settings 2 Select the button in the position where you want to display a feature Note Select to display the previous screen and select to display the next screen 3 Select...

Page 261: ...e and a method for ordinary users to use z Setting from System Administration mode This sets the standard language when the machine is powered on and it maintained when powered off and on again z Ordinary user setting The language setting in Language in the Menu screen is lost when the machine is powered off Important When set to English it is only possible to enter ASCII characters Note This feat...

Page 262: ... 5 1 Select Paper Type 2 Select the item to be set or changed and select Change Settings 3 Select the type of paper Paper Size Standard sized paper loaded into paper Trays 1 to 4 is automatically detected but when a nonstandard size is loaded it is necessary to specify the width and height Important Depending on the paper size the guide lever may not fit and this may cause paper jams or other erro...

Page 263: ...at a tray containing the appropriate paper is automatically selected by the machine for copying or printing You can select paper Trays 1 to 4 Tray 5 bypass cannot be selected 1 Select Paper Tray Priority 2 Select Change Settings 3 Select any of numbers 1 to 4 to assign a tray from Trays 1 to 4 Note You cannot set the same paper tray to different positions in the sequence Paper Type Priority Set th...

Page 264: ...weight 2C Heavyweight 2D and Heavyweight 2S are not supported by the machine Plain S is set by our customer engineer Tray 5 Bypass Paper Size Defaults Set the paper sizes shown in the Tray 5 Bypass screen for Paper Selection when copying with Tray 5 bypass You can assign 11 paper sizes to Tray 5 standard size buttons 1 to 11 If a nonstandard size paper is frequently used for copying by setting thi...

Page 265: ...y containing appropriate paper Set Numbering Date Format Set the format for printing dates in annotations and set numbering This setting is common to annotation and set numbering Set Numbering Text Effect You can set a text effect When the text effect is set and a copy made invisible text is embedded in the background If the created copy is recopied this embedded text appears as Embossed or White ...

Page 266: ... can select from three levels from faint to dark Set Numbering Text Background Contrast Set the text background contrast for printing set numbering You can select from contrast levels 1 to 9 Set the text background contrast after checking the results of printing a Text Effect Sample List For information about sample printing refer to Text Effect Sample List P 382 Set Numbering Copy Job Set whether...

Page 267: ...ore easily recognized as color Photo Reproduction Level When copying with Original Type in the Image Quality screen set to Text Photo you can adjust the color reproduction level in the areas determined by the machine to be photos Selecting More Text emphasizes the dense parts of the image yielding a bold copy effect Selecting More Photo makes the gradation of the photo parts of the image softer Ph...

Page 268: ...int image quality of the machine can be maintained at a constant level For information about procedures for auto gradation adjustment refer to Executing Auto Gradation Adjustment P 424 Note If despite regular auto gradation adjustment the color gradation is not properly corrected contact our Customer Support Center 1 Select Auto Gradation Adjustment Copy Job Text Adjusts the gradation for when cop...

Page 269: ...ents Report Broadcast Multi Poll Report You can select whether or not to automatically print a Broadcast Multi Poll Report Relay Broadcast Report You can select whether or not to automatically print a Relay Broadcast Report Off Does not print automatically Send to Relay Station Send to the relay station specified by the machine Print at Local Station Print on the machine Send to Relay Station and ...

Page 270: ... Select the partition to be reformatted and select Start 3 Select Yes 4 When reformatting completes successfully the message on the screen on the right appears select Confirm Delete All Data This deletes all data recorded in the machine This includes all user settings and data recorded automatically by the system job history and so on Important Once data is deleted it cannot be recovered If you se...

Page 271: ...ter Other Settings These are other settings relating to the machine itself 1 Select Other Settings 2 Select the item to be set or changed and select Change Settings Note Select to display the previous screen and select to display the next screen 3 Select the setting value 4 Select Save Offset Stacking Center Output Tray Offset stacking means that the paper is output in different positions to the f...

Page 272: ... Enabled 3 Select Save Default Print Paper Size Set the paper size normally used when printing a report list You can select from two sizes A4 or 8 5 11 Odd Page 2 Sided When 2 sided printing is specified for an original with an odd number of pages the paper feed system treats those sheets printed on both sides differently from those printed on one side only Since odd numbered pages are printed on ...

Page 273: ...o Yes Yes No No A4 Yes Yes Yes Yes Yes Yes Yes Yes Yes Yes A4 Yes Yes Yes Yes Yes Yes Yes Yes Yes Yes A3 Yes Yes Yes Yes Yes Yes Yes Yes Yes Yes B6 Yes Yes Yes Yes Yes No No No No No B6 Yes Yes Yes Yes Yes No No No No No B5 Yes Yes Yes Yes Yes No Yes Yes No No B5 Yes Yes Yes Yes Yes Yes Yes Yes Yes Yes B4 Yes Yes Yes Yes Yes Yes Yes Yes Yes Yes 5 5 8 5 No No No No No No No No No Yes 5 5 8 5 Yes No...

Page 274: ... No No No B5 Yes Yes Yes Yes No Yes Yes Yes Yes No No No No No No B5 Yes Yes No Yes Yes Yes Yes Yes Yes No Yes Yes Yes Yes Yes B4 Yes Yes No Yes Yes Yes Yes Yes Yes No No No No No No 5 5 8 5 No No No No Yes No No No No Yes No No No No No 5 5 8 5 No No No No No No No No No Yes No No No No No 7 25 10 5 No No No No No No No No No No No No No No No 8 10 No No No No Yes No No No No No No No No No No 8 ...

Page 275: ...tus is displayed at startup When Auto Clear is activated Status displayed when auto clear is executed Overwrite Hard Disk Select whether or not to carry out hard disk overwrite erasing If so you can select whether to overwrite once or three times After deleting data from the hard disk the area on which the data was stored is overwritten This prevents unauthorized retrieval or restoration of the da...

Page 276: ...n is started or ended and when the encryption key is changed the machine must be restarted The corresponding recording area the hard disk is reformatted when restarting At this point the previous data is not guaranteed The recording area stores the following data Spooled print data Secure print sample print and similar print data Forms for the form overlay feature Mailbox and job flow sheet settin...

Page 277: ... of displaying the System Settings screen refer to System Settings Procedure P 240 2 Select Copy Mode Settings 3 Select the item to be set Basic Copying Tab You can change the tray and magnification settings appearing in the Basic Copying Tab screen By setting most commonly used tray and magnification settings you can reduce the number of selection operations for making a copy 1 Select Basic Copyi...

Page 278: ... Color Reduce Enlarge or Paper Supply 8 Features You can set the features appearing in the third and fourth columns from the left of the Basic Copying Tab screen You can set up to five features However the Output Color at the top position in the third column is fixed Note It is not possible to select Output Color Reduce Enlarge and Paper Selection 4 Select the feature to be displayed and select Sa...

Page 279: ...n the five feature buttons do not appear Copy Defaults This sets the default settings of copy feature settings When the power is turned on or the machine returns from a power saving state or the Clear All button is pressed these default settings take effect By setting the defaults to commonly used features you can reduce the number of setting operations required in use 1 Select Copy Defaults 2 Sel...

Page 280: ...out custom colors refer to Custom Colors P 285 Dual Target Color Non target Area Set the default value for Dual Color Non target Area that appears when Output Color More Dual Color is selected in the Basic Copying Tab screen You can select from seven preset colors and six custom colors For information about custom colors refer to Custom Colors P 285 Original Type Set the default value for Original...

Page 281: ... the Color Balance density levels in the Image Quality screen You can set each of the Low Density Medium Density and High Density values for cyan Color Balance Black Set the default value for the Color Balance density levels in the Image Quality screen You can set each of the Low Density Medium Density and High Density values for black Color Shift Set the default value for Color Shift in the Image...

Page 282: ...n is set to Always On or On during Auto The Auto item can be selected when the finisher is installed Note When the finisher is installed Auto is the default value Original Orientation Set the default value for Original Orientation in the Scan Options screen Output Destination Set the default value for copy or print destination Note This feature does not appear for some models An optional package i...

Page 283: ...yed the subsequent processing is determined by these settings You can set the time until memory overflow handling is carried out For more information refer to Auto Job Release P 255 Cancel Job The stored data is discarded Run Job The read in data is treated as valid and the part of the original read in is copied Maximum Stored Pages Set the maximum number of stored pages of a copy original You can...

Page 284: ...is setting is valid when Text Photo is selected for Original Type in the Image Quality screen The larger the value the stronger the effect of removing background noise Auto Exposure Text Set the auto exposure level for color copying This setting is valid when Text is selected for Original Type in the Image Quality screen The larger the value the stronger the effect of removing background noise Tex...

Page 285: ...he stamp printed on the reverse side Opposite to Side 1 Print in a position symmetrically opposite to the front side Same as Side 1 Print in the same position as the front side Date Position on Side 2 When an annotation date is specified for 2 sided copying set where to place the date printed on the reverse side Opposite to Side 1 Print in a position symmetrically opposite to the front side Same a...

Page 286: ...Note Select to display the previous screen and select to display the next screen 3 Select the setting value 4 Select Save A B Series Size You can select from ten A and B series sizes Inch Size You can select from twelve inch series sizes Others You can select from thirteen other sizes Variable Size You can enter any size Set the width from 15 to 432 mm and the height from 15 to 297 mm in 1 mm incr...

Page 287: ...u can assign custom colors with yellow 0 to 100 magenta 0 to 100 and cyan 0 to 100 1 Select Custom Colors 2 Select the item to be set or changed and select Change Settings Note Select to display the previous screen and select to display the next screen 3 Adjust with and Note Adjust so that the total of yellow magenta and cyan does not exceed 240 4 Select Save ...

Page 288: ...ttings 287 Machine E mail Address Host Name 287 POP3 Server Settings 287 SMTP Server Settings 287 Domain Settings 287 Remote Authentication Server 288 Other Settings 289 1 In the System Settings screen select System Settings For the method of displaying the System Settings screen refer to System Settings Procedure P 240 2 Select Network Settings 3 Select the feature to be set Port Settings Set the...

Page 289: ...server In SMTP Server Settings you can set the following items For information about SMTP server settings refer to the Network Administrator Guide Domain Settings Set the accepted domains In Domain Settings you can set the following items For information about accepted domain settings refer to the Network Administrator Guide 1 Ethernet Settings 4 TCP IP Subnet Mask 2 TCP IP Get IP Address 5 TCP IP...

Page 290: ...ris Remote Authentication Server 1 through 5 Make the server settings Server Server Setup You can select the remote authentication server specification method from By IP Address and By Server Name Server IP Address Set the IP address of the remote authentication server using values from 0 to 255 Note You can set this when Remote Server Setup is set to By IP Address 224 XXX XXX XXX to 255 XXX XXX X...

Page 291: ...HTTP SSL TLS Settings Set the HTTP SSL TLS 1 Select the item to be set or changed and select Change Settings 2 Set the setting value 3 Select Save HTTP SSL TLS Communications Enable or disable the HTTP SSL TLS communications HTTP SSL TLS Port Number Set the HTTP SSL TLS communications port number in the range from 1 to 65535 Other Settings Make other settings In Other Settings you can set the foll...

Page 292: ...Allocate Memory For each interface set the memory capacity for the receiving buffer temporary storage for data sent from the client You can change the receiving buffer capacity depending on the pattern of use and purpose Increasing the receiving buffer capacity may allow a client to be released sooner from an interface Important If you change the memory capacity settings the memory is reset and th...

Page 293: ...arallel receiving buffer Set a value from 64 to 1024 KB in 32 KB increments Receiving Buffer USB Set the receiving buffer for USB Set a value from 64 to 1024 KB in 32 KB increments Note This feature does not appear for some models An optional package is necessary For more information contact our Customer Support Center Receiving Buffer LPD Spool Off Do not use spooling While LPD print processing i...

Page 294: ...ng uses the hard disk Receiving Buffer IPP Spool Off Do not use spooling While IPP print processing is being carried out for one client data cannot be received over the same interface from another client Set a value for the dedicated IPP receiving buffer memory capacity from 64 to 1024 KB in 32 KB increments Hard Disk Carry out spooling The receiving buffer for spooling uses the hard disk Receivin...

Page 295: ...Paper Attributes Mismatch Set the action to be taken when the paper type loaded in the paper tray does not match that specified Print Carry on printing even if the paper type is different Display Confirmation Screen Show a confirmation screen and prompt for action Unregistered Forms When a form specified for printing in a form data file overlay printing is not present on the host computer set whet...

Page 296: ... is necessary For more information contact our Customer Support Center PostScript Paper Supply Select whether the PostScript DMS Deferred Media Selection feature is enabled or not Note This feature does not appear for some models An optional package is necessary For more information contact our Customer Support Center PostScript Font Absence Set the handling when a PostScript font specified in a j...

Page 297: ...bout each setting Basic Scanning Tab 295 Scan Defaults 296 Scan to FTP SMB Defaults 298 Scan Size Defaults 298 Output Size Defaults 299 Reduce Enlarge Presets 299 Other Settings 300 1 In the System Settings screen select System Settings For the method of displaying the System Settings screen refer to System Settings Procedure P 240 2 Select Scan Mode Settings 3 Select the item to be set Basic Scan...

Page 298: ...Preset buttons refer to Reduce Enlarge Presets P 299 Reduce Enlarge 4th Button This item can be set when Reduce Enlarge is selected in Feature in 2nd Column Set the magnification shown in the fourth row from the top of the five feature buttons shown in Reduce Enlarge in the Basic Scanning Tab screen Select the magnification from the registered R E Preset buttons For information about R E Preset bu...

Page 299: ...ression in the Image Quality screen Color Space Set the default value for color space in the Image Quality screen Original Orientation Set the default value for Original Orientation when scanning Scan Resolution Set the default value for Scan Resolution in the Scan Options screen You can select from 200 dpi 300 dpi 400 dpi and 600 dpi Mixed Size Originals Set the default value for Mixed Size Origi...

Page 300: ... UNC format 1 Select Scan to FTP SMB Defaults 2 Select Change Settings 3 Select the setting value 4 Select Save Scan Size Defaults Set the original size shown in Scan Size in the Scan Options screen An original size is assigned to each of the eleven buttons other than Auto Detect When frequently scanning nonstandard size originals by presetting a nonstandard size scan it is not necessary to enter ...

Page 301: ... the commonly used sizes you can reduce the number of selection operations for making a scan 1 Select Output Size Defaults 2 Select the item to be set or changed and select Change Settings Note Select to display the previous screen and select to display the next screen 3 Select the setting value 4 Select Save Reduce Enlarge Presets Set the magnifications shown in Preset for Reduce Enlarge in the S...

Page 302: ...ould be handled Once a certain time has elapsed with the confirmation screen displayed the subsequent processing is determined by these settings You can set the time until memory overflow handling is carried out For more information refer to Auto Job Release P 255 Cancel Job The stored data is discarded Run Job The read in data is treated as valid and the part of the original read in is treated as...

Page 303: ...y screen for E mail Scan to Mailbox Scan to FTP SMB and Job Template TIFF Format Set the TIFF format for scanned data You can select from TIFF V6 and TTN2 Image Transfer Screen Select whether to display a message when the scan of an original is completed Hide Message and Screen Do not show a scan completion message Display Message Only Show a scan completion message Display Message and Screen Show...

Page 304: ...Fax Control 304 File Destination Output Destination 307 Reduce Enlarge Presets 308 Scan Size Defaults 309 Local Terminal Information 309 iFax Control 311 1 In the System Settings screen select System Settings For the method of displaying the System Settings screen refer to System Settings Procedure P 240 2 Select Fax Mode Settings 3 Select the item to be set Screen Defaults Set items relating to F...

Page 305: ...ly used features you can reduce the number of setting operations required in use 1 Select Fax Defaults 2 Select the item to be set or changed and select Change Settings Note Select to display the previous screen and select to display the next screen 3 Set the setting value 4 Select Save Resolution You can set the default value for Resolution in the Basic Features screen Original Type You can set t...

Page 306: ...ing document A polling document means that an original is stored in the machine s public mailbox for polling and can then be sent by an operation from the other end Doc for Polling Auto Delete Set whether polling documents should be automatically deleted after sending Rotate 90 degrees If the original can be rotated and sent without reducing the original image set whether to automatically rotate N...

Page 307: ...fault When using on hook set whether the initial state of the touch screen is manual receiving or manual transmission Auto Switch Attempts Set the number of times the phone ring should sound for an incoming call before starting fax communications Set a value from 0 to 9 rings If the other party is a telephone within the set number of rings you can use an external telephone to answer the call and i...

Page 308: ...e received document is declared it is printed on that size Depending on the sizes of the received documents multiple up receiving may not be possible 2 Sided Printing Set whether to print received fax documents including iFax received documents 2 sided This is convenient for saving paper Note This feature does not appear for some models An optional package is necessary For more information contact...

Page 309: ...lid and the part of the original read in is treated as a complete stored file Maximum Stored Pages Set the maximum number of stored pages of a fax original You can set a number from 1 to 999 pages Mailbox Receive Display Priority 1 to 5 Set the display priority for documents received using mailboxes The priority levels are from 1 to 5 and each setting takes these values For each item the same sett...

Page 310: ...els An optional package is necessary For more information contact our Customer Support Center The displayed items may be different depending on the options installed 1 Select Output Destination Line Setup 2 Select the line you want to register and select Change Settings 3 Select the destination 4 Select Save Reduce Enlarge Presets Set the magnifications shown in Preset in Reduce Enlarge in the Sca...

Page 311: ...he height from 15 to 297 mm in 1 mm increments 1 Select Scan Size Defaults 2 Select the item to be set or changed and select Change Settings Note Select to display the previous screen and select to display the next screen 3 Select the setting value 4 Select Save A and B Series Size You can select from ten A and B series sizes Inch Sizes You can select from twelve inch series sizes Others You can s...

Page 312: ...nted in the send headers and on cover notes Using the displayed keyboard and the numeric keypad make the specification with not more than 30 characters Machine Password Set the receiving password when you want to limit the other parties that can send faxes When the receiving password is set only a party that sends the correct receiving password by F code is allowed to send or poll Note that this m...

Page 313: ...rty s iFax supporting machine When specifying a profile check that it can be handled by the other party s iFax supporting machine TIFF S This is the iFax standard Originals larger than A4 size are automatically reduced to A4 size for transmission TIFF F Select this to specify ultra high image quality for transmitting image quality or for sending A3 size or B4 size originals TIFF J Send this when s...

Page 314: ...ppear for some models An optional package is necessary For more information contact our Customer Support Center Fax Transfer from Address Book Set whether to set restrictions when forwarding e mail received in SMTP format by iFax to fax addresses not in the address book Off Forwarding is not restricted On When received by SMTP check if the recipient telephone number is listed in the address book a...

Page 315: ...Fax Mode Settings 313 Setups 11 4 Select Save Off The data size is unrestricted On Set a value from 1 to 65535 KB in 1 KB increments If the set value is exceeded the data is destroyed ...

Page 316: ... information about each setting E mail Defaults 314 Address Search Directory Service 315 Other Settings 318 1 In the System Settings screen select System Settings For the method of displaying the System Settings screen refer to System Settings Procedure P 240 2 Select E mail iFax Settings 3 Select the feature to be set E mail Defaults Set the default subject for e mail The subject line can be up t...

Page 317: ...e IP address must be correctly set The directory server primary IP address or FQDN must be set The port number used for LDAP communications must be set Primary Server Make the directory server settings 1 Select Primary Server 2 Select the item to be set and select Change Settings 3 Set the setting value Primary Server Setup You can select the primary server specification method from By IP Address ...

Page 318: ...dary server port number in the range from in the range from 1 to 65535 Login Name Set the login name for access to the directory server However set this only when authentication is required for the directory service Do not make the setting when authentication is not required When setting the login name you can enter up to 256 characters Password Set a password for access to the directory server Ho...

Page 319: ...acters Attribute Type of E mail Address Set the e mail address attribute type You can enter up to 32 characters Attribute Type of Custom Items 1 to 3 Set the LDAP attribute type of custom items 1 to 3 You can enter up to 32 characters Attribute Name of Custom Items 1 to 3 Set the attribute name assigned to custom items 1 to 3 You can enter up to 16 characters Maximum Search Results Set the upper l...

Page 320: ...t can be specified when sending an e mail The number of addressees is the total number in To Cc Bcc You can set the maximum number of addressees in the range from 1 to 100 If the maximum number of addressees is exceeded the e mail transmission is aborted Note This does not apply to iFax features Auto Print Error Mail Select whether the error e mail resulting from an incorrect address or transmissi...

Page 321: ...lly printed Print when delivery fails Printing only when the transmission failed Page size for Split Send Select whether to split the attachment data into pages for transmission When split for transmission set the number of pages Important It is only possible to split into multiple page files when the output file format is specified as PDF DocuWorks or multiple page TIFF 1 Select Page Size for Spl...

Page 322: ...Mailbox Settings 320 iFax to iFax 321 iFax to E mail 321 Stored Document Settings 321 1 In the System Settings screen select System Settings For the method of displaying the System Settings screen refer to System Settings Procedure P 240 2 Select Mailbox Stored Document Settings 3 Select the item to be set or changed Mailbox Settings Set what happens after documents from a client are received and ...

Page 323: ...ail forwarding of documents received in a mailbox from an iFax supporting machine Stored Document Settings Select whether documents stored in a mailbox are automatically deleted You can select the set the how long documents are kept and time of deletion You can also select whether individual documents are deleted or not 1 Select Stored Document Settings 2 Select the item to be set or changed and s...

Page 324: ...d For more information refer to Delete Documents with Expiry Date P 325 Delete Charge Print Documents Select whether or not to delete charge print documents after the storage period has expired Delete Secure Print Documents Select whether or not to delete secure print documents after the storage period has expired Delete Sample Print Documents Select whether or not to delete sample print documents...

Page 325: ...e created or changed Mailbox You register mailboxes in order to stored scanned documents or carry out mailbox communications and when assigning received documents to mailboxes You can register up to 200 mailboxes Scanned documents and documents received for a mailbox or stored for polling are stored in the specified mailbox It is convenient to make separate mailboxes for example for received docum...

Page 326: ... to 9 The password setting is optional Check Password To restrict access to specified users only you can set a password When the password is set it is necessary to enter the password each time a mailbox reading or writing operation is carried out Save Write When a mailbox is selected password input is required Print Delete Read When a document in a mailbox is printed or deleted password input is r...

Page 327: ...red process you can determine how documents stored in a mailbox are processed For the method of registering a job flow refer to Job Flow Sheets P 326 1 Select Link Flow Sheet to Mailbox and select Create Change Link When a job flow is already associated the screen on the right appears Cut Link Disassociate the job flow from the mailbox Create Change Link A screen for job flow association appears Y...

Page 328: ...eletion Depending on the method of storing in the mailbox there are restrictions on the combination of features Yes can be run No cannot be run Sometimes can be run depending on settings in System Administration mode Important When the Input is Fax Private Polling or Fax to Mailbox and a monochrome 2 tone document is forwarded by e mail FTP or SMB and the Job Flow File Format is set to JPEG the fi...

Page 329: ...m to be changed Delete Settings This deletes the setting values of all selected items Change Settings With this you can confirm or change the setting values of the selected items 2 Select Change Settings Name Set the name for the job flow of up to 128 characters Description Set the description of the job flow of up to 256 characters Send as Fax Specify the fax transmission address You can specify ...

Page 330: ...tes all information for the selected addresses Change Settings You can confirm or change a selected address For information about the method for confirm change refer to Address Book P 334 Send as iFax Specify an address for iFax transmission You can specify a total of up to 100 addresses using either already registered address book numbers or direct input Important It is not possible to use wildca...

Page 331: ...ect Change Settings to set For information about the method for confirm change refer to Address Book P 334 Delete Recipient This deletes all information for the selected addresses Change Settings You can confirm or change a selected address For information about the method for confirm change refer to Address Book P 334 Send as E mail Specify the recipients for the e mail You can specify a total of...

Page 332: ...s to set For information about the method for confirm change refer to Address Book P 334 Delete Recipient This deletes all information for the selected recipients Change Settings You can confirm or change the selected recipients For information about the method for confirm change refer to Address Book P 334 Transfer via FTP 1 Transfer via FTP 2 Specify where FTP forwarding is to be stored Address ...

Page 333: ...of characters you can input are as follows z Recipient Name 18 bytes maximum z Server 64 bytes maximum z Save in 128 bytes maximum z Login Name 32 bytes maximum z Password 32 bytes maximum For more details refer to Address Book P 334 Transfer via SMB 1 Transfer via SMB 2 Specify where SMB forwarding is to be stored Address Book When the server address is registered in the address book you can spec...

Page 334: ...he numbers of characters you can input are as follows z Recipient Name 18 bytes maximum z Server 64 bytes maximum z Shared Name 128 bytes maximum z Save in 128 bytes maximum z Login Name 32 bytes maximum z Password 32 bytes maximum For more details refer to Address Book P 334 Print Make print settings 1 Select On or Off 2 When On is selected you then configure print settings Quantity Set the numbe...

Page 335: ...lete 1 Select a job flow and select Edit Delete 2 Check the content 3 Press the desired button Delete Pressing the Delete button displays a confirmation dialog box select Yes Copy This makes a copy of the selected job flow From the copy of the job flow you can create a new job flow The method of creation is the same as when creating a new job flow For more details refer to Create New Job Flow Shee...

Page 336: ... use an address book number specified with the numeric keypad one touch dialing or an address group 1 Select Address Book 2 Press the abbreviated number you want to register and select Create Delete Note Select to display the previous screen and select to display the next screen By entering a three digit number with the numeric keypad you can specify the abbreviated number directly 3 Select Addres...

Page 337: ...ient Name Enter the recipient as not more than 18 characters For information about entering text refer to Entering Text P 252 Index You can enter a single alphanumeric index character for use as a keyword to search the address book For information about entering text refer to Entering Text P 252 z Cover Note z Billing Midnight Time z Maximum Image Size z Address Type z Communication Mode z E mail ...

Page 338: ...rfine 400 dpi and Superfine 600 dpi Cover Note Select whether to send transmissions with a cover sheet attached If attached specify comments relating to the recipients and sender to be included in the cover sheets Comments must be registered in advance For information about comment registration refer to Comments P 341 1 Off or On 2 When On is selected select Comment 3 Select Recipient s Comment 4 ...

Page 339: ...ing and select Next F Code Select whether to use F code communications F code communications is a communications protocol agreed by the information communications network industrial body as a way of using the T 30 a communications standard subaddresses standardized by ITU T The F code subaddress and password use not more than 20 digits 0 to 9 and 1 Select Off or On 2 If you selected On with the nu...

Page 340: ...ht Time Billing Late Night Time Set the connection time for one unit charge in each of the time bands daytime night late night This item appears when the fax feature for the Login Setup Auditron Administration is enabled For information about how to enable the feature refer to Auditron Mode P 352 The registered details can be confirmed by printing the Billing Data List For information about how to...

Page 341: ... an auxiliary item You can input up to 20 characters This is appropriate for information represented by a shortish character string such as telephone number employee number and so on For more about attribute name refer to Attribute Name of Custom Items 1 to 3 P 317 Custom Item 2 The attribute name set as Custom Item 2 attribute name is shown as the item name You can input any information as an aux...

Page 342: ...d information for the selected address book entry select Yes Important Deleted information cannot be recovered Group Send You can register up to 50 address groups for sending broadcast transmissions Each group can include up to 20 address book entries Note that recipients to be added to an address group must already be stored in the address book Note It is not possible to include an address group ...

Page 343: ...to 18 characters For information about entering text refer to Entering Text P 252 1 Select Comments 2 Select the comment number you want to register and select Create Delete Note Select to display the previous screen and select to display the next screen 3 Using the keyboard on the screen and the numeric keypad enter the comment and select Save Paper Type This item is the same as Paper Type in Pap...

Page 344: ... screen select System Administrator Settings For the method of displaying the System Settings screen refer to System Settings Procedure P 240 2 Select the feature to be set System Administrator Login ID Set the system administrator UserID You can enter from 1 to 32 characters Note The default setting of the system administrator UserID is 11111 1 Select System Administrator Login ID 2 Select On 3 S...

Page 345: ...passwords refer to Login Setup Auditron Administration P 344 1 Select System Administrator Password 2 Select Set 3 With the numeric keypad enter New Password 4 to 12 digits and select Save 4 In Re enter Password enter the same password and select Save Note To set no password leave the password blank and select Save Maximum Login Attempts If system administrator ID authentication fails repeatedly y...

Page 346: ...ser Details Setup 348 Charge Print Settings 350 Fax Billing Data 351 Password Entry from Control Panel 351 Login Setup Auditron Mode 351 1 In the System Settings screen select Login Setup Auditron Administration For the method of displaying the System Settings screen refer to System Settings Procedure P 240 2 Select the feature to set change Create Check User Accounts When the login setup Auditron...

Page 347: ... to Entering Text P 252 Password Set the password This is recommended for stronger security You can set the password to from 4 to 12 numeric digits Password appears when in Login Setup Auditron Mode Check User Details is set to On For information about Login Setup Auditron Mode refer to Login Setup Auditron Mode P 351 E mail Address Enter an e mail address Set an e mail address Up to 128 character...

Page 348: ...nly can be used Account Limit Set the maximum number of pages that can be used in a copy or scan z Color You can set from 1 to 9999999 pages 7 digits Set this in units of one page z Black You can set from 1 to 9999999 pages 7 digits Set this in units of one page Reset Total Impressions Reset the current cumulative number of pages for a selected user returning it to zero 1 Select Reset Total Impres...

Page 349: ...ss or Remote Access is selected in Login Setup Auditron Mode P 351 1 Select Reset User Accounts 2 When printing an auditron report for all services select Print Report 3 Select the item to delete reset and select Reset 4 Select Yes or No All User Accounts This deletes all registered information for each user It also deletes all data including the maximum number of pages cumulative number of pages ...

Page 350: ...e cumulative number of pages copied using System Administration mode on the screen The cumulative number of pages is counted up to 9999999 pages for both color and monochrome 1 Select System Administrator Copy Meter 2 This checks the cumulative number of pages 3 To reset select Reset User Details Setup Set the information required when carrying out authentication 1 Select User Details Setup 2 Pres...

Page 351: ...isplays and when accessing from CentreWare Internet Services Hide Account ID You can set the way in which the AccountID is shown as it is being input Use this for extra security as required Note This item appears when Network Access is selected in Login Setup Auditron Mode P 351 Show As you enter the AccountID the characters are echoed on the screen in the normal way Hide As you enter the AccountI...

Page 352: ...g to Print Auditron Operation follows the receiving controls set on the machine When According to Print Auditron is selected items Job Login Failure and Job without UserID appear Note Job without UserID can be displayed by selecting the CentreWare Internet Services Properties tab Auditron Settings Non Account Print For information about CentreWare Internet Services refer to CentreWare Internet Ser...

Page 353: ...ystem administrator or a user is using the machine Select On to enable Password P 345 for System Administrator Password P 343 and Create Check User Account Select Off to not require the password even if it is set in the above procedures Important The setting of Password Entry from Control Panel is used for verification on the machine A password must always be input when are using CentreWare Intern...

Page 354: ... information about remote authentication refer to Authentication and Auditron Administration P 400 Important When switching to or from remote access mode the following information is lost All user information Personal mailboxes and personal job flow sheets Note This feature does not appear for some models An optional package is necessary For more information contact our Customer Support Center Gue...

Page 355: ...Print Service Administration relating to the printer operations Mailbox Access Set whether to carry out authentication when printing or retrieving documents stored in a mailbox Note When Local Machine Access P 352 or Network Access P 352 is selected this is enabled 1 Select Mailbox Access 2 Set any item Login During Printing Set whether authentication is required when a document within a mailbox i...

Page 356: ......

Page 357: ... job status features z Job Status Overview 356 z Checking Executing Pending Jobs 357 z Checking Completed Jobs 358 z Printing and Deleting Stored Documents 359 z Preferentially Printing Pending Print Jobs 365 z Handling Error Terminations 366 ...

Page 358: ...more details refer to Checking Executing Pending Jobs P 357 Checking the Status of Completed Jobs You can display the status of completed jobs You can also display more details For more details refer to Checking Completed Jobs P 358 Checking Stored Documents You can print or delete authentication print security print sample print delayed print and documents stored in a public mailbox For more deta...

Page 359: ...lay the previous screen and select to display the next screen 3 To cancel or preferentially execute a job select the job 4 Select Stop or Promote Job Stop Cancels the executing or pending job Promote Job Promotes the job to be run after the currently executing job Note however that if after using Promote Job you continue to use Promote Job for another job the later promoted job will be promoted ah...

Page 360: ...heck whether a job has completed successfully Also by selecting a job you can display more details 1 Press the Job Status button 2 Select the Completed Jobs tab Note Select to display the previous screen and select to display the next screen 3 To check the details of a job select the job 4 After checking select Close ...

Page 361: ...hentication details such as UserID or password on the print drivers are processed according to the settings in Charge Print Settings This section describes how to print or delete documents stored by charge print receiving control For more details of charge print settings refer to Charge Print Settings P 350 1 Press the Log In Out button 2 With the numeric keypad enter the UserID for whom the audit...

Page 362: ...t After printing the document is deleted Print and Save This starts printing the document After printing the document remains undeleted Cancel This cancels printing the document Secure Print This section describes how to print and delete documents stored by the secure print feature For information about secure print operations refer to the print driver help information 1 Select Secure Print 2 Sele...

Page 363: ...es the security print document 1 Select Delete 2 Select Yes Yes This deletes the document Important Once the document is deleted it cannot be recovered No This cancels deleting the document When You Selected Print This prints the security print document 1 Select Print 2 Select what happens to the document after printing Print and Delete This starts printing the document After printing the document...

Page 364: ...lect Document List Note Select Refresh to display the updated information Select to display the previous screen and select to display the next screen You can also enter a three digit number directly with the numeric keypad 3 Select the document you want to print or delete Note Select Select All to select all documents Press this button once more to deselect all documents When You Selected Delete T...

Page 365: ...dated information Select to display the previous screen and select to display the next screen When You Selected Delete This deletes the document saved by the delayed print feature 1 Select Delete 2 Select Yes Yes This deletes the document Important Once the document is deleted it cannot be recovered No This cancels deleting the document When You Selected Print This prints the document saved by the...

Page 366: ...ect Public Mailbox 2 Select the document you want to print or delete Note Select Refresh to display the updated information Select to display the previous screen and select to display the next screen Select Select All to select all documents Press this button once more to deselect all documents When You Selected Delete This deletes the document saved in a public mailbox 1 Select Delete 2 Select Ye...

Page 367: ...5 Job Status 12 Preferentially Printing Pending Print Jobs You can preferentially print pending print jobs Note If there are no pending print jobs then you cannot select Print Waiting Jobs 1 Press the Job Status button 2 Select Print Waiting Jobs ...

Page 368: ... codes refer to Error Code P 460 For a Fax Job This prints a transmission report undelivered For information about transmission report undelivered refer to Transmission Report Undelivered P 382 For information about how to select whether to print undelivered fax reports automatically refer to Transmission Report P 382 For Other Jobs Print a job status activity report and check the execution result...

Page 369: ...3 Machine Status This chapter describes the features for checking the machine status z Overview of Machine Status 368 z Machine Status 369 z Billing Meter Print Report 374 z Consumables 384 z Faults 385 ...

Page 370: ...You can also set the printer mode and fax receiving mode For more information refer to Machine Status P 369 Meter Checking and Report Output You can check the number of pages printed for each meter or for each user You can also print a report list and check the job history and settings recorded values For more information refer to Billing Meter Print Report P 374 Checking Consumables You can check...

Page 371: ... appears you can check the machine status Machine Information In Machine Information you can check the serial number machine configuration and software version 1 Select Machine Information For enquiry on maintenance and operation This indicates how to make maintenance and operating inquiries Serial Number You can check the machine serial number Machine Configuration The Machine Configuration scree...

Page 372: ...k the following items Paper Tray You can check the paper trays configured in the machine On the screen you can check the following items z Tray status z Amount of paper remaining z Paper size z Paper type 1 Select Paper Tray z Configuration Code z Output Device z HP GL 2 z Auto Document Feeder z Duplex Module z PCL z Paper Tray z Hard Disk z PDF z High capacity paper tray z Page Memory Size z Fax ...

Page 373: ...lect Overwrite Hard Disk Print Mode You can set the printer mode Note The items that appear depend on the options that are installed 1 Select Printer Mode 2 Select Off line or On line Off line The printer cannot accept data Any data being sent is terminated and not printed On line The printer can accept data 3 Select the printer language used to set the printer mode 4 Select the required item Stor...

Page 374: ... the item number for the feature you want to set Current Value When you enter an Item Number this shows the currently set value New Value Enter the value to which you want to change the setting Stored Programming Store Delete You can save the printer mode in memory You can save up to 20 modes for HP GL 2 emulation 1 Select Store Delete 2 Select Store Current Selections or Delete 3 Select the memor...

Page 375: ...s The number stored in memory appears Fax Receiving Mode You can set the fax receiving mode For information about automatic and manual fax receiving modes refer to About Receiving Faxes P 149 1 Select Fax Receiving Mode 2 Select the receiving mode Manual Receive Reception of a fax from a remote machine is manual This mode is convenient for confirming the sender or using an external telephone to co...

Page 376: ...onversion using an ICC profile for example on the application is printed at Auto Color B W even documents that appear in black and white on the monitor are printed in color In this case meter 3 color printing is used for counting the number of prints 1 is applied on models equipped with FAX features Only B W and not color is supported for FAXes For 2 large size full color is counted as a print at ...

Page 377: ...o Check the Billing Meter for the Currently Authenticated UserID 1 Enter the UserID for the user for which you want to check the billing meter Note If a password is required enter the password 2 Continue to step 3 To Check the System Administrator Meter 1 Enter the UserID for System Administration mode Note If a password is required enter the password 2 Select User Mode 3 Press the Machine Status ...

Page 378: ...r to Reports P 266 Activity Report You can check whether outgoing or incoming communications were completed successfully You can organize reports by the remote terminal name or by whether the communication was incoming or outgoing The following cases are not included in Activity Report Redialed outgoing communications and polling When a document waiting to be sent is deleted while on send standby ...

Page 379: ...ck the hardware configuration of the machine network information and the print feature and copy feature setting status Note The same content is printed for the Settings List regardless of whether you print from Copy Mode Settings Print Mode Settings Scan Mode Settings or Fax Mode Settings PCL Settings List This prints settings for PCL virtual printers PCL Form List This prints a list of forms regi...

Page 380: ...tended Features Settings List You can check the settings relating to scan features Note The same content is printed for the Extended Features Settings List regardless of whether you print from Scan Mode Settings or Fax Mode Settings Domain List You can check the permitted domains registered for domain filtering Job Template List You can print a list of job templates created using CentreWare Scan S...

Page 381: ... Settings Box Selector List You can check the settings of the feature for sorting into mailboxes Domain List You can check the permitted domains registered for domain filtering Note This can be used when the iFax kit is installed Address Book You can check the contents of the address book relay station settings and the group send settings When you specify a range of address numbers the three addre...

Page 382: ...f System Administration mode 1 Select Mailbox List 2 Select the range of mailbox numbers to be printed 3 Press the Start button Job Counter Report This prints the counter report for each feature 1 Select Job Counter Report 2 Select Job Counter Report 3 Press the Start button Auditron Administration You can print a Auditron Report by user Note that the Auditron Report by user that appears on the sc...

Page 383: ...s all users 4 Press the Start button Auditron Report Print You can check how many pages have been printed on the machine and the total number of sheets of paper used for each client job owner The number of print pages is counted for each of color and monochrome Auditron Report Print counts from the time at which the data is initialized Auditron Report Copy You can check the total number of pages c...

Page 384: ...port Undelivered P 267 Transmission Report You can check documents that have been transmitted and the transmission results If the result of a transmission attempt is success it is printed You can specify whether a transmission report is to be printed when sending You can specify whether this is to be printed automatically when each document is sent For information about the settings refer to Trans...

Page 385: ...ed when the multi poll transmission completes For information about how to set whether this should be automatically printed refer to Broadcast Multi Poll Report P 267 Relay Broadcast Report You can check the results of a relay broadcast If this is set to be automatically printed it is automatically printed when the relay broadcast completes For information about how to set whether this should be a...

Page 386: ... screen and select to display the next screen On the Consumables screen you can check the following items Note that staple cartridges only appear when the finisher is installed Important If using a partly consumed toner cartridge for example a toner cartridge removed from another Document Centre C450 C360 C250 unit the indicated status may not match the actual amount of consumable remaining When r...

Page 387: ...ccurring errors The items displayed include the date and time error code and error category This section describes how to print the error history 1 Press the Machine Status button 2 Select the Faults tab 3 Select Error History Report 4 Press the Start button Note You can also access the Error History Report from the Billing Meter Print Report screen Job Status Activity Report ...

Page 388: ......

Page 389: ...d an Auditron Administration feature that manages the use of each machine feature This chapter contains information for System Administrators on the features used to change the settings and on the setting procedures z Overview of Authentication 388 z Authentication for Job Flow Sheet and Mailbox 391 z Overview of Auditron Administration 400 ...

Page 390: ... To enter System Administration mode enter the System Administrator ID into the user ID entry field on the authentication screen Authenticated Users These are users who are registered with the machine When an authenticated user uses a service that is restricted the user must enter their user ID on the authentication screen Unauthenticated Users These are users who are not registered with the machi...

Page 391: ...ntrolled by using the Authentication feature The features controlled depend on the way in which the machine is used There are two ways of use as follows z Local access z Remote access For information about mailbox and job flow sheet control when the Authentication feature is enabled refer to Authentication for Job Flow Sheet and Mailbox P 391 Local Access Local access refers to using the machine b...

Page 392: ...Setup Auditron is set to Remote Access For information about Remote Access refer to Remote Access P 352 Direct fax When the Authentication feature is used for fax the use of direct fax from a computer is restricted To use the Authentication feature in the fax driver the authentication information including the UserID and password must be set Note Not restricted when System Settings Login Setup Aud...

Page 393: ...een The owner of such a job flow sheet is the mailbox Users able to use the mailbox where the job flow sheet is created can share it and freely change settings The job flow sheet can only be used when the Authentication feature is not being used and when the Authentication feature is being used can only be run by the System Administrator System Administrator Shared Job Flow Sheet This job flow she...

Page 394: ... who made the copy Important A job flow sheet created from Check Mailbox allows editing copying deletion and selection execution only from the mailbox in which the job flow sheet was created The users are all users who are able to use the mailbox If a job flow sheet is associated with a mailbox in which it can no longer be used as a result of a change in the authentication status then editing and ...

Page 395: ...sheet is the user who made the copy Job flow sheet operation General users System administrator Generally shared Box Administrator shared Personal Generally shared Box Administrator shared Personal Creation registration Yes Yes Display Yes Yes Yes Yes Yes Yes Editing Yes Yes Yes Yes Yes Copying Yes Yes Yes Yes Yes Yes Deletion Yes Yes Yes Yes Yes Selection execution Yes Yes Yes Yes Yes Yes Associa...

Page 396: ...led this mailbox is shared by all users When the Authentication feature is enabled this mailbox is shared by all authenticated users Only a System Administrator can change the settings To create an administrator shared box it is necessary to press the Log In Out button and operate the machine as the System Administrator Personal Mailbox This is a mailbox created by an authenticated users using the...

Page 397: ...trieval using a scan driver or mailbox viewer Important If a job flow sheet is associated with a mailbox in which it can no longer be used as a result of a change in the authentication status then changing copying is no longer possible but it can still be used However once the association is released the job flow sheet is no longer displayed and cannot be used Mailbox operation General users Syste...

Page 398: ...Important If a job flow sheet is associated with a mailbox in which it can no longer be used as a result of a change in the authentication status then changing copying is no longer possible but it can still be used However once the association is released the job flow sheet is no longer displayed and cannot be used Mailbox operation Unauthenticated user general user Authenticated user System admin...

Page 399: ...inking Job Flow Sheet and Mailbox The ways to link job flow sheets to mailboxes differ depending on whether the Authentication feature is enabled The following explains the relationships available z When the Authentication Feature is not Enabled z When the Authentication Feature is Enabled Note When job flow sheets not available for operation depending on changes made to the authentication status ...

Page 400: ...ne Access Network Access Check User Details is set to On Mailbox Job Flow General users System administrator Generally shared Administrator shared Personal Generally shared Administrator shared Personal Box Yes Yes Yes Yes General shared Yes Yes Yes Yes Administrator shared Yes Yes Yes Yes Personal Yes Yes Yes Mailbox Job Flow Unauthenticated user general user Authenticated user System administrat...

Page 401: ...er general user and job flow operation and mailbox use is not allowed Mailbox Job Flow Unauthenticated user general user Authenticated user System administrator Generally shared Administrator shared Personal Generally shared Administrator shared Personal owner Personal non owner Generally shared Administrator shared Personal General shared Yes Yes Yes Yes Administrator shared Yes Yes Yes Yes Perso...

Page 402: ... information managed by the remote accounting service User information managed by the remote accounting service is sent to the machine from the remote accounting service and registered on the machine When the user information managed by the remote accounting service is updated the user information must be sent from the remote accounting service to the machine Net authentication allows a number of ...

Page 403: ...ounting service 2 This feature sets a predetermined limit on the number of sheets that can be used and when this limit is reached prevents further operation The settings are made with the remote accounting service 3 You can only restrict color modes when using DocuHouse optional Refer to your software manual for information about DocuHouse Note Verification does not take place when System Settings...

Page 404: ...ditron administration is possible for each feature Print Service This section describes the information for which Auditron administration is possible for the job types that can be used by print Corresponding service Restrictions on use Per user usage counts UserID Authentication Color mode restrictions 1 Maximum page count 2 Copy Yes Yes Print Yes Charge print Yes Yes Scanner Yes Yes Fax and iFax ...

Page 405: ...harging units Manual feed transmission originating receiving Required Authenticated user Number of fax transmissions pages number of charging units Fax receiving and printing Auto receiving and printing Not required Fax receiving Number of calls received pages number of charging units print pages number of sheets Manual receiving and printing originating receiving Not required Fax receiving Number...

Page 406: ...ric keypad or on hook off hook is used When an address book number is used for which the charging data has not been registered When combined with a telephone call including when a transmission is started by making a telephone call Fax Relay broadcast Relay receiving Not required Fax receiving Number of calls received pages number of charging units Relay broadcast print Not required Relay broadcast...

Page 407: ...ms E Mail Required Authenticated user Scanned color pages monochrome pages mail transmission color pages monochrome pages Scan to Mailbox Required Authenticated user Scanned color pages monochrome pages stored color pages monochrome pages Scan to FTP SMB Required Authenticated user Scanned color pages monochrome pages file transfer color pages monochrome pages Job template Required Authenticated u...

Page 408: ......

Page 409: ...scribes how to replace consumables clean the machine perform auto gradation adjustment and print a report list z Replacing Consumables 408 z Cleaning the Machine 419 z Executing Auto Gradation Adjustment 424 z Printing a Report 427 ...

Page 410: ...nlight Dusty location z Before using consumables periodical replacement parts carefully read the instructions and precautions on the packaging z We recommend having spare consumables periodical replacement parts ready z Check the product code of the consumables periodical replacement parts and contact our Customer Support Center to place your orders z The use of toner cartridges waste toner contai...

Page 411: ...nd performance Use only toner cartridges recommended by Xerox for the machine When only a small amount of toner remains in a toner cartridge the machine may stop during printing and display a message If this happens replace the toner cartridge for the indicated color to continue copying or printing Replace toner cartridges while the machine is on After the Please order a new xxx message is display...

Page 412: ...idge Return used toner cartridges to our Customer Support Center for disposal 4 Prepare a new toner cartridge of the same color as the cartridge that you removed and gently tilt the cartridge three or four times up down left and right as shown in the figure on the right 5 Insert the toner cartridge as far as possible with the arrow K on the cartridge facing upwards 6 Turn the toner cartridge clock...

Page 413: ... beforehand Used waste toner containers require special processing during disposal Return them to our Customer Support Center The use of waste toner containers not recommended by Xerox may impair quality and performance Use only waste toner containers recommended by Xerox for the machine Replace the waste toner container while the machine is on Note The number of pages that you can copy or print i...

Page 414: ...lied orange vinyl cap to prevent toner from spilling out 6 Hold the used waste toner container firmly with both hands and lift it into the empty box Important Return used waste toner containers to our Customer Support Center for disposal 7 Gently insert the supplied cleaning rod that you removed from the box into each of the cleaning slots D1 to D4 square holes with the pad facing down 8 When the ...

Page 415: ...slightly open Replacing Drum Cartridges A1 A2 A3 and A4 When it is time to replace a drum cartridge a message appears on the touch screen When this message appears contact our Customer Support Center If you have concluded a spot maintenance contract refer to this section then confirm the indicated drum cartridge position A1 A2 A3 or A4 and replace the corresponding drum cartridge If you continue t...

Page 416: ...is for when A4 paper is used The number of pages that you can copy or print is only an estimate and varies depending on conditions such as the content paper size paper type and the computer environment After the Please order a new xxx drum AX maintenance request message appears images may not print clearly 1 Make sure that the machine has stopped before opening the front cover 2 Lift up the stoppe...

Page 417: ...ge in an upright position Return used drum cartridges to our Customer Support Center for disposal 7 Place the new drum cartridge with protective cover on the handle and insert the end of the drum cartridge into the machine Note Insert the drum cartridge up to the arrow mark as shown in the figure on the right 8 Peel off the seal from the top of the drum cartridge while the end of the cartridge is ...

Page 418: ...cover is even slightly open Replacing the Staple Cartridge When a Staple Finisher optional is installed and it is time to replace the staple cartridge a message appears on the touch screen When this message appears replace the staple cartridge with a new one Important The use of staple cartridges not recommended by Xerox may impair quality and performance Use only staple cartridges recommended by ...

Page 419: ...ght towards you 3 Lift up the staple cartridge to remove it 4 Press the PUSH marks on both sides of the staple cartridge You can now remove the staple case Important If there are staples inside the staple case the case will not rise up even if you press on the PUSH marks 5 Insert your fingertip into the round section on the cartridge and remove the staple case ...

Page 420: ...e right 8 Remove the seal from the new staple case as shown in the figure on the right 9 Return the staple cartridge to its original position by pushing it until you hear it click into place 10 Close the front cover of the Finisher Note A message will be displayed and the machine will not operate if the front cover of the Staple Finisher is even slightly open ...

Page 421: ...ly wrung soft cloth moistened with water Important Do not use cleaning agents other than water or neutral detergent Note If it is difficult to remove dirt try gently wiping with a soft cloth moistened with a small amount of neutral detergent 2 Wipe off any excess water from the exterior with a soft cloth Cleaning Internal Components Raster Output Scanners The following describes how to clean inter...

Page 422: ...and spilling toner place the container in another location away from the machine Lay paper on the floor and place the waste toner container on top of that paper 4 Remove the cleaning rod from the inside of the front door 5 Gently insert the cleaning rod into each of the cleaning slots D1 to D4 square holes with the pad facing down 6 When the cleaning rod is inserted as far as it will go gently pul...

Page 423: ...document glass are dirty dirt may appear on copies and the machine may not properly detect document sizes To ensure that clean copies are made clean the machine about once a month Important Do not use benzene paint thinner or other organic solvents Doing so might damage paint or coating on plastic parts Cleaning the machine with an excessive amount of water may cause the machine to malfunction or ...

Page 424: ...c solvents Doing so might damage paint or coating on plastic parts Cleaning the machine with an excessive amount of water may cause the machine to malfunction or damage documents during copying 1 Wipe the film section with a soft cloth moistened with water to remove any dirt and then wipe it with a soft dry cloth Important Do not press with excessive force because the film is easily damaged Do not...

Page 425: ... during copying or printing 1 Pull up the handle on the front of the left cover of the document feeder and fully open the cover Note When you fully open the cover it enters a fixed position Open the cover gently 2 While turning the rollers gently clean it with a soft cloth moistened with water Important Do not use cleaning agents other than water or neutral detergent Use a cloth that has been firm...

Page 426: ... type For information about the setting procedure refer to Paper Type P 260 Note We recommend executing auto gradation adjustment for all four of the screen types When the adjustment for one screen type is complete specify the next screen type and repeat the procedure If color shift is not compensated for despite the periodic execution of auto gradation adjustment contact our Customer Support Cent...

Page 427: ...mmon Settings 6 Select Image Quality Adjustment 7 Select Auto Gradation Adjustment 8 Load A4 plain paper into Tray 5 bypass and move the paper guide to gently touch the edge of the paper 9 Select the screen type for gradation adjustment and select Start Note The example described here is for the Copy Job Text screen ...

Page 428: ...Select Start The message Gradation adjustment is in progress Copy Job Text appears and the machine automatically adjusts the gradation It takes about 20 seconds to execute gradation adjustment If the adjustment ends successfully the Auto Gradation Adjustment screen for setting the screen type is redisplayed If there is a problem the machine stops adjustment and displays an error message Solve the ...

Page 429: ... in Memory indicator is lit you can confirm the documents stored to memory in the Stored Documents List For information about report list types refer to Print Report List P 376 1 Press the Machine Status button 2 Select the Billing Meter Print Report tab 3 Select Print Report List 4 Select the report list you wish to print and press the Start button 1 2 3 4 5 6 7 8 9 0 C Machine Status button ...

Page 430: ......

Page 431: ...e and their solutions z Troubleshooting 430 z Machine Trouble 432 z Image Quality Problems 437 z Trouble during Copying 443 z Trouble during Printing 448 z Trouble during Fax 451 z Trouble during Scanning 455 z Error Code 460 z Paper Jams 475 z Document Jams 486 z Stapler Faults 488 ...

Page 432: ...ower switch on Refer to Power On Off P 36 No Cause Is power of the correct voltage being supplied Action Make sure that the power supply is 220 240 V volts 10 A amperes Make sure that power of capacity compatible with the specified maximum power consumption of the machine 2 2 KVA is being supplied Refer to Safety Notes P 19 Touch screen is dark Cause Is the Power Saver button on No Yes Action The ...

Page 433: ...od Action Refer to Image Quality Problems P 437 No Yes Trouble during copy Action Refer to Trouble during Copying P 443 No Yes Trouble during printing Action Refer to Trouble during Printing P 448 No Yes Trouble during fax Action Refer to Trouble during Fax P 451 No Yes Trouble during scanning Action Refer to Trouble during Scanning P 455 Yes ...

Page 434: ...36 Is the power cord disconnected from the machine or the rear of the rack Is power of the correct voltage being supplied Make sure that the power supply is 220 240 V volts 10 A amperes Make sure that power of capacity compatible with the specified maximum power consumption of the machine 2 2 KVA is being supplied Safety Notes P 19 6 3 Registering Confirming Account Data P 196 Touch screen is dark...

Page 435: ...ort Center Is the printer mode Offline Press the Machine Status button and confirm the Printer Mode in the Machine Status screen If Printer Mode is Offline select Online in the Printer Mode screen Is the power cord disconnected from the machine or the rear of the rack Turn the power switch off and then firmly plug in the power cord Then turn the power switch on Refer to Power On Off P 36 Online in...

Page 436: ... Did you open a cover or turn power off during printing Turn the power off without unnecessarily inserting or removing a paper tray Wait several seconds and then turn the power switch on Make sure that the machine is online ready to receive data and then insert or remove the paper tray Copies are not made at the desired size Is the document scanning glass or the document cover dirty Clean the docu...

Page 437: ...aper tray to remove the torn paper or the foreign object Refer to Paper Jams P 475 Loading Paper P 232 Is out of spec paper loaded in the tray Replace with paper that meets machine specifications Refer to Loading Paper P 232 Is paper loaded in the paper tray past its maximum fill line Load paper in the paper tray so that it does not exceed the maximum fill line Refer to Loading Paper in Trays 1 to...

Page 438: ...r and check inside Refer to Document Jams P 486 When importing originals of different sizes is the Mixed Size Originals setting set to ON Set Mixed Size Originals to ON Refer to Mixed Size Originals Scanning Different Size Documents Simultaneously P 70 Is an A5 size document loaded horizontally on the document feeder when the Mixed Size Originals feature is in use Load the A5 size document vertica...

Page 439: ...y and then retry copying Refer to Image Quality P 61 Lighten Darken Contrast Adjusting the Copy Density and Contrast P 63 Are you making copies of glossy printing paper Glossy printing paper easily sticks to the document glass and shadows are sometimes copied and reproduced as dirt Place a transparency or highly transparent film under the document and retry copying The copy has black lines Is the ...

Page 440: ...s of the copy are not shown or the copy is smudged and unclear Replace with paper from a new ream Refer to Loading Paper P 232 Is the loaded paper folded or wrinkled Remove the defective paper and replace with paper from a new ream Refer to Loading Paper P 232 Is the document pasted together or folded in A probable cause is that the pasted or folded in section is curling back and has risen up from...

Page 441: ...m cartridge Refer to Replacing Drum Cartridges A1 A2 A3 and A4 P 413 Black or colored lines are printed The drum cartridge is depleted or damaged Replace with a new drum cartridge Refer to Replacing Drum Cartridges A1 A2 A3 and A4 P 413 Internal components ROS Raster Output Scanners are dirty Clean internal components Refer to Cleaning Internal Components Raster Output Scanners P 419 The scanning ...

Page 442: ...unsuitable Load suitable paper Refer to Loading Paper P 232 The entire paper area is printed black The drum cartridge is depleted or damaged Replace with a new drum cartridge Refer to Replacing Drum Cartridges A1 A2 A3 and A4 P 413 A probable cause is a high voltage power supply malfunction Contact our Customer Support Center Nothing is printed Two or more sheets of paper are being fed simultaneou...

Page 443: ...the paper thoroughly before loading it again Refer to Loading Paper in Tray 5 Bypass P 233 Two or more sheets may be feeding at once Fan the paper well and reset Refer to Loading Paper P 232 Paper becomes wrinkled Text is blurred The paper in use is unsuitable Replace with paper from a new ream Refer to Loading Paper P 232 Paper is being added while it is being fed Is the paper damp White or color...

Page 444: ...Text or images are printed at an angle The paper guide in the paper tray is not set at the correct position Set the horizontal and vertical paper guides to the correct positions Refer to Loading Paper in Trays 1 to 4 P 232 Symptoms Check Remedy ...

Page 445: ...cuments with tags paper clips and cellophane tape cannot be used Refer to Step 1 Loading Documents P 46 Cause The document guides are in the incorrect position Action Set the document guides to correctly match the document size Refer to Step 1 Loading Documents P 46 Cause Part of the document is ripped and a piece of paper remaining in the document feeder Action Open the document feeder cover and ...

Page 446: ... and then retry copying Cause Glossy printing paper is being used Action Glossy printing paper easily sticks to the document glass and shadows are sometimes copied and reproduced as dirt Place a transparency or highly transparent film under the document and retry copying Copy is too dark or too light Cause Copy density is set to Dark or to Light No Action Adjust the copy density Refer to Lighten D...

Page 447: ...r in copies at some enlargement ratios Adjust the copy enlargement ratio Refer to Reduce Enlarge Making Enlarged Reduced Copies P 52 Images on the copy are skewed Cause The document is not loaded correctly No Action Load the document correctly Refer to Step 1 Loading Documents P 46 Cause The document guides are in an incorrect position Action Load the document correctly and align the document guid...

Page 448: ...r the Document P 69 Cause The document is folded or bent Action Straighten and properly reset the document Refer to Step 1 Loading Documents P 46 Unable to take color copies Cause Output Color is set to Black No Action Set Output Color to Auto or Full Color Refer to Output Color Selecting the Color to Copy P 57 A corner of the copy is cut off Cause The document exceeds the printable area No Action...

Page 449: ... The finisher is not attached Action A finisher is needed to perform stapling Attach a finisher or remove stapling from the print options Cause The number of pages to staple exceeds 50 Action A maximum of 50 pages can be stapled Reduce the number of pages to 50 or lower ...

Page 450: ... Offline Action Press the Machine Status button and confirm the Printer Mode in the Machine Status screen If Printer Mode is Offline select Online in the Printer Mode screen Cause An error occurred with the printer Action Check the error details Cause The IP address or SMB network path is misconfigured Action Configure a correct IP address or SMB network path For information about Network Settings...

Page 451: ...etails Cannot print in color Cause In print options the Output Color is set to B W No Action Set Output Color to Auto or Color No stapling done Cause The finisher is not attached No Action A finisher is needed to perform stapling Attach a finisher or remove stapling from the print options Cause The number of pages to staple exceeds 50 Action A maximum of 50 pages can be stapled Reduce the number o...

Page 452: ... is not equipped with an offset feature No Action To output with offset an offset output unit or finisher is needed Printing is slow Cause The print mode specifies Print Quality No Action When printing image data that has image quality as a priority such as pictures the print speed decreases Turn off the quality priority in the print mode The settings specified for print options do not take effect...

Page 453: ... used then transmission will fail When the correct input is used you are able to make phone calls with the On hook feature Cause The line type for the telephone line is not configured correctly Action Match the configured line type with the actual line type Tone 10pps Cause There is an error with the telephone line Action Use a regular phone to test whether you can make phone calls If no calls can...

Page 454: ...on P 344 For information about sending faxes directly from your computer refer to For more information refer to Importing from Mailbox Viewer 2 P 219 P 212 or Sending a Fax P 223 Image quality is not good Cause Is the document feeder glass clean Action Clean the document feeder glass Refer to Cleaning the Film and Document Feeder Glass P 422 Cause The sending density is not appropriate Action Adju...

Page 455: ...red on Turn the power on Cause Paper is not set Action When paper is not set in the machine received documents cannot be printed Cause Paper jam Action View the touch screen and remove the jammed media Cause The System Administration mode is on Action When the machine is in System Administration modes faxes cannot be received Exit the System Administration mode Cause A receive password is configur...

Page 456: ... by the remote machine A 1 page received document is split into multiple pages Cause During scanning on the sender s side for some reason the document was scanned large Action Auto Reduce on Receipt and Border Limit can be combined on the machine for when documents like those described in the items on the left are received Depending on the combination a received document prints in the following wa...

Page 457: ...ar sized documents business cards transparencies or thin documents In addition documents with tags paper clips and cellophane tape cannot be used Refer to Step 1 Loading Documents P 154 Cause The document guides are in the incorrect position Action Set the document guides to correctly match the document size Refer to Step 1 Loading Documents P 154 Cause Part of the document is ripped and a piece o...

Page 458: ...etwork Settings refer to Network Administrator Guide Cause The network connection between the computer and machine is abnormal Action Check with your system administrator Unable to open Mailbox Cause No Mailbox has been created No Action Create a Mailbox Refer to Mailbox P 323 Cause Mailbox password forgotten Action Unable to verify password Set the password to Off and then reset the password agai...

Page 459: ...e location Cause When using SMB is the Shared Name entered correctly Action Check the Shared Name Cause When using SMB UNC Format is the save location entered correctly Action Check the save location Cause Is the login name entered correctly Action Check the login name Cause Is the password entered correctly Action Check the password Unable to send e mail Cause Mail address is incorrect Action Che...

Page 460: ...rinting paper easily sticks to the document glass and shadows are sometimes scanned and reproduced as dirt Place a transparency or highly transparent film under the document and retry scanning Image is too dark or too light Cause Scan density is set to Dark or to Light No Action Adjust the scan density Refer to Lighten Darken Contrast Adjusting Scan Density and Contrast P 175 Cause The Original Ty...

Page 461: ...g Size P 179 Cause The document is folded or bent Action Straighten and properly reset the document Refer to Step 1 Loading Documents P 154 The image is not color Cause Output Color is set to B W or Grayscale No Action Select Full Color at Output Color Refer to Output Color Selecting the Scanning Color P 170 The image is coarse Cause Resolution is too low No Action Set a higher resolution Refer to...

Page 462: ... Important If an error code is displayed all print data of the printer as well as print data stored in the printer s built in memory is discarded Errors are divided into the following Categories C Copy P Print F Fax S Scan M Mail O Others Problems Error Code Category Cause and Remedy C P F S M O 002 770 Cause Unable to process job template due to insufficient hard disk space Remedy Remove unnecess...

Page 463: ...cument pages for each service is exceeded Remedy Have your System Administrator check the Maximum Storable Page Number settings 003 973 Cause The document orientation and specified paper orientation are different Remedy Start the job as is or cancel the job and reconfigure 003 976 Cause The document size exceeds the readable area resulting in an error Remedy Change the document size or send in sec...

Page 464: ... Customer Support Center Trays other than Tray 5 bypass can be used 007 276 Cause Paper Tray 3 high capacity malfunctioned Remedy Contact our Customer Support Center Trays other than Paper Tray 3 high capacity can be used 007 277 Cause Paper Tray 4 high capacity malfunctioned Remedy Contact our Customer Support Center Trays other than Paper Tray 4 high capacity can be used 007 281 Cause Paper Tray...

Page 465: ...upport Center 012 256 012 257 012 260 012 262 012 267 012 281 Cause Finisher Tray malfunctioned Remedy Power cycle the printer If the error persists contact our Customer Support Center 016 450 Cause The SMB host name already exists Remedy Change the host name For information about Network Settings refer to Network Administrator Guide 016 454 Cause Unable to retrieve IP address from DNS Remedy Chec...

Page 466: ...o register a Secure Print document because the HDD kit is not installed Remedy A HDD kit is needed to use the Secure Print feature Refer to Secure Print P 360 016 706 Cause The maximum number of Secure Print users has been exceeded and no space is available on the hard disk Remedy Remove unnecessary documents stored on the printer and delete unnecessary Secure Print users For information about Sec...

Page 467: ...ile directly to the printer which had a PostScript3 kit installed but no HDD kit Remedy For 1 the PostScript3 kit must be installed For 2 the HDD kit must be installed 016 728 Cause An unsupported tag was included in the TIFF file Remedy Check the print data Refer to Scan Options P 177 016 729 Cause Unable to print because the number of colors resolution of the TIFF file exceeds the allowed range ...

Page 468: ...ure Print mode 016 762 Cause A print language not installed on the machine was specified Remedy In Specify Print Mode under Port Settings specify a print language 016 764 Cause Could not connect to the SMTP server Remedy Contact the SMTP server administrator 016 765 Cause Could not send mail as the hard disk on the SMTP server was full Remedy Contact the SMTP server administrator 016 766 Cause An ...

Page 469: ...s interrupted because of insufficient disk space Remedy Remove unnecessary data from the hard disk to increase free disk space 016 779 Cause An error occurred during scanned image conversion processing Remedy Retry scanning 016 780 Cause A hard disk error occurred during scanned image conversion processing Remedy The hard disk might be defective When replacing a hard disk contact our Customer Supp...

Page 470: ... job template save location could not be accessed Remedy Check whether you can access the specified forwarding destination 016 793 Cause The hard disk has run out free space Remedy Either remove unnecessary data from the hard disk to increase free disk space or initialize the hard disk 016 981 Refer to 003 976 016 982 Cause An error occurred due to insufficient hard disk space Remedy Remove unnece...

Page 471: ...ver settings from CWIS are correct 027 501 Cause Unable to resolve POP3 server name when using POP3 protocol Remedy Check that the POP3 server settings from CWIS are correct 027 502 Cause Unable to login to POP3 server when using POP3 protocol Remedy Check that the user name and password used in the POP3 server from CWIS are correct 027 737 Cause An error occurred while reading data from the job t...

Page 472: ...ministrator check the port status 027 796 Cause When the machine is configured to only print attached documents when received by mail a message with no attachments is discarded upon receipt Remedy To print the mail body or header information as well change settings in the CentreWare Internet Services Properties screen Refer to E mail Print P 216 027 797 Cause Invalid received mail output destinati...

Page 473: ... Transmission can not be made because the telephone number is not correct Remedy Check the phone number and transmit again Customers who use G3 DP Dial Pulse should check if the dialed number contains or 034 790 034 792 034 793 034 794 034 795 Refer to 034 501 034 796 Refer to 034 728 035 701 Refer to 034 728 035 702 Cause The other party terminated the transmission There is nothing wrong with the...

Page 474: ...fax network enter two pauses after 161 and 162 then dial the telephone number 035 749 Cause The other party was redialed the set number of times but did not answer Remedy Check with the other party if the telephone line of the remote machine is disconnected or the exchange is defective 036 507 Refer to 035 702 036 786 036 787 Refer to 034 507 062 211 Cause An error occurred in the document feeder ...

Page 475: ...ata from the hard disk to increase free disk space 116 740 Cause Numerical value operation error occurred as a value exceeding the value limit of the printer was used in the print data Remedy Check the print data 116 747 Cause There are too many paper margin values for the HP GL 2 optional effective coordinate area Remedy Reduce the paper margin values and instruct it to print again 116 748 Cause ...

Page 476: ...hine Ensure that the screen disappears before switching it on xxx yyy Cause An error occurred Remedy Turn off the power wait until the touch screen goes dark and then turn on power again If the message persists record the displayed contents for xxx yyy Switch off the machine immediately wait for the touch screen to go dark and contact our Customer Support Center A fault has occurred The machine ha...

Page 477: ...e paper jam occurred This section describes how to clear paper jams that occur at the following locations The references are described below Paper Jams in Top Left Cover 476 Paper Jams in Middle Left Cover 477 Paper Jams in Lower Left Cover 478 Paper Jams in Trays 1 to 4 479 Paper Jams in High Capacity Tray 479 Paper Jams in Tray 5 Bypass 481 Paper Jams in the Duplex Module 481 Paper Jams in the F...

Page 478: ...or damage the transfer belt necessitating belt replacement 1 Gently open the top left cover while lifting up the release lever Side Output Tray Optional Attached Remove the paper from the side output tray before opening the left upper cover If delivered sheets are left on the tray it will become heavy when the top left cover is returned to its original position 2 If the edge of the jammed paper ca...

Page 479: ... to gently close the cover and lift up Tray 5 bypass Paper Jams in Middle Left Cover The following describes how to clear paper jams that occur at the middle left cover of the body 1 Gently open the left center cover while pulling the release lever 2 Remove the jammed paper Note Paper can become jammed in hard to find upper regions Look carefully for jams If paper is torn check for any torn pieces...

Page 480: ... describes how to clear paper jams that occur at the lower left cover of the body 1 Gently open the lower left cover while pulling the release lever 2 Remove the jammed paper Note If paper is torn check for any torn pieces of paper inside the machine 3 Gently close the bottom left cover ...

Page 481: ...ine malfunction Check where the paper jam occurred before remedying the problem 2 Remove the jammed paper Note If paper is torn check for any torn pieces of paper inside the machine 3 Push the tray in gently until it comes to a stop Paper Jams in High Capacity Tray This describes how to clear paper jams in the high capacity tray when using the Document Centre C450 Tandem Tray model Paper Jams in T...

Page 482: ...t Tray 4 high capacity Important Paper is sometimes torn and remains inside the machine if you draw out a tray without checking the paper jam position This may cause machine malfunction Check where the paper jam occurred before remedying the problem 2 Remove the jammed paper Note If paper is torn check for any torn pieces of paper inside the machine 3 If paper is jammed in the paper feed section o...

Page 483: ...all of the sheets from the tray Note If paper is torn check for any torn pieces of paper inside the machine 2 Fan the paper you removed making sure that all four corners are neatly aligned 3 Insert the paper into the tray with the printing side facing down until its leading edge lightly comes up against the paper feed entrance Paper Jams in the Duplex Module This describes how to clear paper jams ...

Page 484: ...3 Close the duplex module cover and lift up Tray 5 bypass Paper Jams in the Finisher The following describes how to clear paper jams that occur inside the light finisher when the light finisher optional is installed Paper Jams on the Light Finisher Top Cover 1 Press the button on the light finisher top cover 2 The light finisher top cover opens ...

Page 485: ...orn pieces of paper inside the machine 4 Close the light finisher top cover Finisher Connector Paper Jams 1 Move the light finisher to the right 2 Open the top cover on the light finisher interface 3 Remove the jammed paper Note If paper is torn check for any torn pieces of paper inside the machine ...

Page 486: ...he light finisher to the main body Paper Jams on the Center Output Tray Exit 1 Move the light finisher to the right 2 Remove the jammed paper Note If paper is torn check for any torn pieces of paper inside the machine 3 If the jammed paper is hidden from view open the exit cover and check inside ...

Page 487: ...Paper Jams 485 Problem Solving 16 4 Return the light finisher to the main body ...

Page 488: ...ters a fixed position Open the cover gently 2 If the document is not caught in the input section you can remove it 3 If there are instructions to turn the wheel turn the green wheel to eject the document upward Important If the document is stuck do not pull on it directly The document could be damaged 4 If there are instructions to open the inner cover lift up the lever with the green seal on it a...

Page 489: ...ke sure that the document is not torn wrinkled or folded and load the document again following the instructions displayed on the touch screen Note After removing the jammed document load the entire document again including delivered document sheets Already scanned document sheets will automatically be skipped and scanning will resume from the unscanned document sheet Torn wrinkled or folded docume...

Page 490: ... when staples are bent Contact our Customer Support Center if the problem persists after you have tried the following solutions If staples are stapled on the copies in the manner shown in the figures below contact our Customer Support Center Unstapled Bent staple One side of staple rising up Staple bent in reverse direction Flattened staple Entire staple rising up Staple rising up with center pres...

Page 491: ... 2 Hold the staple cartridge by its lever as shown in the figure on the right and draw out the staple cartridge to the right towards you 3 Lift up to remove the staple cartridge 4 After removing the staple cartridge check the inside of the finisher for any remaining staples 5 Pull up the lever on the front of the staple cartridge ...

Page 492: ...f the staple cartridge until you hear it click into place 8 Lower the lever to return the staple cartridge to its original position until you hear it click into place 9 Close the light finisher s front cover Note A message will be displayed and the machine will not operate if the staple finisher s front cover is even slightly open If the staples cannot be removed after carrying out the above proce...

Page 493: ...ains descriptions about the following z Specifications 492 z Printable Area 501 z Using PDF Direct Print 502 z PCL Emulation 504 z List of Options 521 z Cautions and Limitations 522 z Using the Telephone 526 z Simple Procedures 529 ...

Page 494: ...size is 297 432 mm A3 11 17 inch for both sheets and books Copy sheet size Paper Tray 4 Maximum A3 297 432 mm or 11 17 inch 279 432 mm Minimum A5 148 210 mm bypass tray Maximum 12 6 17 7 inch 320 449 6 mm or 12 18 inch 304 8 x 457 2 mm Maximum postcard 100 148mm or envelope 120 235 mm Non standard size X direction horizontal 100 to 483 mm Y direction vertical 100 to 305 mm When copying both sides ...

Page 495: ... using the Auto document feeder For A4 monochrome priority mode The default for the Color Mode is Black or No Default Monochrome 6 7 seconds Color 10 3 seconds For A4 color priority mode The default for the Output Color is Full Color Auto Dual Colors or Single Color Monochrome 8 8 seconds Color 8 1 seconds Same magnification from the paper Tray 1 single sided and output to the center output tray C...

Page 496: ...4 27 pages minute 21 pages minute B4 22 pages minute 17 pages minute A3 21 pages minute 17 pages minute Paper Tray 5 Continuous double sided copy same magnification Monochrome Color B5 A4 34 pages minute 26 pages minute B5 A4 19 pages minute 15 pages minute B4 17 pages minute 13 pages minute A3 17 pages minute 13 pages minute When feeding from paper Tray 5 bypass try and the paper size is set to A...

Page 497: ...nuous double sided copy same magnification Monochrome Color B5 A4 19 pages minute 15 pages minute B5 A4 17 pages minute 13 pages minute B4 15 pages minute 12 pages minute A3 15 pages minute 12 pages minute When feeding from paper Tray 5 bypass try and the paper size is set to Auto Size Detect the printing speed for the first page will be slower Feeding method paper capacity 4 Tray model 560 pages ...

Page 498: ...ng on the paper type When printing papers narrower than B5 such as postcards continuously the temperature of part of the fuser unit where the paper is not passing will rise and a message Please wait may be displayed while the printing is paused The printing will resume after 1 2 minutes Also for the paper size less than A4 only 1 page output may cause the message Please wait be displayed and print...

Page 499: ...colors 8 bits output Document scanning speed Monochrome 50 pages minute Scanning into mailbox for ITU T No 1 chart A4 200dpi Color 35 pages minute Scanning into mailbox for ITU T Xerox standard document A4 200dpi Important Scanning speed varies by the document Interface Ethernet 10Base T 100Base TX Scan to mailbox Supported protocols TCP IP Salutation HTTP Output format Monochrome 2 colors TIFF Gr...

Page 500: ...ansmission time 2 3 seconds 1 Communications mode ITU T G3 Scanning density Standard 8 x 3 85 lines mm 200 100 dpi 7 9 3 9 dots mm High image quality 8 7 70 lines mm 200 200 dpi 7 9 7 9 dots mm Ultra high image quality 16 15 4 lines mm Ultra high image quality 400 dpi 400 400 dpi 15 7 15 7 dots mm Ultra high image quality 600 dpi 600 600 dpi 23 6 23 6 dots mm Encoding method MH MR MMR JBIG Communi...

Page 501: ...nute A4 1 sided Document Centre C250 Monochrome 25 sheets minute A4 1 sided Color 21 sheets minute A4 1 sided Power supply Supplied from main unit Dimensions Width 560 Depth 510 Height 120 mm Weight 12 kg Tray type Finisher tray x 1 soft offset available stack offset available Paper size supported papers Maximum A3 minimum B5 64 128 g m2 Output tray capacity A4 1 000 pages B4 or larger 500 pages m...

Page 502: ...When using Xerox P paper Ejection method Face up Dimensions occupied Width 1 021 Depth 780 mm Paper sizes for auto 2 sided output A5 A4 A4 A3 B5 B5 B4 8 5 11 8 5 11 8 5 13 8 5 14 11 17 Paper loaded in paper trays 1 4 can be used for automatic 2 sided copying Paper weight 64 105 g m2 ...

Page 503: ...f 302 476 6 mm Depending on the paper size however the unprintable area is different Note To extend the print area change the PCL print driver or the Print Area setting on the touch screen For information on how to make print driver settings refer to the online help for the print driver For more about the setting on the control panel refer to Print Area P 293 When the paper width is less than 12 i...

Page 504: ...mber of copies output z Paper size z Duplex printing z Color mode z Printing mode z Print processing mode z Sorting z Password z Layout Setting item Item number Setting values Number of copies output 401 Sets the number of copies to be printed 1 999 default 1 1 999 copies Duplex 402 Selects duplex printing 0 default No 1 Flip on Long Edge 2 Flip on Short Edge Flip on Long Edge means duplex printin...

Page 505: ...n Four up is selected the paper size is fixed at A4 Paper size 406 Sets the paper size for printing 0 Auto 1 default A4 The Auto setting automatically determines the paper size according to the original size of the PDF file to be printed and settings Color mode 407 Selects color printing or black and white printing 0 default Auto 1 Black and white The Auto setting automatically determines for each...

Page 506: ...A4 5 A5 14 B4 15 B5 21 8 5 14 22 8 5 13 23 Default 8 5 11 24 11 17 30 8K Sets the default paper size when the machine is set to select the paper size automatically Only available when Paper Tray is set to Auto The default value will be either 4 or 23 depending on the region of use Bypass Size 203 3 A3 4 Default A4 5 A5 14 B4 15 B5 21 8 5 14 22 8 5 13 23 Default 8 5 11 24 11 17 Sets the paper size ...

Page 507: ...ierPS Bold Oblique 58 SymbolPS 59 Palatino Roman 60 Palatino Italic 61 Palatino Bold 62 Palatino Bold Italic 63 ITC Bookman Light 64 ITC Bookman Light Italic 65 ITC Bookman Demi 66 ITC Bookman Demi Italic 67 Helvetica Narrow 68 Helvetica Narrow Oblique 69 Helvetica Narrow Bold 70 Helvetica Narrow Bold Oblique 71 New Century Schoolbook Roman 72 New Century Schoolbook Italic 73 New Century Schoolboo...

Page 508: ...Specify the number of print sets Image Enhance 213 0 Off 1 Default On Sets whether to enable the enhanced image mode Hex Dump 214 0 Default Off 1 On Sets whether to enable a hex dump Draft Mode 215 0 Default Off 1 On Sets whether to enable the draft mode Color Mode 216 0 Default Color 1 Monochrome Sets the color mode Binding 217 0 Default LEF 1 SEF Specifies which edge of paper is to be bound Line...

Page 509: ...ument size created by a PC client When Auto 99 is specified the document size is determined based on the Scaling Mode setting the item number 160 Paper Size 102 99 Auto 101 Default A Size 3 A3 4 A4 5 A5 14 B4 15 B5 Sets the paper size to be printed This can be set if the paper tray setting is either Auto or Tray 5 Manual Feed In addition settings can only be made for cut paper When Auto 99 is spec...

Page 510: ... Tray 1 Side Output Tray 80 Finisher Tray Sets the output tray Two Sided Printing 110 0 Default None 1 Head to head 2 Head to toe Sets the two sided printing None Prints one side Head to Head Place the paper as in the Paper Orientation and it prints both sides so that the orientation of the up sides are aligned for each page when the left side is closed Head to Toe Place the paper as in the Paper ...

Page 511: ...ea for A4 A3 letter and ledger are the same as for the Hewlett Packard HP7550A Hard clip area for other paper sizes is the same as this M C printable area Paper Make the hard clip area the same area as the paper Eject Command 152 SP 153 SPO 154 NR 155 FR 156 PG 157 AF 158 AH 0 Default OFF 1 ON Sets the command that indicates a drawing is finished When the command specified here is received drawing...

Page 512: ...sets the method for obtaining the active coordinate area Auto Determines any of the methods listed below PS IW IP or Adapted PS Area specified by the first PS command is to be a rectangular area IW Area specified by the very last IW command is to be a rectangular area IP Area which combines all the IP Commands is to be a rectangular area Adapted The maximum minimum coordinates within the areas and...

Page 513: ...area The Hard Clip Area can be set either via HP GL Emulation Mode settings or by the specified hard clip command 1 The following coordinate values present an example of when the origin is set at the lower left Auto Layout in HP GL 2 of A3 sheet Manual Feed Tray Check Indicator 165 0 None 1 Default Yes Pen Width No 0 No 15 800 815 0 255 Default 3 0 25 5 mm Sets the width of the pen thickness of th...

Page 514: ...idth Height Bottom left X Bottom Left Y Long Side Short Side Top right X Top right Y XR YU A3 119052 84168 1260 1260 116532 81648 117792 82908 1260 1260 A4 84168 59508 1260 1260 81648 56988 82908 58248 1260 1260 A5 59508 41940 1260 1260 56988 39420 58248 40680 1260 1260 B4 103176 72828 1260 1260 100656 70308 101916 71568 1260 1260 B5 72828 51588 1260 1260 70308 49068 71568 71568 1260 1260 16798 11...

Page 515: ...60 1260 81648 116532 82908 117792 1260 1260 A4 59508 84168 1260 1260 56988 81648 58248 82908 1260 1260 A5 41940 59508 1260 1260 39420 56988 40680 58248 1260 1260 B4 72828 103176 1260 1260 70308 100656 71568 101916 1260 1260 B5 51588 72828 1260 1260 49068 70308 50328 71568 1260 1260 Width Short side YU Long side Bottom left X Bottom left Y 0 0 XR Height Actual Paper Printable Area Top right X Top r...

Page 516: ...ling to ON The default value is ON z Select a method for obtaining the active coordinate area using the area determining mode The default value is AUTO z Set the paper margin using Paper Margin The default value is 0 mm z Set the Scaling Mode The default value is Paper Size 3 Details on Setting Items Details on each item are as follows Document Size Press the mode button and select AUTO under docu...

Page 517: ...he areas specified by PS commands in the data becomes the active coordinate area If there are no PS commands in the data the active coordinate area is determined by Adapted Paper Margin Set the range from 0 to 99mm The default value is 0mm To get the active coordinate area subtract the area set in paper margins from the ACA obtained in the area determination mode Scaling Mode Select the mode for d...

Page 518: ...nate area to be active from the HP GL data entered in accord with the area determination mode 2 As a margin add the larger value of either the font size specified in the page the default size or one half the specified pen width to the ACA obtained in 1 3 Subtract the value set in paper margins from the ACA obtained in 2 4 The ACA obtained in the process up to 3 will be the document size Ex If the ...

Page 519: ...to load A sized paper If the Paper Size Setting is Auto The possibilities for paper size are those that are actually loaded in the trays from among the 5 sizes A3 B4 A4 B5 and A5 If A3 B4 A4 B5 or A5 paper is not loaded in the trays all of the sizes become possible sizes a message is displayed on the operation panel prompting the user to load paper If the Scaling Mode Setting is Paper Size If the ...

Page 520: ...in position is bottom left or center the origin of the document and the paper are aligned and drawn If the Document Size is Auto and the Scaling Mode is ACA The hard clip setting is inactive The hard clip area is always the advanced hard clip area The scaling factor is determined according to the ACA and the paper size The range for the ACA for each paper size is as follows Unit Plotter Unit The m...

Page 521: ...ppens change the Auto Layout memory capacity on the operation panel However the Auto Layout memory capacity max is 5120kbyte So print data larger than 5120kbyte cannot be received When using the Auto Layout function we recommend the printer be equipped with a hard disk 8 Examples of Combinations of Each Function Below are examples showing the print results that can be achieved by combining various...

Page 522: ...ing Mode Active Coordinate Area Scaling ON Document Auto Coordinate Origin 0 Degrees Scaling Mode Active Coordinate Area Scaling OFF Print Area Active Coordinate Area determined by entered data Paper Size Print Area Active Coordinate Area determined by entered data Paper Size ...

Page 523: ...t provides extended copy features the printer spooling feature and scanner features 128 MB Memory This extends the page memory by 128 MB 512 MB Memory This extends the system memory by 512 MB USB 2 0 port kit This allows USB 2 0 to be used Annotation copy kit This allows copies to be made with stamps and page numbers added Electronic pre collation kit This kit allows copies to be output already co...

Page 524: ... sided printing when duplex was specified z Jobs are canceled if a page cannot be rendered in the print page buffer the job including that page is canceled Options z To use the sorting electronic collation feature secure print and print guarantee features requires the optional HDD kit z To use the machine as a PostScript printer requires the optional PostScript3 kit to be installed Installing and ...

Page 525: ...tions screen when iFax Profile is set to TIFF S even if you specify a size large than A4 the original is reduced to A4 size for transmission For information about iFax profiles refer to iFax Profile Specifying iFax Profiles P 134 iFax Profiles z When specifying iFax profiles The iFax profiles that can be handled vary depending on the recipient When specifying an iFax profile check that the iFax pr...

Page 526: ...ng on the system environment mail server restrictions and so on it may not be possible to send or receive large volume e mails When setting the number of pages for splitting mails to send check the system environment at both sending and receiving ends If even splitting a mail to be sent into single pages results in excessive volume for the transmission reduce the transmission quality or change the...

Page 527: ...tes on Receiving Mail Depending on the data in a received iFax document it is possible for there to be insufficient memory or for printing not to be possible In this case either add more memory or ask the sender to resend with a lower resolution ...

Page 528: ...telephone To place a call press the Power Saver button to switch out of power saver mode 2 Select On hook Manual Send Receive in the On hook Others screen 3 Select Manual Receive 4 Select Alphanumeric or Symbol For information about the manual send feature refer to On hook Confirming Remote Machine Response Prior to Transmission P 139 5 Dial the number Important You can use the numeric keypad Addr...

Page 529: ...ion mode For information about how to change it refer to Line Monitor Volume P 257 The factory default setting is Medium 1 In the Menu screen select Fax Internet FAX 2 Select On hook Manual Send Receive in the On hook Others screen 3 Select Manual Send Note For information about the manual send feature refer to On hook Confirming Remote Machine Response Prior to Transmission P 139 4 Select Alphanu...

Page 530: ...x 17 6 Once the connection is made you can carry out the telephone call 7 At the end of the telephone call replace the telephone Important Be sure to replace the telephone properly Otherwise the line remain in the busy state ...

Page 531: ...J Fax Mode Settings J Fax Defaults J Send Header J Off For more information refer to Send Header P 303 Changing the Dialing Method Tone Dialing Circuit Pulse Dialing Circuit Log In Out J UserID input J System Settings J System Settings J J Fax Mode Settings J Local Terminal Information J G3 Dial Type For more information refer to G3 Dial Type P 310 Changing the Circuit Type External Internal Line ...

Page 532: ... System Settings J System Settings J J Fax Mode Settings J Fax Control J Receiving Paper Size For more information refer to Receiving Paper Size P 306 Changing the Volume When Receiving Log In Out J UserID input J System Settings J System Settings J J Common Settings J Audio Tones J Ringing Volume For more information refer to Ringing Volume P 257 Changing the Number of Phone Rings Log In Out J Us...

Page 533: ...UserID input J System Settings J J System Administrator Settings J System Administrator Login ID The default setting is 11111 For more information refer to UserID P 345 Changing the time for Switching to Power Saving Mode Log In Out J UserID input J System Settings J System Settings J J Common Settings J Machine Clock Times J Auto Power Saver For more information refer to Auto Power Saver P 255 Ch...

Page 534: ...58 Changing the Functions Assigned to the Custom Buttons Log In Out J UserID input J System Settings J System Settings J J Common Settings J Screen Defaults J Custom Button 1 Custom Button 3 For more information refer to Custom Buttons 1 to 3 P 259 Checking That a Job Has Completed Job status J Completed Jobs For more information refer to Checking Completed Jobs P 358 Displaying Only Particular Jo...

Page 535: ...18 Glossary This chapter describes the glossary provided by the machine z Glossary 534 ...

Page 536: ...This is mm paper Border Erase Erases the top bottom left right or center of the document image before copying Border Limit Page split threshold value One more sheet is used when the length of the transmitted document exceeds the length of paper installed on the receiving terminal A margin at the bottom of a received document can be eliminated so that the data can be printed on one page The amount ...

Page 537: ...ts printed in one inch Primary unit used to describe resolution ECM Error Correction Mode A type of G3 transmission ECM transmission sends the document image data in segments and retransmits segments that the remote machine receives incorrectly ECM described on the Activity Report shows that the communication was processed using ECM Emulation This refers to operating the printer to achieve the sam...

Page 538: ...used Insert This refers to white colored or copy paper inserted between each copy as it is output Internet A worldwide communications network that combine miscellaneous networks Internet fax iFax Unlike a regular fax machine Internet Fax uses corporate networks or the Internet to send or receive mail TIFF attachments Job Offset This feature outputs the pages in alternating offsets to make page gro...

Page 539: ... profile is determined to restrict the attribute information for transmissions via Internet fax iFax such as image resolution and paper size Depending on the iFax features of the recipient the profiles that can be processed vary Confirm the profile that can be processed by the recipient s iFax installed machine before specifying the profile RAM Random Access Memory RAM is a storage device memory t...

Page 540: ...ple Mail Transfer Protocol A communications protocol an agreement governing the way data is transmitted commonly used for sending and receiving mail Start Reservation Refers to setting a document configuring a feature and pressing the Start button immediately after power is turned on Once the device status is ready copy begins automatically Status Display Code Code indicating the device status Whe...

Page 541: ...stem settings 258 All Services button 43 Annotation 83 Annotation Date Position system settings 280 Annotation Page Number Position system settings 281 Annotation Page Number Style system settings 280 Annotation Stamp Color system settings 280 Annotation Stamp Density system settings 283 Annotation Stamp Position system settings 280 Annotation Stamp Size system settings 283 Applicable telephone ci...

Page 542: ... 297 Border Erase Left Right system settings 280 298 306 Border Erase Top Bottom system settings 279 297 306 Border Limit system settings 305 bottom left cover 31 Bound Originals 67 121 178 Box Selector List 379 brightness dial 42 Broadcast 140 Broadcast Multi Poll Report system settings 267 Broadcast Communication Mode system settings 311 Broadcast iFax Profile system settings 311 Broadcast Repor...

Page 543: ...em settings 277 Copy Density 60 copying facing pages onto separate sheets 67 copying multiple documents onto one sheet 81 copying to non standard size paper see Paper Supply 55 Copy Job Complete Tone system settings 256 Copy Mode Settings 377 Copy Mode Settings system settings 275 Copy Output system settings 280 Copy Output Stapling 76 Copy Position Margin Shift 71 Cover Note 127 Cover Note system...

Page 544: ...il iFax Settings system settings 314 E mail Address system settings 335 E mail Defaults system settings 314 E mail print 216 E mail Receive Protocol system settings 289 Encoding method 498 Energy Saver see Power Saver Mode 39 enlarged copies 52 entering numbers using Address Number 115 entering specific symbols 116 entering text 252 erasing edges and margin shadows in the document 71 180 erasing t...

Page 545: ...alette List 378 HP GL 2 Settings List 378 HP GL 2 Stored Programming List 378 HTTP SSL TLS communications system settings 289 HTTP SSL TLS communications port number system settings 289 I iFax Fax 113 iFax Comment 128 iFax Control system settings 311 iFax Profile system settings 304 339 iFax profiles 134 iFax to E mail system settings 321 iFax to iFax system settings 321 if you have more documents...

Page 546: ...Login Setup Auditron Administration system settings 344 351 Low Power mode 39 Low Toner Alert Tone system settings 257 M Machine Clock Timers system settings 253 Machine Configuration 369 Machine E mail Address Host Name system settings 287 Machine Information 369 Machine Password system settings 310 Machine Ready Tone system settings 256 Machine Status 369 Machine Status button 42 machine trouble...

Page 547: ...e Synchronization system settings 254 Number of originals held 499 numeric keypad 43 O Object Class of Search Target system settings 317 Odd Page 2 Sided system settings 270 off hook dialing 526 Offset Stacking system settings 269 one touch button panels 43 one touch buttons 43 115 On hook 139 on hook dialing 527 Online indicator 42 OP TEL 34 operation of Up Down Buttons system settings 273 Origin...

Page 548: ...ve Command Control system settings 350 PKI Public Key Settings system settings 289 Polling 136 poor image quality see Image Quality 61 120 437 POP3 Server Settings system settings 287 Port Number system settings 340 Port Settings system settings 286 Poster 82 PostScript Default Color system settings 294 PostScript Font Absence system settings 294 PostScript Fonts List 378 PostScript Font Substitut...

Page 549: ...ings 305 Reduce Enlarge 181 Reduce Enlarge system settings 277 Reduce Enlarge 2nd Button system settings 296 Reduce Enlarge 3rd and 4th Buttons system settings 277 Reduce Enlarge Presets system settings 284 299 308 reduced copies 52 Reducing 8 5x11 Originals to A4 system settings 306 Relay Broadcast system settings 337 Relay Broadcast Report 383 Relay Broadcast Report system settings 267 Remote Ac...

Page 550: ... faxes to multiple recipients 113 sending fax from your computer see Direct Fax 223 sending iFax 108 sending in sections 183 Send Options 124 Send overseas fax see F4800 125 serial number 369 Server 169 Server Application system settings 317 Server IP Address system settings 288 Server Name IP address system settings 340 Server Port Number system settings 288 Server Realm name system settings 288 ...

Page 551: ...ng for Polling 137 Substitute Tray system settings 293 Supported operating systems 498 Supported protocols 499 suppressing the document background 176 System Administration mode 240 System Administrator Copy Meter system settings 348 System Administrator Login ID system settings 342 System Administrator Password system settings 343 System Administrator Settings system settings 342 System Administr...

Page 552: ...es during copying 443 troubles during fax 451 troubles during printing 448 troubles during scanning 455 troubleshooting 429 troubles with receiving 453 troubles with transmission 451 Type 492 types of authentication 388 types of job allowing auditron to be collected 402 types of mailboxes 394 U unable to print 448 unauthenticated users 388 unlock lever 31 Unregistered Forms system settings 293 USB...

Page 553: ...ation Address About the Guide Other comments After completing this form detach and send it to the address below Please use your own envelope and postage stamp Thank you for your cooperation Fuji Xerox Co Ltd KSP R D 2D7 3 2 1 Sakado Takatsu ku Kawasaki shi Kanagawa ken JAPAN 213 0012 Strongly agree Neutral Strongly disagree 1 It is handy 1 2 3 4 5 2 It is easy to read 1 2 3 4 5 3 Titles of chapter...

Page 554: ......

Page 555: ...Document Centre C450 C360 C250 User Guide Human Interface Design Development Fuji Xerox Co Ltd DE3253E2 1 Edition 1 July 2004 Copyright 2004 by Fuji Xerox Co Ltd ...

Page 556: ......

Reviews: