Send Options
127
Fax
4
Send Header (Adding Your Name and Phone Number to Faxes)
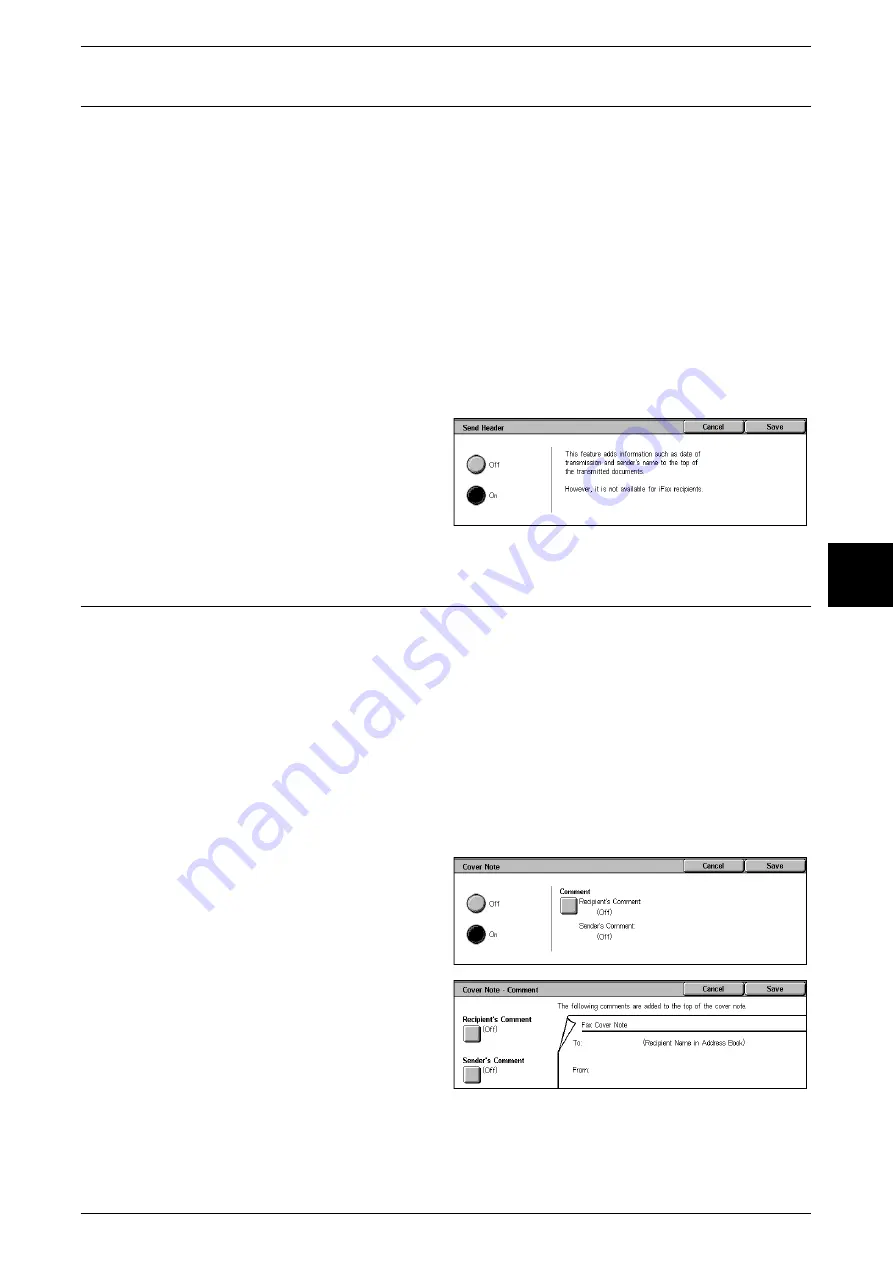
The Send Header feature adds the transmission start time, sender name, recipient
name, G3 ID, and number of pages to the transmitted document.
This enables the recipient to confirm when and from whom the fax was sent.
Important •
The Send Header is printed at the top of the document, so an area of about three to five
millimeter may not be printed at the top of each page at the remote machine.
Note
•
If the document is resent, "Resend" is printed at the left of the date and time indication.
•
If this feature is set to On for Broadcast, the Send Header is attached for all recipients.
•
The transmission start time is printed in the format set on the machine (12 or 24 hour clock).
For information about setting the time, refer to "Time" (P.254).
•
For information about the sender name and G3 ID, refer to "Local Terminal Information"
(P.309).
•
The recipient name is only added if it has not been registered for the Address Number.
•
The Send Header default value can be changed in the System Administration mode. For
information about how to change the default value, refer to "Send Header" (P.303).
1
Select [Send Header] on the [Send
Options] screen.
2
Select [On].
Cover Note (Transmitting Documents With a Cover Page)
Cover Note is a feature for attaching a cover page to the document.
It includes the recipient name, comment, sender name, machine fax number, number
of pages, date and time, and note.
Note
•
Cover Note can be individually set for each Address Number. For information about how to
register Address Numbers, refer to "Address Book" (P.334).
•
When Send Header is set to On, the Send Header is not printed on the Cover Note.
•
You cannot use the Cover Note feature if you specify Broadcast using the numeric keypad. If
necessary, register the Cover Note to the Address Number.
•
The size and resolution of the Cover Note is based on the first page of the document.
•
Comments must be entered beforehand. For information about how to register comments,
refer to "Comments" (P.341).
1
Select [Cover Note] on the [Send
Options] screen.
2
Select [On].
3
Select [Comment].
4
Select [Recipient’s Comment] to
add a recipient comment to the
cover note and select [Sender's
Comment] to add a sender
comment to the cover note.
5
Select [On].
6
Select a comment from [Comment].
Summary of Contents for Document Centre C250
Page 1: ...Document Centre C450 C360 C250 User Guide ...
Page 14: ......
Page 98: ......
Page 198: ......
Page 204: ......
Page 210: ......
Page 356: ......
Page 388: ......
Page 408: ......
Page 430: ......
Page 487: ...Paper Jams 485 Problem Solving 16 4 Return the light finisher to the main body ...
Page 535: ...18 Glossary This chapter describes the glossary provided by the machine z Glossary 534 ...
Page 554: ......
Page 556: ......


