User Administration and Levels of Access
6.2 User Groups Screen
6
6-5
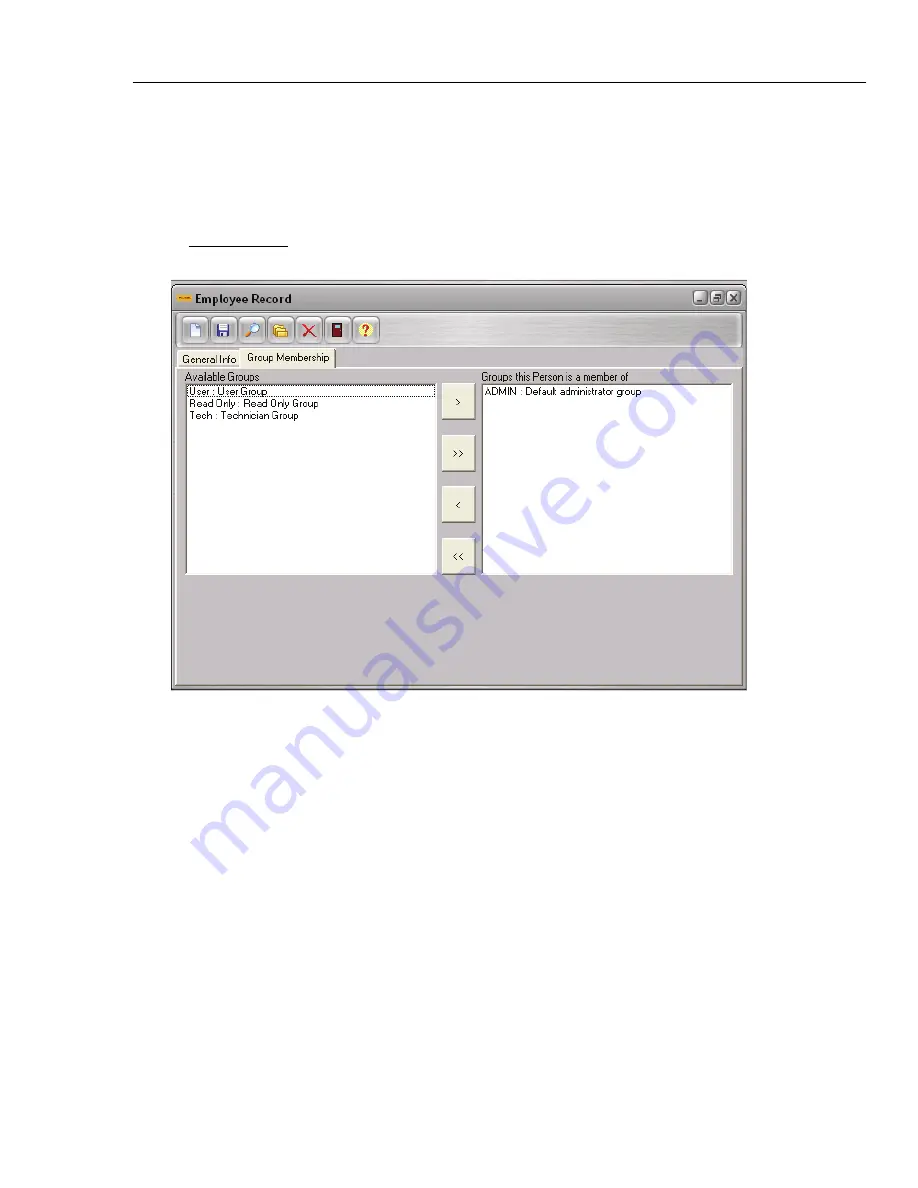
6.1.2 Group Membership Tab
This tab (shown in Figure 6.2) is used to assign the employee to one or more user groups
that have already been established. You may move groups back and forth between the
two boxes by using the center arrow buttons. All of the groups that currently exist in the
system will be listed by their group ID and description in the
Available Groups
box. You
may assign the employee to a group, by highlighting the desired group(s) and clicking the
Move Selected button. This will move the selected group(s) to the
Groups This Person Is
A Member Of
box, creating the assignment.
Figure 6.2
6.1.3 Force Log Off User
There may be instances when you will need to force another user’s ID off the system.
This can be accomplished by performing the following actions. (Keep in mind however,
that you may only log off another user if you are in the ADMIN Group.)
While in the Home Screen, select “Employee Records” from
File
menu. Once you are in
the EMPLOYEE RECORD screen, open the record of the employee whose ID needs to
be logged off and select “Force Log Off User” from the
File
menu. A message will
appear on the screen confirming that the user has been successfully logged off the
system.
6.2 User Groups Screen
Access to DPCTrack2 is controlled via User Groups which individuals are assigned to.
The USER GROUPS screen may be accessed by selecting “Group Record” from the
File
menu while the Home Screen is open.
6.2.1 Group Type
User groups must be one of two types- “User Access” or “Technician”. If you are
viewing the
Technician
Group, the
Access Levels
and
Reminder Options
tabs disappear
from the screen, thus limiting you to only selecting members for the group. Assigning an
employee to a “Technician” group does not give them any access to DPCTrack2. It
Shop for Fluke products online at:
1.877.766.5412
www.
MyFlukeStore
.com


