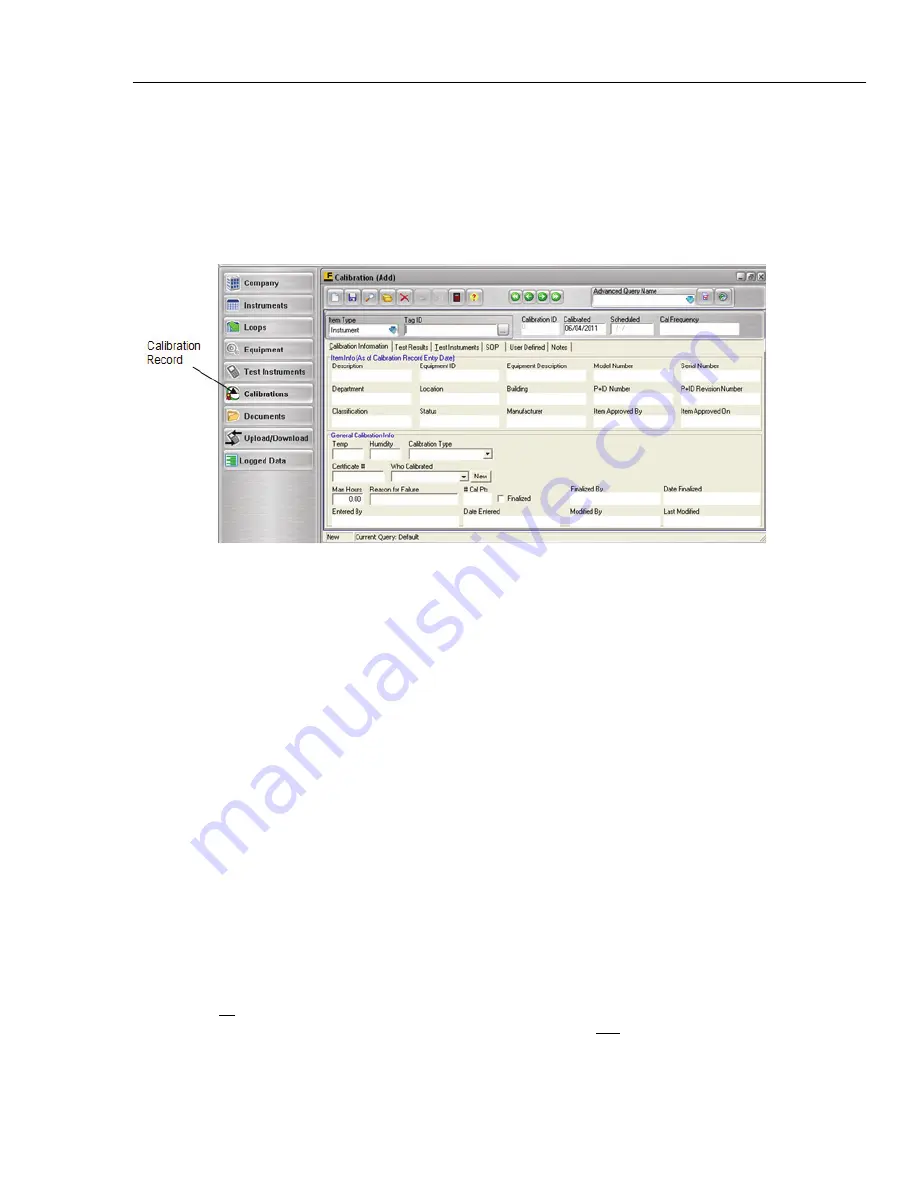
Calibration Screen
19.1 Calibration Records
19
19-3
19.1 Calibration Records
This screen is used to add, display, modify and if necessary, delete the results of an
Instrument, Loop, Test Instrument or System calibration. Once you have entered Master
Instrument, Loop and Test Instrument records, you may create calibration records based
upon the data you already established in the database. The CALIBRATION screen is
accessed by clicking the speed button labeled
“Calibrations”
on the Record Toolbar.
Figure 19.1
Note
It is not necessary to fill in all empty fields. However, you must enter an
Item ID, the Calibration Date, and either select “Pass”, “Fail” or
“Incomplete” to save a new record.
19.2 Tabbed Notebook Section
The tabbed notebook section of the CALIBRATION screen contains six (6) different sub-
screens or “pages” available for data entry. These pages are logically grouped on the tabs
of the notebook. To open a tab page, click it with your mouse. Each page and its
associated fields are described below.
19.2.1 Header Fields
These fields will always appear at the top of the page no matter what tabbed page you are
on
19.2.1.1 Item Type
When adding a new record you must first select the
Item Type
from the drop down list
(Instrument, Loop or Test Instrument)
19.2.1.2 Item ID
There are two ways to enter an ID. If you know the ID you may type it in. (quick type
does not function in this field) If you are not sure of the item’s ID number, you may click
the (…) button next to the
ID
field. This will invoke a master list of all items of the
selected type. Selecting an item from the list and clicking the OK button will insert that
ID into the field.
Shop for Fluke products online at:
1.877.766.5412
www.
MyFlukeStore
.com


