background image


72


2.4. 
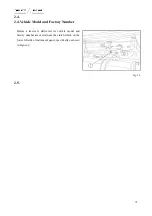
2.4.Vehicle Model and Factory Number 

Before  a  tractor  is  delivered,  its  vehicle  model  and 

factory number are carved near the clutch which on the 

lower left side of instrument panel, specifically as shown 

in Figure

.


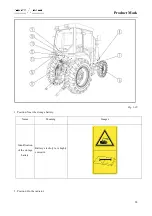
Fig. 2-6


2.5. 


Summary of Contents for FL35-70HP Series

Page 1: ...P Series Wheeled Tractors Operation Manual FL354 FL354C FL400 FL400C FL404 FL404C FL450 FL450C FL454 FL454C FL500 FL500C FL504 FL504C FL554 FL554C FL554 1 FL554C 1 FL604 FL604C FL704 1 FL704C 1 Deutz Fahr Machinery Co Ltd ...

Page 2: ...ry Deutz Fahr Machinery Co Ltd Notice 1 Fill in this form carefully in time of purchase 2 The serial numbers in the form should be completely recorded including letters Operation Manual for FL35 70HP Series Wheeled Tractors Prepared by Deutz Fahr Machinery Co Ltd Format 880 x 1230 1 16 FL35 70HP SM 2016 12 November 2018 The 2nd Edition November 2018 The 2nd Printing ...

Page 3: ...or any damage or injury caused by any unauthorized modification of this machine Never operate this tractor before you have not yet read through or understood this manual Any buyer or user shall have obligations to read this operation manual and comply with the safety recommendations as well as operating and maintenance instructions Please make sure to familiarize yourself with the safety instructi...

Page 4: ...tion if being equipped with trailer The trailer mass ratios proportion of total mass of the trailer and the total mass of the tractor shall not be more than 3 it can be operated jointly with the straw field returning machine via power output and can also be used as original power of pump and thresher Please correctly prepare supporting agricultural machines to obtain the maximum economic benefits ...

Page 5: ...ration knowledge Rules for preventing accidents other safety regulations and road traffic rules must be abided by all the time Use shall not exceed provisions of the operation manual otherwise performance of the tractor may be reduced or the tractor may break down This operation manual is not product quality guarantee therefore any requirement cannot be put forward based on data figure and explana...

Page 6: ...y Acceptance and Transportation Disassembly and Disposal Main Technical Specifications of the Tractor Warranty Contents Appendix Theme index of every chapter is enclosed in the beginning of the manual Alphabetical index is enclosed in the end of the manual Left right front and back shown in the manual refer to view angle of the driver in the cab Therefore left side and right side of the tractor ar...

Page 7: ...onal Unit Chinese Comparison 1 Time s 秒 2 min 分钟 3 h 小时 4 Length mm 毫米 5 cm 厘米 6 m 米 7 km 千米 8 Force N 牛顿 9 kN 千牛 10 Moment N m 牛顿 米 11 Mass kg 千克 12 g 克 13 Pressure Pa 帕 14 kPa 千帕 15 MPa 兆帕 16 kgf cm2 千克力 平方厘米 17 Temperature 摄氏度 18 Speed km h 千米 小时 19 Revolving speed r min 转 分钟 ...

Page 8: ...7 20 Current A 安培 21 Voltage V 伏 22 Volume L 升 23 mL 毫升 24 Flow L min 升 分钟 25 Power kW 千瓦 26 PS 马力 27 Fuel Consumption g kW h 克 千瓦 小时 28 Capacity of the Storage Battery A h 安培 小时 ...

Page 9: ...24 3 GENERAL SAFETY REGULATIONS 24 4 ACCIDENT PREVENTION AND SAFETY 28 4 1 SAFETY CLOTHES AND EQUIPMENT 29 4 2 NOISE EXPOSURE 29 4 3 PROTECTIVE AND SAFETY EQUIPMENT 30 4 4 CHECK THE TRACTOR AND IMPLEMENT 30 4 5 GET ON OR OFF THE TRACTOR 32 4 6 PARKING THE TRACTOR 33 4 7 CLEAN THE TRACTOR 34 5 OPERATION 34 5 1 STARTING 35 5 2 INDICATOR LAMP WILL BE CHECKED 35 5 3 STARTING LIQUID 37 5 4 AUXILIARY EQ...

Page 10: ...OVER PROTECTION SYSTEM 49 7 2 SAFETY CAB 50 7 3 EMERGENCY EXIT 50 7 4 FALLING OBJECT PROTECTIVE SYSTEM FOPS 51 7 5 OPERATOR PROTECTIVE SYSTEM OPS 51 7 6 UTILIZATION OF HAZARDOUS SUBSTANCES 52 7 7 AVOID CONTACTING INSECTICIDE 52 8 STOP AND DISPOSE THE TRACTOR 53 8 1 STOP THE TRACTOR 53 8 2 STOP AND DISPOSE THE TRACTOR 53 9 SAFETY WARNING SIGN 55 2 PRODUCT MARK 69 2 1 TRACTOR NAMEPLATE 70 2 2 ENGINE...

Page 11: ... 3 7 3 RIGHT ROCKER SWITCH COMBINATION 92 3 7 4 IGNITION LOCK 93 3 7 5 WIPER SWITCH 94 3 8 CAB OPTIONAL 95 3 8 1 CAB ENTRANCE 95 3 8 2 CAB DOOR 96 3 8 3 CAB LOCKS 96 3 8 4 SAFETY LOCK OF CAB DOOR 96 3 8 5 INTERIOR TRIMS OF THE CAB 97 3 8 6 REAR WINDOW HATCH 97 3 8 7 ROOF HATCH 98 3 8 8 INTERIOR ILLUMINATING LIGHT 98 3 8 9 BUILT IN RADIO 99 3 9 HEATING SYSTEM OPTIONAL 100 3 9 1 HEATING SYSTEM CONTR...

Page 12: ...108 3 14 3 BRAKE PEDAL 109 3 14 4 PARKING BRAKE HANDLE 110 3 14 5 SHUTDOWN CABLE 111 3 14 6 THROTTLE CONTROL PEDAL 114 3 14 7 THROTTLE CONTROL HANDLE 114 3 14 8 GEARBOX CONTROL DEVICE AS FOLLOWS 115 3 14 9 MAIN GEAR SHIFT LEVER 116 3 14 10 RANGE SHIFT LEVER 116 3 14 11 SHUTTLE SHIFT LEVER 116 3 14 12 DIFFERENTIAL LOCK CONTROL PEDAL 117 3 14 13 FOUR WHEEL DRIVE CONTROL HANDLE 117 3 14 14 PTO CONTRO...

Page 13: ... 2 2 2 STARTING BY A TOWING TRACTOR 128 4 2 2 3 USE ANOTHER BATTERY AS EMERGENCY BATTERY TO START THE ENGINE 128 4 2 3 OPERATION OF ENGINE 130 4 2 4 SHUT DOWN THE ENGINE 130 4 3 STARTING OF THE TRACTOR 132 4 4 STEERING OF THE TRACTOR 132 4 4 1 CYCLOID ROTARY VALVE TYPE HYDROSTATIC STEERING 133 4 5 POWER TRAIN DEVICE 135 4 5 1 POWER TRAIN DEVICE CONFIGURATION 135 4 5 2 8 4 SPEED GEAR CONFIGURATIONS...

Page 14: ...NKAGE 163 4 11 4 MANUAL ADJUSTMENT OF THE LIMIT LEVER 164 4 11 5 DIAGRAM FOR MOVEMENT OF THE HITCH MECHANISM 164 4 11 6 COUPLING LIFTING AND TRANSFER OF THE IMPLEMENT 168 4 11 7 SELECTION OF FRONT HINGING POINT OF THE UPPER LINK 169 4 12 HYDRAULIC SYSTEM 170 4 12 1 HYDRAULIC VALVE 170 4 12 2 TYPE OF HYDRAULIC VALVE THREE WAY NON ENFORCED TYPE 173 4 12 3 CONTROL OF HYDRAULIC VALVE NON ENFORCED TYPE...

Page 15: ... 195 5 2 WHEEL TREAD CALCULATION 196 5 2 1 MINIMUM WHEEL TREAD 196 5 3 ADJUSTMENT OF WHEEL TREAD 197 5 3 1 CHANGE THE WHEEL TREAD 197 5 3 2 ORDINARY WHEEL TREAD ADJUSTMENT 198 5 3 2 1 FRONT WHEEL TREAD ADJUSTMENT 198 5 3 2 2 REAR WHEEL TREAD ADJUSTMENT 199 5 4 ADJUSTMENT OF THE FRONT WHEEL TOE IN 201 5 5 HALF AXLES WITH REMOVABLE WHEEL HUB 201 5 6 BALLAST 202 5 6 1 CAPACITY FOR CARRYING BALLAST 20...

Page 16: ... 7 1 ON BOARD SPARE PARTS AND TOOLS 235 7 2 QUICK WEAR PART 237 8 MAINTENANCE SPECIFICATION 241 8 1 MAINTENANCE OPERATIONS 242 8 1 1 MAINTENANCE CYCLE 244 8 1 2 CLEANING TRACTOR AND HITCHED IMPLEMENTS 244 8 2 LIQUID OIL AND FILLING QUANTITY UNIT L 245 8 3 SERVICE CYCLE 248 8 4 ENTER INTO ENGINE COMPARTMENT 255 8 5 TECHNICAL MAINTENANCE PER SHIFT 10H 256 8 5 1 ROUTINE CHECK OF THE TRACTOR 256 8 5 2...

Page 17: ...UE 273 8 7 MAINTAIN EVERY 200 HOURS 277 8 7 1 MAINTENANCE OF FUEL FILTER 277 8 7 2 MAINTENANCE OF SPIN ON TYPE OIL FILTER 279 8 7 3 MAINTENANCE OF HYDRAULIC OIL SUCTION FILTER OF LIFTER 280 8 7 4 LUBRICATING OIL OF ENGINE SUMP WILL BE REPLACED 281 8 7 5 REPLACEMENT OF LUBRICATING OIL FOR OIL BATH AIR FILTER 283 8 8 MAINTAIN EVERY 400 HOURS 284 8 8 1 CHECKING OF HYDRAULIC OIL OF THE TRANSMISSION SY...

Page 18: ...EEZING SOLUTION 305 8 10 3 CENTRAL DRIVE OF FRONT DRIVE AXLE 307 8 10 4 REPLACEMENT OF LUBRICATING OIL OF FRONT DRIVE AXLE FINAL DRIVE 309 8 11 ADJUSTMENT OF TRACTOR CHASSIS 311 8 11 1 ADJUSTMENT OF CLUTCH 311 8 11 2 SERVICE BRAKE 313 8 11 2 1 CHECK BRAKING DISTANCE 313 8 11 2 2 ADJUSTMENT OF BRAKE OPERATING MECHANISM 313 8 11 2 3 ADJUSTMENT OF GEARBOX 314 8 11 3 ADJUSTMENT OF REAR AXLE 314 8 11 3...

Page 19: ...35 8 12 6 2 STRUCTURE AND ADJUSTMENT OF FRONT DRIVE AXLE ASSEMBLY 335 9 TROUBLESHOOTING 337 9 1 TOWING THE TRACTOR 338 9 1 1 TOWING WITH THE ENGINE BEING OPERATED 338 9 1 2 TOWING WITH THE ENGINE BEING SHUT DOWN 340 9 2 SAFE TRANSPORTATION OF THE TRACTOR 340 9 3 HOISTING THE TRACTOR 341 9 4 COMMON FAULTS AND TROUBLESHOOTING OF THE TRACTOR 341 9 4 1 CHASSIS FAULTS AND TROUBLESHOOTING 341 9 4 1 1 CL...

Page 20: ...7 11 1 DELIVERY AND ACCEPTANCE 358 11 2 TRANSPORTATION 358 12 DISASSEMBLY AND DISPOSAL 361 13 WARRANTY CONTENTS 364 13 1 BASIS FOR PRODUCT WARRANTY 365 13 2 NON WARRANTY CONDITIONS 365 14 MAIN TECHNICAL SPECIFICATIONS OF THE TRACTOR 366 14 1 MODEL OF PRODUCT 366 14 2 PRODUCT SPECIFICATIONS 367 14 3 MAIN SPECIFICATIONS OF ENGINE 398 14 4 THEORETICAL SPEED OF TRACTOR 403 15 APPENDIX 410 15 1 IMPLEME...

Page 21: ...Product Mark 20 1 Security Considerations ...

Page 22: ...ety descriptions that are generally included in a box Don t ignore these descriptions Otherwise you will be in danger Danger Indicates an imminently situation which if not avoided will result in death or serious injury Notice Indicates a potentially hazardous situation which if not avoided could result in death or serious injury Warning Indicates a potentially hazardous situation which if not avoi...

Page 23: ...trol braking steering stability and load Safety information provided in the manual will not substitute safety standards specified in national laws and regulations or insurance article Therefore you shall check whether your tractor is correct equipment complying with local laws and regulations It is impossible to foresee all potential dangerous situations Therefore safety protective measures and da...

Page 24: ...Product Mark 23 Driver must adequately read and understand the operation manual and safety warning signs You must remember correct operation and working methods Fig 1 1 2 2 ...

Page 25: ...riving on roads Personnel who operate it for the first time shall drive at low speed before it is familiar with it Fig 1 2 2 3 3 General Safety Regulations You shall abide by all general safety and accident prevention regulations in addition to commands in the Operation Manual You shall abide by highway laws and regulations when driving on public roads You shall be familiar with all control device...

Page 26: ...iving seat The control device can be operated only after sitting on the driving seat It is prohibited to connect the engine to the short circuit starting motor to avoid accidental operation of the tractor Danger You shall guarantee that rubber protective layer is installed on relay of starting motor Fig 1 3 Fig 1 4 Fig 1 5 When the tractor is started just now you shall pay attention to whether the...

Page 27: ...en filling oil and overhauling fuel system The fuel tank cannot be filled top up and it shall reserve space for fuel expansion Quality of fuel and lubricating oil will be executed strictly in accordance with provisions The machine cannot have accumulated dirt lubricating grease and fragment When fuel oil or engine oil overflows it will be cleared with clean duster cloth Driver shall wear tight wor...

Page 28: ...d from the starting switch If there is the general battery switch the battery switch will be switched over to close When the tractor in under operation any person cannot be close to the drive axle hook of the trailer traction rod connecting arm power output shaft lifting oil cylinder belt pulley and any other moving parts Please guarantee protective and preventive devices are correctly installed o...

Page 29: ...terials Heat radiation from flame will accidentally damage pipelines Fig 1 11 Hands cannot be used to detect oil or check leakage of fuel oil but wood piece or cardboard If any liquid of oil liquid of hydraulic machine or pressure circuit contacts skin you shall immediately seek for medical care Pressure will be discharged before disconnecting any pressure circuit part Avoid contacting pesticide T...

Page 30: ...worn You shall be equipped with the following protective articles Safety helmet Protective glasses or mask Protective glove chemical products will use polychloroprene heavy work will use leather Ear protective device Mask or filter mask Waterproof coat Reflective clothes Safety shoes Fig 1 13 It is wise to install fire extinguisher and first aid kit on the tractor for safety When the tractor is en...

Page 31: ...ions Some devices are indispensable and required by laws for safety of the tractor in accordance with local provisions Don t remove or dismantle safety device Please check whether the tractor has been equipped with following devices to improve safety of the driver and other personnel Seat belt PTO shaft cover Rearview mirror Slow traffic sign additional protective device additional lamp and identi...

Page 32: ...ave been installed when outputting power Check and guarantee protective devices of all rotating parts are installed and are under good working state Check hydraulic system of the tractor and implement If there is any leakage or damaged part repair or replacement must be conducted Notice If fuel or oil contacts skin or eyes under high pressure it will cause serious injury blindness and even death H...

Page 33: ...nds hold the handrail and one foot stand on ladder or one hand holds the handrail and two feet stand on ladder Fig 1 15 Don t climb via the pedal Don t get on or off the tractor when the tractor is under operation Until it has completely stopped Unless it is emergent you cannot jump down from the tractor Before stopping the tractor below operations will be executed Activate parking brake All contr...

Page 34: ...ne is shut off Activate parking brake All control devices will be adjusted to neutral gear Three point linkage and implement which hitching the tractor will be declined to the ground Stop engine Shift to gear I if the tractor that is equipped with implement gearbox Parking when the engine is under operation Check to confirm that there is no one surrounding the tractor Check to confirm that the tra...

Page 35: ... All tools barrels chains and hooks will be removed 5 Operation Don t operate the tractor under influence of alcohol or drug Speed of the tractor must be always adapted to ground conditions While it is upslope down slope or crossing the slope avoid sharp turn Don t drive at high speed or make a turn with differential lock When driving on inclined slope the clutch pedal cannot be pressed or gear ca...

Page 36: ...l not be operated near ditch embankment and cave The speed should be reduced when you drive on inclined slope coarse humid slippery or muddy ground For the sake of safety it is a good method to adjust to proper low speed gear before driving on the inclined slope When it is cold don t use diethyl ether to start the engine Abide by instructions in the paragraph of starting and stopping of the engine...

Page 37: ...Product Mark 36 If the tractor cannot correctly operate any control operation it cannot be used until fault has been corrected ...

Page 38: ...e located at position higher than rear axle Three point linkage can be used only to connect implement it cannot be used as trailer hook Notice Don t stand or allow others to stand between the tractor and implement unless the engine is shut off key is removed from the starting switch parking brake is activated it is adjusted to first gear and all accessories or implements are declined to the ground...

Page 39: ...ing the driver driver arm when it is raised Objects and loads that are not adequately secured may fall and injure personnel near the tractor DO not overload an attachment or towed implement Use the proper ballast weights to maintain the stability of the tractor Use the safety chain when transporting implements to prevent them becoming detached from the drawbar Using the appropriate adapters attach...

Page 40: ...ion to steer and brake the tractor 5 6 Driving on highway Comply with the highway code including regulations concerning speed limits correct use of lights hazard warning lights and slow moving vehicle warning signs When driving the tractor on the road insert the connecting bolt to lock the two brake pedals together This is to ensure effectiveness and bilateral braking Speed will be reduced adequat...

Page 41: ...ectric shock danger under situations of transportation working and shutdown 5 7 Overturning Notice DO NOT disengage the clutch or change gear after starting to drive down a slope 5 8 Notice Never tow implements trailer or agricultural implement by attaching them to the top link of the three point linkage This could cause the tractor to overturn backwards For safety reasons the tractor is equipped ...

Page 42: ... down slopes as traversing slopes across the gradient could cause the tractor to overturn When going down or uphill on inclined slope keep implements as close to the ground as possible An unloaded tractor or a tractor with a rear mounted implement should tackle uphill gradients slopes in reverse and downhill gradients travelling forwards DO NOT freewheel down a slope with the clutch disengaged or ...

Page 43: ...he tractor is hitched to a heavy load or a fixed object improper use of the clutch can cause the tractor to overturn If the front of the tractor starts to rise up reduce speed and if necessary disengage the clutch immediately Reduce your speed when working on loose or slippery ground and when unseen hazards could be hidden by branches or leaves DO NOT use the tractor to herd animals 6 Maintenance ...

Page 44: ...in fields the engine shall be shut off Repair cannot be conducted when the engine is still under operation when the tractor is still very hot or when the tractor is still under operation Fig 1 22 6 1 Correct supporting of the tractor Parts or equipment will be declined to the ground If the tractor or its part must be lifted up it will be safely supported Equipment or tractor must be supported with...

Page 45: ... can only be used only on the hard supporting face to prevent personal injury or property loss When using the jack it will be placed underneath the left and right half axle casings of rear axle and underneath front support other parts cannot be used to support it Fig 1 24 1 Front support 2 Left half axle casting 3 Right half axle casting ...

Page 46: ...d cannot be used for other purposes Fig 1 25 It is very dangerous to contact electrolyte dilute sulphuric acid If eyes skin and clothes contact electrolyte they shall be flushed with clean water at once when they enter into eyes eyes shall be flushed with clean water and you should see a doctor The following measures will be adopted to avoid injury Wear protective glasses and rubber glove Avoid br...

Page 47: ...attery will be checked to confirm whether it is unblocked or not and whether surrounding air is smooth or not Reasonable charging current will be selected as per rated capacity of the storage battery After charging is completed charging power supply shall be cut off at first Then the cable will be separated from the pole column of the storage battery to prevent spark from detonating the storage ba...

Page 48: ...ing damaged by high pressure liquid If you are injured by leaked hydraulic oil you shall immediately seek for medical treatment If you don t get timely necessary treatment it may cause serious infection and reaction Fig 1 29 Tire will be removed before welding or repairing wheel or wheel rim Under any circumstance if you don t have necessary equipment or experience for conducting this work under c...

Page 49: ...ce Working liquid such as high pressure hydraulic oil braking liquid and engine oil is dangerous which will cause serious personal injury The engine should be shut off before you replace working liquid Smoke and fire are strictly prohibited When working liquid overflows it should be cleared with clean dust cloth Replacement of working liquid must comply with liquid specified Working liquid that ha...

Page 50: ...waste down to the ground and into water pipe and to discharge waste into other water sources Don t discard waste engine oil fuel oil refrigerant braking liquid filter element or storage battery with potential hazards Please consult local environmental protection department or recycling center to correctly recycle or dispose waste Fig 1 31 6 8 7 Roll Over Protection System and Safe Cab 7 1 Roll ove...

Page 51: ...the cab help enhance road safety and mitigate consequence of accidents Fig 1 33 Notice If the device is damaged or modified the protection level of the safety cab will be reduced If the cab has been involved in any rollover accident of tractor or modified in any manner it shall be replaced immediately 7 3 Important Perform a comprehensive inspection on the safety cab driver s seat and all devices ...

Page 52: ...vehicle Danger This tractor is not equipped with FOPS If work must be conducted in place with the risk that object may fall down from the top to the bottom you shall consult your distributor before working so that it can install suitable protective devices 7 5 Operator protective system OPS OPS operator protective system refers to the protective system installed on the tractor that is used to mini...

Page 53: ...n description about utilization of these substances provided by the manufacturer that you shall use personal protective device you shall also wear these devices even if you are in the cab Danger Suitable personal protective device will be used in accordance with requirements of laws and regulations of your country Classification of cab is as follows Category 1 cab cannot prevent hazardous substanc...

Page 54: ... it to remind shutdown state 8 2 Stop and dispose the tractor The tractor includes Liquid hydraulic system cooling system and so on Gas air conditioning system storage battery and so on Acid battery Machinery heavy part Warning The tractor must be dismantled by authorized and qualified company If you want to purchase new tractor please directly give the tractor to the distributor Organization rece...

Page 55: ...rdous therefore they can be treated before adopting preventive measures Notice Lubricant and fuel must be disposed in accordance with environmental protection regulations Notice Suitable tools and lifting device will be used in accordance with relevant regulations and laws ...

Page 56: ...10 Notice When safety sign is lost or is not clear it will be replaced in time by contacting sales department or manufacturer Notice If components with safety warning sign need be replaced the safety warning sign shall also be replaced when replacing the component Notice Contents reminded in the safety warning sign are involved in personal safety which must be strictly executed ...

Page 57: ...Product Mark 56 Fig 1 35 Fig 1 36 ...

Page 58: ...Product Mark 57 Fig 1 37 Fig 1 38 ...

Page 59: ...Product Mark 58 Fig 1 39 1 Position Near the storage battery Name Meaning Images Identification of the storage battery Battery electrolyte is highly corrosive 2 Position On the radiator ...

Page 60: ...Product Mark 59 Name Meaning Images Cooling system label Drain all coolant from the engine before leaving the tractor not in service for a long period with ambient temperature 0 ...

Page 61: ...the lower limit of oil dipstick Failure to do so could cause damage to the parts of power train 4 Position Side of radiator Name Meaning Images Label indicating caution against scald caused by high temperature You shall keep away from the heat surface of the machine when it is working to prevent personal injury To prevent personal injury do not ride or stand here 5 Position Rear transverse board o...

Page 62: ...Product Mark 61 Rear transverse board safety label To prevent personal injury do not ride or stand here ...

Page 63: ...uirements Check for damaged filter element and ring seal Replace them promptly if any 7 Position On protective cover of the generator Name Meaning Images Safety warning label Ⅶ When the engine is working don t open or dismantle safety protective cover and don t put your hands into working area to prevent personal injury 8 Position Outside the silencer Name Meaning Images ...

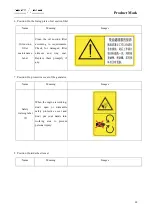
Page 64: ...d the rear right wheel cover Name Meaning Images Safety warning label Ⅲ When the lifter working keep a distance from the tractor Otherwise crush accident could occur 10 Position On protective cover of PTO Name Meaning Images PTO safety label Ⅱ Only when all parts of the tractor completely stop running can you contact the tractor so as to avoid personal injury 11 Position On upper of protective cov...

Page 65: ...rom the power source while the PTO shaft is working Stop the tractor before attaching any implement to the PTO shaft 12 Position Near the PTO Name Meaning Images PTO safety label Ⅲ See the picture on the right 13 Position On the right stop rod Name Meaning Images ...

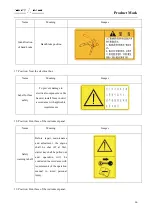
Page 66: ...es Safety warning label II Keep a safe distance from the tractor to avoid personal injury 14 Position In the front of left and right wheel covers Name Meaning Images Label against riding on fender Do not ride on a non occupant position in the tractor so as not to obstruct the driver s view and cause injury 16 Position Near the handbrake handle ...

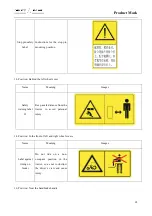
Page 67: ...nstall fuses in strict accordance with applicable requirements 18 Position Front face of the instrument panel Name Meaning Images Safety warning label I Before repair maintenance and adjustment the engine shall be shut off at first starter key shall be pulled out and operation will be conducted in accordance with requirements of the operation manual to avoid personal injury 19 Position Front face ...

Page 68: ... start the engine by short circuiting the starter 20 Position Front face of the instrument panel Name Meaning Images Label for safety fluid levels in steering fluid tank and braking fluid tank Before performing field work check carefully the fluid level in the steering fluid tank 21 Position Front face of the instrument panel Name Meaning Images ...

Page 69: ...ecification Please read the operation manual and understand meanings of safety identifications without character to avoid personal injury 22 Position Near the PTO handle Name Meaning Images Control identification of PTO Control identification of PTO ...

Page 70: ...69 2 Product Mark ...

Page 71: ...a tractor and the service staff will check the product nameplate before services so please keep the product nameplate clear and safe in place Fig 2 1 2 2 The product nameplate is located on the left of the tractor instrument panel arrow position as shown in the figure Fig 2 2 2 2 Engine Nameplate ...

Page 72: ...model is an identification code prepared for a certain batch of the same products by the engine manufacturing enterprise in accordance with the relevant regulations and enterprise industry practices as well as the engine properties for indicating the engine manufacturing enterprise specifications performance characteristics technology use product batches and other relevant information Such as fuel...

Page 73: ...icle Model and Factory Number Before a tractor is delivered its vehicle model and factory number are carved near the clutch which on the lower left side of instrument panel specifically as shown in Figure Fig 2 6 2 5 ...

Page 74: ...73 Page Left Intentionally Blank ...

Page 75: ...Product Description 74 3 Product Description ...

Page 76: ...Product Description 75 3 1 Tractor External View 3 1 1 Appearance of tractor equipped with rollover protection structure Fig 3 1 ...

Page 77: ...Product Description 76 Fig 3 2 3 1 2 Appearance of tractor equipped with cab ...

Page 78: ... Fig 3 4 3 2 Common Identifiers Symbol Meaning Symbol Meaning Symbol Meaning Safety alert symbol Hazard indicator light Loudspeakers Front wheel drive Trailer braking Fast Hand brake braking liquid level Low Engine oil pressure Slow ...

Page 79: ...rn indicator Rear wiper Clearance lamp Low beam lamp High beam lamp PTO disengagement Hydraulic oil filter Preheating Rear PTO revolving speed Differential lock Parking brake Oil water separation Engine coolant temperature Transmission oil filter Transmission oil pressure Fuel oil level Warning lamp 3 3 Table 3 1 ...

Page 80: ...04 FL 604C FL 704 1 FL 704C 1 FL35 70HP series wheeled tractors are a kind of multipurpose medium sized agricultural wheeled tractors Such products feature compact structure convenient manipulation flexible steering large lifting force easy maintenance and other excellent characteristics 3 3 Hood 3 3 1 Hood without cabin The tractor hood adopts elegant appearance stream line sheet metal structure ...

Page 81: ...Product Description 80 ...

Page 82: ...seize beneath the hood and lift it up gently and the hood will be driven by the two gas springs left and right to open automatically Pull the hood downward and the hood lock will be locked automatically when the hood is lowered to a certain angle Fig 3 7 3 3 4 3 4 Tractor Control Mechanism Fig 3 8 ...

Page 83: ...l lever 9 Shutdown cable 10 Clutch pedal 11 Parking brake handle 12 Hydraulic output control lever 3 5 Instrument Panel The tractor electric control switches and combination instruments are all installed on the instrument panel which mainly serves as support of the control switches and decoration seal Fig 3 9 3 6 Steering Wheel The steering wheel is located as shown in the figure Fig 3 10 ...

Page 84: ...Product Description 83 3 7 Notice Check whether the steering wheel is fixed firmly before driving ...

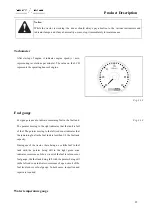
Page 85: ...t assembly Fig 3 12 1 Fuel gauge 2 Tachometer 3 Indicator 4 Water temperature gauge The combination instrument contains various indicating devices such as the tachometer fuel gauge water temperature gauge direction indicator lamp high low beam headlamp indicator position indicator charging alarm light and engine oil pressure alarm light and air pressure alarm light for users to timely monitor the ...

Page 86: ...he fuel tank The pointer moving to the right indicates that the tank is full of fuel The pointer moving to the left red zone indicates that the remaining fuel in the fuel tank is less than 1 8 the fuel tank capacity During use of the tractor there being no or little fuel in fuel tank with the pointer being still in the right green zone indicates occurrence of short circuit of the fuel level sensor...

Page 87: ...e engine immediately if the pointer moves to the red zone Trailer brake lamp red When the trailer brake system has failed during operation this indicator lamp will light up When the air brake system has its pressure lower than 0 4Mpa this indicator lamp will light up it indicates a fault of the brake gas path and immediate troubleshooting should be needed If the air pressure is found insufficient ...

Page 88: ... engine is running at idle speed It is a normal phenomenon due to low pressure in the lubrication system If this light comes on while the engine is running at normal operating speed stop immediately the engine running for inspection If this light does not come on when the ignition key is turned to the position START inspect and repair its bulb Hand brake brake fluid level low indicator red When th...

Page 89: ...ow When a tractor is preheating this indicator lamp will light up Left steering indicator green When the left steering switch is connected when a tractor is turning left this indicator will light up Right steering indicator green When the right steering switch is connected when a tractor is turning right this indicator will light up High beam indicator blue When the light switch is locating at pos...

Page 90: ...TO control lever is at any gear position other than the neutral one this indicator lamp will light up Differential lock indicator yellow When the differential lock is applied this indicator lamp will light up Low beam indicator green When the light switch is locating at position 2 and the dimmer switch is locating at position 0 this indicator will light up It shows that the low beam headlamps are ...

Page 91: ... oil pressure indicator red When the transmission hydraulic oil pressure is insufficient this indicator lamp will light up At this time you should stop for troubleshooting Notice According to different models some of the above mentioned indicator lamps are reserved devices Consult your dealer for details 3 7 2 Left rocker switch combination 1 Dimmer switch 2 Lamp switch 3 Top working lamp switch F...

Page 92: ...otice The high low beam switching is controlled by the lighting master switch Fig 3 17 Lighting master switch Position 0 Cut off the power supply Position 1 The clearance lamp will light up Position 2 The headlamp power supply is under control and if 2 is connected then you can use the dimmer switch to control the headlamp high low beams Fig 3 18 Top rear lamp switch ...

Page 93: ...up Fig 3 19 Notice Never have the working lamp enabled when a tractor is driving on roads 3 7 3 Right rocker switch combination 1 Electric horn switch 2 Hazard warning lamp switch 3 Steering switch Fig 3 20 3 7 4 Horn switch Position 1 The horn will ring out Position 0 The horn will be turn off It is used to give sound warning Fig 3 21 Hazard warning lamp switch ...

Page 94: ... if the engine has been stopped with the key removed Fig 3 22 Notice This function can be enabled if it is necessary to warn the vehicles and pedestrians around for preventing traffic accidents when a tractor has stopped on the road due to failures or any other reason Steering switch Position 1 Connect the right steering lamps Position 0 Cut off the power supply Position 2 Connect the right steeri...

Page 95: ...rcuits ST position starting Start the vehicle for work and the key will return to the ON position after the engine has been started at this time the ON and ACC are connected at the same time to provide power supply to all onboard electrical components Fig 3 24 3 7 5 Notice Before starting the engine make sure that it is adequately ventilated around Please do not start the engine in a closed area T...

Page 96: ...g 3 26 3 8 Cab Optional The cab of the tractor is composed of framework that is made of special tubular product through welding which is embedded with a large area of space curved glass Fig 3 27 3 9 Warning Don t revise the cab Don t drill or weld in the cab 3 9 1 Cab entrance Entrance Steps and Handrails ...

Page 97: ... streamlined cab and not only highlighting the spacious and comfortable driving space but also improving greatly the appearance of entire tractor Fig 3 29 3 9 3 3 9 3 Cab locks The double locks can prevent accidental opening of the door To open the door turn the key clockwise by 90 remove the key grab the door handle push inward the movable part at the slot for key with thumb to release the lock m...

Page 98: ...ocked it can only be opened from outside by key Moving down the handle can cause the door to open automatically Fig 3 31 3 9 5 3 9 5 Interior trims of the cab The interior trims of the cab include the interior trims offenders floor mats instrument panel and interior roof lining as shown in Figure Fig 3 32 3 9 6 3 9 6 Rear window hatch The rear window hatch of tractor can be opened upward semi auto...

Page 99: ...of hatch The roof hatch can be opened for ventilation Hold the handle and rotate it clockwise to unlock the safety lock Gently push outward the roof hatch It will open automatically under the action of the left and right air springs To close the roof hatch operate in the reverse order as opening the roof hatch Fig 3 35 3 9 8 3 9 8 Interior illuminating light Interior illuminating light may be turn...

Page 100: ...Product Description 99 3 9 9 3 9 9 Built In Radio Radio is an optional device Radio is located to the right of the cab interior roof lining Fig 3 37 3 9 10 ...

Page 101: ...Product Description 100 3 9 Heating System Optional Fig 3 38 1 Control switch 2 Air outlet 1 3 Air outlet 2 3 9 1 Heating system control switch ...

Page 102: ...lation system is turned off you can simply turn off the ventilation fan to avoid the tractor battery operation under overload If the ventilation system has been running at full power for a long time do not turn it off immediately Before turning it off have it running at minimum speed for at least 20 seconds With the heating system turned on you can feel air flow immediately from the air outlet If ...

Page 103: ...gure Fig 3 42 3 9 6 3 10 Cab Air Conditioning Filter Not Apply to This Model The purpose of the cab air conditioning filter is to remove dust from air But it cannot remove the chemical vapor emitted by the pesticide sprayer When disposing of used filters follow the regulations applicable locally regarding disposal of cartridges contaminated with harmful substances ...

Page 104: ...ot clogged or obstructed Check the conditions of the seals around the doors and windows of the cab Check the hole diameter of connecting levers with pass to the outside of the cab If it is not possible to identify the cause by the above checks contact an authorized Service Center Special filters Notice Before working with harmful substances the external cab air filters and internal if installed mu...

Page 105: ... to be carried out After each use the filter should be removed from the cab and replaced in its original packaging and the standard dust filter should be installed The activated carbon filter should be carefully sealed in its packaging in order to maintain its efficiency This filter providing it is used for a total of no more than 200 hours has a maximum service life of 36 months from the time the...

Page 106: ...he driver seat Adjust the back and forth regulating handle at the lower right corner of the cab and the seat can be adjusted back and forth within 150mm according to the requirements of the driver Fig 3 43 3 11 2 Rigidity adjustment of the driver seat Adjust the rigidity regulating handle to achieve more comfortable sitting according to the height and weight of the operator Fig 3 44 Danger For saf...

Page 107: ...actor is designed only to accommodate one person In some countries the passenger seat provided by the manufacturer is allowed First check whether the tractor is allowed to accommodate passengers 3 13 Danger Unless your tractor is equipped with an appropriate seat no passenger is allowed to accommodate When a passenger seat is used please comply with the local laws and regulations including insuran...

Page 108: ... implements from the driver seat Fig 3 45 3 13 2 3 13 2 Rear view mirrors without cab See the figure as follows for such a cab with no rearview mirror provided Adjustment Adjust the rearview mirrors on both sides Fix the rearview mirrors so that a clear vision could be available behind the tractor and implements from the driver seat Fig 3 46 3 13 3 Warning If one or two rearview mirrors are accide...

Page 109: ... driving never put your foot on the clutch pedal or step it downward a lot otherwise the clutch plates will be early worn 3 14 3 Warning When driving downhill never press down the clutch pedal or put the transmission in its neutral position Warning When a tractor is stationary avoid stepping down the clutch pedal for a long time Select the neutral position even for a brief stop ...

Page 110: ...rator pedal appropriately to avoid sudden bumps when the tractor is moving Once the clutch is released you should remove your foot from the clutch pedal because even slight stepping on can also speed up the clutch wear Fig 3 48 3 14 3 Brake pedal Notice In time of downhill and especially in the process of towing implements or trailer apply downshifts and engine brake but never step on the brake pe...

Page 111: ...dals the right and left brakes can controlled independently 1 Left brake pedal 2 Brake pedal interlocking plate 3 Right brake pedal Fig 3 49 3 14 4 Parking brake handle Warning Before leaving your driving position after engine flameout you need to pull up the parking brake For further information about the procedures for safe operation you should refer to the chapter of Tractor parking for safety ...

Page 112: ...aneously push the handle forward Fig 3 50 Information about the parking brake This function is temporarily unavailable When the parking brake is activated the parking brake lamp position in the figure on the tractor instrument will light up Fig 3 51 3 14 5 Shutdown Cable The shutdown cable is located as shown in Figure Fig 3 52 3 14 6 ...

Page 113: ...Product Description 112 ...

Page 114: ...the tractor on a steep slope Parking when engine is shut off Activate parking brake All control devices will be adjusted to neutral gear Three point linkage and implement which hitching the tractor will be declined to the ground Stop engine Shift to gear I if the tractor that is equipped with implement gearbox Parking when the engine is under operation Check to confirm that there is no one surroun...

Page 115: ... guarantee the tractor will not be moved and then stand near the tractor for placing the pad 3 14 6 Throttle Control Pedal Use this control device to change the engine speed Fig 3 54 3 14 7 3 14 7 Throttle Control Handle The hand throttle control handle is located on the right side of the driver The hand throttle is used to increase or reduce the engine speed There is an icon beside the control ha...

Page 116: ...arking in the safety related chapters in this Manual 3 14 9 Three configurations of the gearbox control unit are provided for FL40 55 70 1 series tractors Configuration I 8 4 speed gear configurations 8 forward gears 4 reverse gears The transmission consists of such different parts as follows One main gear shift lever 1 2 3 4 One range shift lever L H R Configuration II 8 8 speed gear configuratio...

Page 117: ...n in the figure There are four gear positions respectively as 1 2 3 4 Fig 3 56 3 14 10 Range shift lever As shown in the figure Selection from three configurations may be made depending on the tractor model See the Power train device for details Fig 3 57 3 14 11 3 14 11 Shuttle shift lever ...

Page 118: ...ol pedal When the differential lock control pedal is stepped down then the differential lock will be engaged and the left and right drive shafts are connected in a rigid manner Release the differential lock control pedal and then the differential lock will disengage automatically Fig 3 59 3 14 13 3 14 13 Four wheel drive control handle See the figure for the four wheel drive control handle Pull up...

Page 119: ...e position is neutral Push down and then there will be a power output 760r min Fig 3 61 3 14 15 Important For different tractor models are provided different PTO speeds 540 1000 r min 540 760 r min 3 14 15 Lifter Control Handle non enforced type The control levers of the lifter include the position adjustment lever and force adjustment lever The position adjustment lever is shown in the illustrati...

Page 120: ...rce adjustment lever is shown in the illustration Fig 3 63 3 14 16 Lifter Control Handle pusher type See the figure for the pusher type lifter control handle Fig 3 64 3 14 17 3 14 17 Multi way Valve Control Handle non enforced type ...

Page 121: ...on 120 See the figure for the multi way valve control handle Fig 3 65 3 14 18 3 14 18 Multi way Valve Control Handle enforced type See the figure for the multi way valve control handle Fig 3 66 3 14 19 3 14 19 Fuel Tank ...

Page 122: ...suitable place 3 14 21 Fire extinguisher Warning The fire extinguisher must always be kept in a good working state and always installed at a specified place Strictly abide by the maintenance and inspection intervals detailed by the fire extinguisher manufacturer 3 14 22 The fire extinguisher should be prepared by the user itself 3 14 22 Operation manual The operation manual contains all necessary ...

Page 123: ...t Description 122 In order to prevent accidents you should follow all safety regulations contained in the operation manual 3 14 23 Tool Kit Tool kit is located on the left fender Floor model Fig 3 68 3 14 24 ...

Page 124: ...Electrical system 123 4 Operation Instructions ...

Page 125: ...power output of your tractor does not exceed the declared and approved value Any tampering with this seal on the governor will void the warranty for the entire tractor with immediate effect In the first hours of use of the machine the following procedures must be adhered to At each start up allow the engine to run at low speed for a few minutes Do not use the engine continuously at low revs or at ...

Page 126: ... throttle to semi opening state For the tractor that is new overhauled or is not used for a long time remove air trapped in oil circuit prior to startup so as to ensure smooth startup of the diesel engine The method is as follows First loosen the vent screw of the diesel filter and use a hand pump to pump fuel to remove the air trapped in the pipe section from the fuel tank to the diesel filter un...

Page 127: ...tle shift control handle to the neutral position Ignition key Insert the key into the ignition lock and turn the key in clockwise direction ACC position auxiliary position connect auxiliary electric components such as warm air wiper fan and etc ON position ignition position connect power supply of the complete vehicle circuit ST position starting position enable the complete to start working after...

Page 128: ...d the controller does not work so the key can be turned to starting position ST to start the engine directly If the atmospheric temperature is below 5 the indicator light comes on and the controller starts working at this moment the glow plug is powered for warming up b The warm up time of the glow plug is related to the battery voltage and is usually about 30s After warm up is finished the indica...

Page 129: ...portant After the engine is started lose hold of the key immediately to enable the key to automatically return to ON position see ignition lock picture Otherwise the engine will drive the starter motor causing damage to the starter motor Important The time of every start should not be more than 5s and the time interval between continuous starts should not be less than 15s For maintaining charging ...

Page 130: ... battery requiring an external power supply is connected with the vehicle chassis the cover has been assembled completely and the electrolyte level remains normal Connect two batteries as per following steps Connect the port of a cable to the positive pole of the power shortage battery and then connect it to the positive pole of the auxiliary battery Connect the port of the other cable to the nega...

Page 131: ...ne oil pressure is not lower than 98kPa 1 kgf cm At this moment the oil pressure indicator light is off After the engine is started do not have the engine operated at full load immediately but have the engine operated at middle speed for warm up When the coolant temperature is more than 60 the engine speed can be increased to the maximum value and be operated at full load The engine speed and load...

Page 132: ...e engine is very hot have it idled for a while before shutdown 2 To shut down the engine pull out the shutdown handle 3 Set the gear shift lever and shuttle shift control handle to the neutral position and pull the hand brake 4 Turn the ignition key to the position OFF Fig 4 4 Fig 4 5 4 3 5 ...

Page 133: ...radually enlarge the throttle opening to enable the tractor to reach desired operating speed During operation semi engagement of the clutch is not allowed to reduce driving speed of the tractor During driving do not put your foot onto the clutch pedal always to avoid speeding up wear of the release lever and friction lining Fig 4 6 4 4 Important 1 Starting to move forward at high gear position is ...

Page 134: ...curve or on a soft field and the steering is failed due to front wheel slippage it is possible to press the brake pedal on corresponding side to help steering 4 5 4 5 1 Cycloid Rotary Valve Type Hydrostatic Steering Fig 4 7 1 Steering wheel 2 Steering column 3 hydraulic steering gear 4 Steering oil tank 5 Constant flow overflow pump Prior to delivery of the tractor the steering system is adjusted ...

Page 135: ...on between the steering cylinder piston and direction wheel and turn the steering wheel to enable the piston to move to the left or right position it does not stop at both limit positions and fill oil to the oil tank to the specified highest oil level Tighten all threaded connections which cannot be tightened under pressure and connect the piston rod Inspect whether the steering system operates no...

Page 136: ...ration Fig 4 8 Gear layout of FL35 70HP Series Tractor a Gear layout for the tractor models with 8 forward gears 4 reverse gears b Gear layout for the tractor models with 8 forward gears 8 reverse gears c Gear layout for the tractor models with 12 forward gears 12 reverse gears ...

Page 137: ...e 1st gear or forward to the 2nd gear Depress the main clutch pedal move the main shift lever from the neutral position to the left then backward to the 3rd gear or forward to the 4th gear Fig 4 9 Range shift lever The range shift lever has three positions 2 forward gears L low gear H high gear and 1 reverse gear L Low speed H High speed R Reverse gear Depress the main clutch pedal move the range ...

Page 138: ...he main shift lever from the neutral position to the right then backward to the 1st gear or forward to the 2nd gear Depress the main clutch pedal move the main shift lever from the neutral position to the left then backward to the 3rd gear or forward to the 4th gear Fig 4 11 Range shift lever The range shift lever can accomplish gear shift between 2 speed ranges L indicates low speed range and H i...

Page 139: ...edal Move the shuttle shift lever from the neutral position forward to get a forward gear or backward to get a reverse gear Fig 4 13 4 5 4 12 12 speed gear configurations 12 forward gears 12 reverse gears The transmission consists of such different parts as follows One main gear shift lever 1 2 3 4 One range shift lever L H M One shuttle shift lever F R Main gear shift lever ...

Page 140: ...kward to the 3rd gear or forward to the 4th gear Fig 4 14 Range shift lever The range shift lever can accomplish gear shift among 3 speed ranges L indicates low speed range H indicates high speed range and M indicates middle speed range L Low speed H High speed M Middle speed range Depress the main clutch pedal move the range shift lever from the neutral position to the left then forward to the L ...

Page 141: ...n can flow into the rear axle The oil filler port is located on the rear axle housing and during oil drainage the oil drain bolt on the rear axle housing should be unscrewed and the scrap iron adhered to the oil drainage bolt should be cleaned Use an oil dipstick to inspect the lubricating oil level Correctly selecting a tractor operating speed is not only able to obtain optimal productivity and e...

Page 142: ...y load in field or on humid and soft soil the tractor s traction force may be insufficient at this moment coupling the front drive axle can increase traction force of the tractor and reduce the slippage rate so as to enhance working suitability of the tractor To engage and separate the front drive axle the following operating procedures should be observed 4 7 2 Engagement of the front drive axle D...

Page 143: ...ard road coupling the front drive axle is not allowed otherwise it may cause early wear of the front wheels increasing fuel consumption The front drive axle can be coupled only in rainy and snowy weather when the road is slippage and the rear wheels of the tractor are prone to slippage during uphill driving After the tractor drives out of the hard area the front drive axle should be uncoupled Impo...

Page 144: ...ll the throttle control handle to the maximum fuel supply position Depress the differential lock control pedal by your right foot Smoothly release the clutch pedal to enable the tractor to start to move forward smoothly After the tractor drives out of the slippage area release the differential lock pedal and enable the differential lock to be self disengaging automatically Fig 4 19 4 7 5 Important...

Page 145: ...ant parts and speeding up wear of the tires 4 8 Operation of the Trailer Brake System Notice The tractor must be equipped with a trailer brake system that is properly connected to the trailer 4 9 Important Please contact an authorized service center to adjust the brake system The engine driven air compressor delivers compressed air to the trailer brake system see the diagram ...

Page 146: ...pressure of air reservoir shall be 0 75MPa 0 8MPa 7 5kgf cm2 8kgf cm2 Make timely adjustment to the system in the case of air pressure gauge reading exceeding this range If the air reservoir pressure of tractor is normal but the air reservoir pressure of trailer is low indicated by inefficient trailer brake adjust only the adjusting screw to the left of brake valve If the air reservoir pressure is...

Page 147: ...re that the air brake system operates normally open the drain valve to drain water from the air reservoir every 50 hours of tractor operation Check periodically Conditions of hose Operation of pressure gauge Tension of compressor drive belt Compressor oil leakage Cleanliness of connector and operation of valve in connector By checking whether air has reached the air reservoir of trailer 4 9 PTO Co...

Page 148: ...anual Danger After disengaging the power take off the mounted implement may continue to operate due to inertia Only when the implement is at a complete standstill and the engine has been switched off is it possible to come near to perform the required maintenance Danger For safety seasons the PTO shaft shield must never be removed The shaft s safety cap must only be removed to couple the PTO shaft...

Page 149: ...ls For further information on safe working procedures refer to the chapter Parking the tractor in the safety section of this manual FL35 70HP Series tractor is equipped with a 2 speed rear PTO 540rpm and 760rpm The PTO shaft of FL35 70HP series tractors is an independent type The tractor is able to carry out working in a mobile manner or in a fixed manner The PTO works independently With the main ...

Page 150: ...r min if it is pulled upward the low speed gear of 540r min is engaged Fig 4 22 Unscrew the protective cover of the PTO shaft and then couple the upper cardan joint of the implement with the PTO shaft Install the PTO protective cover properly Set the control handle of the lifter to Up position to lift up the implement Model 2 Have the implement coupled with the hitch mechanism ...

Page 151: ... shaft Install the PTO protective cover properly Set the control handle of the lifter to Up position to lift up the implement Select PTO shaft sped according to requirements Depress the clutch pedal and press down the PTO control handle to engage the high speed gear of 760r min if it is pulled upward the low speed gear of 540r min is engaged Fig 4 24 Model 35 40 50 55 1 Engine Laidong Quanchai Xin...

Page 152: ...PM engine rated speed 678 815 621 1149 692 833 634 1173 Engine speed PTO rated speed RPM 1872 2191 2044 2045 1872 2191 2044 2045 Percentage 80 93 87 87 78 91 85 85 Model 55 60 70 Engine Xinchai Quanchai Engine rated speed RPM 2300 2400 PTO configuration 540 760 540 1000 540 760 540 1000 PTO speed RPM 540 760 540 1000 540 760 540 1000 Gear ratio 0 26 12 46 0 34 15 44 0 26 12 46 0 49 19 39 0 26 12 4...

Page 153: ...the implement so as to avoid occurrence of danger 4 9 3 Steps for disconnecting the PTO shaft Adjust the engine to the idling state Wait for a while until the engine gets standstill Disconnect the PTO shaft Depress the clutch pedal and set the PTO control handle to the neutral position Warning When the PTO is not required the PTO control handle should be in the neutral position and the PTO shaft s...

Page 154: ...ce Do not stand or allow anyone else to stand between the tractor and the implement unless the engine is shut off and the key removed from the starter switch the parking brake applied a gear engaged and all attachments or implements lowered to the ground The rear lift unit for the control of mounted implements semi mounted implements and trailed implements is composed of Lifter located on the PTO ...

Page 155: ...osition adjustment levers Diagram for non enforced type lifter Fig 4 25 None Pusher type Lifter control device The hydraulic lifter control handle is located to the right of the driver s seat shown as the figure 1 Force adjustment lever 2 Force adjustment lever Fig 4 26 Implement tillage depth adjustment ...

Page 156: ...owers to increase tillage depth b Position adjustment Position adjustment refers to adjusting the position of implement relative to the tractor Generally position adjustment is mainly used for rotary tillage harvesting sowing and bulldozing Position adjustment can be used for tillage across even terrain When using the position adjustment work force adjustment handle in the first end of the raised ...

Page 157: ...Electrical system 156 ...

Page 158: ... 10 2 Lifter pusher type Diagram for pusher type lifter Fig 4 28 Pusher type Lifter control device The hydraulic lifter control handle is located to the right of the driver s seat shown as in the figure Fig 4 29 Control Type ...

Page 159: ... The more the control lever moves backward the more the implement moves upward b Float control It shall be used when an implement equipped with a working depth limiting wheel is used Placing the control lever in the float control position can bring the hydraulic system to the draft control state and the lift arm can thus swing freely The working depth of implement is controlled by the working dept...

Page 160: ... angle between the PTO shaft and the drive shaft of the implement 4 11 Three point Linkage FL35 70HP Series tractors adopt a rear three point linkage to connect the implement Notice Hooking on to the rear axle or any other point above the swinging drawbar or rear wheels can cause the tractor to tip over Notice When working with the 3 point linkage ensure that anybody keeps far away from working ra...

Page 161: ... screwed into the turnbuckle housing to withstand the tractive force applied when working The length of the upper link lifting lever and limit lever can be adjusted via the threaded sleeve with a handle The Three point linkage can be adjusted by following methods Manual adjustment of the lifting lever Manual adjustment of the upper link Manual adjustment of the limit lever Three point linkage Mode...

Page 162: ...Electrical system 161 Fig 4 32 Three point linkage Model 2 ...

Page 163: ... 162 Fig 4 33 Three point linkage Model 3 Fig 4 34 Three point linkage Model 4 1 Upper link assembly 2 Lifting lever assembly 3 Lower link assembly 4 Limit lever assembly 4 11 1 Maximum lifting stroke of the lower link ...

Page 164: ...ent of horizontal position of the implement The lifting height is increased through retracting the lifting lever e g during transportation of when a plough implement requiring decrease in soil penetration is installed Generally length of the lifting rod should be adjusted to its intermediate length The left and right lifting levers can be adjusted by turning the guide pipe weld unit of the middle ...

Page 165: ...llation of the implement i e the lower link The stop rod length can be adjusted by rotating the threaded limit sleeve Inserting the lock pin into the long hole B in the extension rod ball joint assembly allows the limiting rod to move somewhat Inserting the lock pin into the round hole A in the extension rod ball joint assembly prevents the limiting rod from moving Fig 4 38 The movement of the lim...

Page 166: ...Electrical system 165 Fig 4 39 Diagram for movement of the hitch mechanism configuration 1 Highest Wheels PTO shaft 624 lifting s troke 883 transportation ...

Page 167: ...Electrical system 166 Fig 4 40 Diagram for movement of the hitch mechanism configuration 2 Highest transportation positions Wheels PTO shaft 460 lifting s troke 827 transportation h eight ...

Page 168: ...Electrical system 167 Fig 4 41 Diagram for movement of the hitch mechanism configuration 3 Wheels ...

Page 169: ... 11 6 Coupling lifting and transfer of the implement Before the implement is coupled must ensure that the swing type drawbar has no interference The drawbar may be moved forward or dismantled as required and it is required to inspect whether there is other possible 968 6 transportation h eight ...

Page 170: ...nts When the position control lever is used to control plowing depth the front end of the upper link should be connected to the lower hinging point When the draft control lever is used to control plowing depth the upper hinging point is used when the soil resistance is small or the plowing depth is shallow When the soil resistance is big or the plowing depth is big the middle hinging point is used...

Page 171: ... a high pressure circuit so that the implement can be controlled by it to meet all application requirements The control valve is a double action type Notice If high pressure fuel l is splashed to your skin or eye it may cause serious injury and blindness even death High pressure fluid leakage may be unapparent Use a paper board or wood to detect the place where fluid leaks Do not operate it by han...

Page 172: ...tion the oil flows in reverse direction The control handle has 3 positions 1 Outlet 0 Neutral position 2 Outlet Fig 4 44 Double action device with a floating position The double action device with an additional position can realize connection of two outlets of the remote valve with the discharging port at the same time This enables the coupled implement to be floated freely based on the ground pro...

Page 173: ...T the control lever will always return to the NEUTRAL position when released by the operator The control handle has 4 positions 1 Outlet 0 Neutral position 2 Return Detent Fig 4 46 Non return valve Mechanically operated check valve that prevents leakage past the control valve spool and thus undesired movements of the hydraulic cylinders Fig 4 47 Flow distribution valve Allows the oil flow rate to ...

Page 174: ...draulic load or walk under the hydraulic load 4 13 2 Type of hydraulic valve three way non enforced type Fig 4 49 1 Gear pump 2 Oil suction filter 3 Multi way directional control valve 4 Quick change connector 4 13 3 Control of hydraulic valve non enforced type ...

Page 175: ...rload the system 4 13 4 Control of hydraulic valve 1 Control handle for the hydraulic output device Fig 4 50 2 Position adjustment lever of rear hydraulic lifter 3 Force adjustment lever of rear hydraulic lifter Fig 4 51 Operation of the control valve for the control handle of rear hydraulic lift non pusher type Non enforced type control handle can be divided into Position adjustment lever Force a...

Page 176: ... hydraulic output device has 3 oil output circuits each of which is operated by an independent control handle Each control handle is provided with 2 control positions by which hydraulic oil of respective return circuit is controlled For details consult Manipulation and use of the hydraulic output device ...

Page 177: ...llowing works and then insert the female connector of the implement into the socket 1 Stop the engine 2 Lower the suspended implement 3 Move the hydraulic output valve control handle to relieve the pressure in the hydraulic quick change connector seat 4 Remove the sealing cover of the quick change connector and clean the quick change connector Important When the quick change connector is not used ...

Page 178: ...t device cannot be used simultaneously Notice After the hydraulic output valve is manipulated the control handle must be returned to neutral position otherwise it may result in overheat of the hydraulic system 4 13 5 Type of hydraulic valve configuration 2 4 53 ...

Page 179: ...ontrol levers must be returned to in their neutral positions as soon as the external rams reach their stroke limit in order to avoid maintaining maximum pressure in the hydraulic circuit for longer than necessary as this could dangerously overload the system 4 13 7 Control of hydraulic valve 1 Control handle for the rear hydraulic lift 2 Control handle for the hydraulic output device Fig 4 54 ...

Page 180: ...handle of rear hydraulic lift Four positions are provided for the control handle of rear hydraulic lift Lift up Neutral neutral gear Lower Floating For details refer to the section Hydraulic Lifts 4 13 7 Operation and use of hydraulic output device configuration 3 Relationship between the control handle and rear hydraulic connectors ...

Page 181: ...nto the socket 1 Stop the engine 2 Lower the suspended implement 3 Move the hydraulic output valve control handle to relieve the pressure in the hydraulic quick change connector seat 4 Remove the sealing cover of the quick change connector and clean the quick change connector Important When the quick change connector is not used the seat hole must be covered with a dust proof cover ...

Page 182: ...ction is not used have it sealed with a sealing cover During use connect the male connector put in the spare parts box with the female coupler of the quick change connector and then with the oil inlet and outlet of the oil cylinder of the hydraulic implement By operating the control handle upward and downward the double action cylinder will complete corresponding action 4 13 8 Operation of the rem...

Page 183: ...is allowed the hose moves freely between the tractor and implement If connecting the hose to the hydraulic connector of the tractor remove the sealing cover and insert the male coupler into the socket If required to disconnect the hose push the male coupler to the female coupler while pushing the connector ring forward and push it toward the tractor and then pull it back quickly to have it separat...

Page 184: ...he reversible plow move the control handle forward or backward according to requirements for turning the plow in clockwise direction or counterclockwise direction Fig 4 61 Example for connecting the single action cylinder Trailer with a hydraulic tipper If desired to tilt the trailer move the control handle to Up position If desired to lower the trailer move the control handle to Down position If ...

Page 185: ...return port must be connected with the no load discharge pipe Connect the pressure pipeline with the control valve For a hydraulic motor that may rotate in two directions connectors required for the 2 control valve is usually used Install an oil temperature sensor and if necessary install an oil cooler The allowable maximum temperature is 110 C 230 F Fig 4 63 Warning Do not move the control valve ...

Page 186: ...itch The locking pin must be fixed onto the hitch pin always Warning Overload is not allowed during traction or with a trailer coupled Warning During braking the trailer is braked at time earlier than braking of the tractor The tractor may be configured with either of following rear drawing devices Swing drawbar hitch frame 4 14 1 Swinging towing device optional The swinging towing device is only ...

Page 187: ...an change height of the towing point to obtain a towing height suitable for the mating implement Warning During operation the drawbar can swing from side to side but when the tractor tows the implement in reverse direction the 2 dowel pins must be inserted into the hole of the drawplate to keep the drawbar standstill 4 14 2 Towing device configuration 1 The hitch is suitable for all types of trail...

Page 188: ... 5 Install the elastic locking pin Fig 4 65 4 14 3 Towing device configuration 2 The hitch is suitable for all types of trailers and cannot be used along with the swinging drawbar Main structure of the towing device is shown as following figure Hitch pin Hitch frame Elastic locking pin During use conduct following operations 1 Remove the elastic locking pin 2 Remove the hitch pin from the hitch fr...

Page 189: ...Electrical system 188 5 Wheels ...

Page 190: ... unevenly worn transpose the left and right tires before continuous use Notice The tire replacement is of risks so such operation must be completed by professionals with professional equipment in accordance with the operating manual provided by the tire and wheel manufacturers Mismatched tires and wheels may cause damages tire explosion and even injuries or death Never install or use any damaged t...

Page 191: ...he cover tire into the wheel rim it is most difficult at last but you can use a hammer to tap the crowbar as shown in the figure Finally check whether the valve position is skewed and whether the tire edge and rim fit tightly During inflating check whether the inner tube is broken inflate it and use a hammer to knock at the cover tire until the regulated pressure has been achieved and then half di...

Page 192: ...ermitted speed Follow the instructions of the manufacturer and check frequently the inflation pressure Do not weld the rim or flange without having first removed the tire it will explode under the action of such intense heat Do not use flammable materials in making repairs Never inspect tires by tapping them unless previously deflated Notice Always check that the tire is seated correctly on both s...

Page 193: ...d in a short time and the tire valve may be cut off at the same time the driving resistance may increase accordingly If the front tires suffer from too low pressure it should be strenuous to control if too high the tire body fabrics will be excessively tensioned to cause fracture accelerate the tread wear and increase the bodywork vibration When working in the field the tractor may have its tire p...

Page 194: ...otice For the tire bead to seat correctly on the rim the inflation pressure must never exceed 200kPa 0 2 MPa If the tire is not seated correctly on the rim deflate it and repeat the operation Higher inflation pressures may cause the tire rim to explode We recommend using all the appropriate safety devices when inflating tires Notice A tire inflated to less than 80 of the recommended inflation pres...

Page 195: ...adside parking lot as soon as possible before troubleshooting Danger Please do not drive when any tire has become flat Otherwise irreparable damages may happen and your tractor may be out of control Only training tire experts can decide whether a tire should be repaired or replaced Important The tire repair can only be performed by qualified workshop professionals It should be ensured that all nec...

Page 196: ...d bolts again After every 50 hours working please tighten the wheel nuts and bolts according to the regulated torques After wheel tread adjustment or wheel replacement please tighten the wheel nuts and bolts according to the regulated torques Table 5 1 Description Grade Tightening torque Error Bolt M 14 x 1 5 8 8 120 Nm 12 2 kgm 5 Bolt M 16 x 1 5 8 8 184 5 Nm 18 8 kgm 5 Bolt M 16 x 1 5 10 9 271 Nm...

Page 197: ...the minimum front track width setting is used and the tractor is fitted with wide tires the steering angle will be very limited Check that the clearance between the engine hood and the fenders is sufficient To do this raise the tractor and then raise and lower the steered front wheel swing the axle and check that there is no interference Front axle width regardless of the wheel width 2WD front axl...

Page 198: ...ts and bolts to the following required tightening torques Front wheel Bolt M16x1 5 271 Nm 27 6 kgm Rear wheel Nut M20x1 5 550 Nm 56 kgm Before replacing any wheel please make sure that the tractor can t move and is appropriately supported When working with compressed air to bed in the tire on the rim always use an extension line of sufficient length to allow you to remain at the side of the tire T...

Page 199: ...hows different ways of wheel installation and two kinds of rear wheel treads Fig 5 8 Notice Widen the wheel tread when necessary to avoid overloading of the tractor Calculation of wheel tread when the wheel rims are fixed 5 3 2 Ordinary wheel tread adjustment 5 3 2 1 Front wheel tread adjustment 1 FL35 70HP Series Wheeled rear drive Tractor Adjustment to Front wheel track ...

Page 200: ... length of tie rod Finally install and tighten these bolts Four options for front wheel track 1200mm 1300mm 1400mm and 1500mm Fig 5 9 Fig 5 10 2 FL35 70HP Series Wheeled 4WD Tractor The front tire rim is welded together with the wheel spoke and which is non adjustable 5 3 2 2 Rear wheel tread adjustment The common wheel tread is 1300mm and the four wheel treads as shown in the figure can be availa...

Page 201: ...conditions Important During rear wheel tread adjustment do have the arrow marked on the tire side or the tip of the tire herringbone pattern pointing to the direction of driving forward and always ensure that the two front wheels and rear wheels are symmetrical to the center line of the tractor In time of adjustment first select the most appropriate rear wheel tread and then select the front wheel...

Page 202: ...n the figure and obtain the toe in value A B 4 8 by adjusting the length of the tie rod Fig 5 12 5 5 Notice After the front wheel toe in has been inspected and adjusted tighten the nuts at both ends of the tie rod 5 5 Half Axles with Removable Wheel Hub This type of half axles can have tread change available in the absence of rim flanges Danger Pease change the wheel tread with the help of another...

Page 203: ...e hub cap and hub on the drive shaft to the specified position and then fully tighten the bolts and Fig 5 13 Important Do adjust the two wheels in the same way 5 6 Ballast 5 6 1 Capacity for carrying ballast Danger We recommend that you use appropriate safety equipment as much as possible when carrying the ballast 5 6 2 According to the requirements of the statutory regulations a man can carry the...

Page 204: ...ck the weight of each ballast If it weighs more than the bearable limit male 30 kg female 20 kg please use appropriate mechanical lifting devices Intermediate plate The intermediate plate must be installed by at least two workers One undertakes to lift up in place while the other uses bolts to fix the load block Danger Please make sure to check the weight of each load If it weighs more than the be...

Page 205: ...or has large farm implement engaged in the rear for your safety it must be equipped with enough front ballast otherwise rollover risks may happen In order to adjust the front and rear ballast distribution it is necessary to install front ballast in the front of the tractor For heavy load ploughing or large sowing implement etc engaged front ballast must be equipped in order to prevent the tractor ...

Page 206: ... field operation cast iron ballast are usually installed on the rear wheel spokes to improve the tractor working performance and increase its traction Each cast iron ballast block is 30kg and 3 pieces 5 pieces 6 pieces can be installed at each side a If rear tires are selected to be 14 9 to 24 wide tires each rear ballast weighs 45kg and 2 or 3 ballasts may be mounted on each side Fig 5 16 Notice ...

Page 207: ...tor load the front axle to ensure safe steering The front axle load cannot exceed 20 of the tractor overall weight Notice Please keep in mind that any additional implement trailer or tractor onboard ballast may have great impact on manipulation braking and performance ...

Page 208: ...Electrical system 207 6 Electrical System ...

Page 209: ...necessary Notice The terminals and some components of the battery contain lead or lead compounds Wash your hands carefully after handling the battery 6 1 1 Accessing the battery Access the battery on the front end of radiator water tank proceed as follows Open the hood lock Open the hood Fig 6 1 Notice The battery can be charged only by using 12V voltage Dismantle battery Notice Protective glasses...

Page 210: ...t Take care that the acid electrolyte does not come into contact with your skin or clothes To remove the battery proceed as follows Disconnect connection between ground terminal and negative terminal Disconnect the power supply wire from the positive terminal Completely loosen and remove nut and gaskets Remove pressing plate of the storage battery Remove the battery from the holder To refit the ba...

Page 211: ...itch counterclockwise to the position OFF Connecting the battery Rapidly turn the switch clockwise direction to the position ON 6 2 Fuse Box The central electrical box mainly contains the main power supply relay electronic flasher lighting control relay and 15 way fuse plate The rated operating currents and corresponding protected electrical components are shown in the Figure When electric element...

Page 212: ... 30A Protected electrical component High beam light Low beam light Main power supply control circuit Top light Positio n light Backli ght Steerin g light Air conditi oning wipers Brake lights electri c horn Prehe ating Master fuse Before changing one fuse with fault Disconnect the power supply Repair fault that has burn out fuse Replace the burn out fuse Fuse box illustration ...

Page 213: ...h the following lights used on roads Two head lights on the front panel low beam headlight and high beam headlight Two steering lights on the front panel Two clearance lamp on the front panel Two lamps that are composed of indicator light on the side and direction indicators on two sides with cab Fig 6 5 Main Flash Lighting relay Master fuse Prehe ating B ra Stan dby Stan dby Wip ers Air Low beam ...

Page 214: ...6 4 1 High beam and low beam headlight Light model used on roads of low beam and high beam headlight is 12V H4 55 60W to provide enough width and far enough illumination for vehicles 1 Low beam light and high beam light Fig 6 6 6 4 2 Bulb replacement Important Only fit replacement bulbs of the same type and specification as those originally fitted ...

Page 215: ...lector Embed one new bulb to guarantee positioning mark number is consistent with the notch of reflector Rotate pinch cock and lock it Re fix rubber cap to guarantee that it can be greatly installed on edges of the reflector Connect the power connector of bulb Close the bonnet Fig 6 7 Fig 6 8 Important Avoid touching the inner surface of the reflector Make sure no foreign material gets inside the ...

Page 216: ...lamp on the front panel Fig 6 9 6 4 3 Bulb replacement Steps for replacing bulb are as below Lift Engine bonnet Remove the bulb connector Gently take out the bulb in position Slightly embed new bulb and fix bulb Insert the connector into the terminal of the bulb Close the bonnet Fig 6 10 6 4 3 Steering light on the front panel ...

Page 217: ... 4 Bulb replacement Steps for replacing bulb are as below Lift Engine bonnet Remove the bulb connector Remove the protective rubber cap Slightly remove the bulb Slightly embed new bulb and fix bulb Insert the connector to the terminal of the light Close the bonnet Fig 6 12 Fig 6 13 6 4 4 Side direction indicators and side lights ...

Page 218: ...e bulbs enclosed in a single container on each side of the tractor Direction indicator light equipped with bulb type 12VP21W Sidelight equipped with bulb type 12VP10W Fig 6 14 6 4 5 Bulb replacement Important Only fit replacement bulbs of the same type and specification as those originally fitted ...

Page 219: ...lightly press the bulb that need be replaced meanwhile rotate to bulb or by anti clockwise to break away from the bulb socket Slightly embed all new bulbs and rotate by clockwise until the bulb is locked tightly refer to the figure Fit the transparent plate back on and secure it with the two screws Fig 6 15 Fig 6 16 Important Avoid touching the inner surface of the reflector Make sure no foreign m...

Page 220: ...cification as those originally fitted To replace the bulb proceed as follows One screwdriver is used to loosen and remove six screws that are used to tighten red and yellow transparent board Slightly remove the transparent board to reach the bulb Slightly press the bulb or that need be replaced meanwhile rotate anti clockwise to break away from the bulb socket Gently rotate the new bulb clockwise ...

Page 221: ...To adjust the headlight aim the tractor must be parked on a level surface at a distance of 10 m from a vertical wall in normal road transport condition the tires must be inflated to the recommended pressures and the front wheels must be in the straight ahead position Switch on the low beam headlights The figure shows calibration of head light when driving on highway points on the wall correspondin...

Page 222: ... headlights on mark the centers on the wall and then reverse to a distance of 10 m from the wall Horizontal adjustment of head light With the headlights switched on the centers of the beams should be apart the distance A indicated in the figure Vertical adjustment of head light With the headlights on the lines delimiting the light and dark zones on the wall should be 10 cm apart as shown in the fi...

Page 223: ... worklights in the rear of the fender Front work lights on the top of cab Light model of front worklights on the top of cab is H3 12V 55W Fig 6 21 Rear worklights on the top of cab Light model of rear worklight on the top of cab is H3 12V 55W Fig 6 22 Bulb replacement Important Only fit replacement bulbs of the same type and specification as those originally fitted ...

Page 224: ...ke off protection cover Disconnect the light connector from the power supply Using a screwdriver loosen the screw to separate the bulb socket from the reflector glass Remove the bulb by rotating it counterclockwise Install the bulb by rotating it clockwise Using a screwdriver tighten the screw to securely attach the bulb socket to the reflector glass Connect the bulb connector to the power supply ...

Page 225: ...cal system 224 Lamp model of two work lights in the rear of the fender is H3 12V 35W Fig 6 25 Bulb replacement Important Only fit replacement bulbs of the same type and specification as those originally fitted ...

Page 226: ... to access the bulb Gently rotate the bulb to remove it out of the reflector glass Install new bulb Refit the protective cover Fix it suing screws Fig 6 26 Fig 6 27 Important Avoid touching the inner surface of the reflector Make sure no foreign material gets inside the reflector 6 4 2 Door controlled interior illuminating light The tractor is equipped with the following door controlled interior i...

Page 227: ...of the interior illuminating light is 12V 5W F 2 Fig 6 28 Bulb replacement Important Only fit replacement bulbs of the same type and specification as those originally fitted Steps for replacing bulb are as below Remove light guard by pulling it outwards Fig 6 29 ...

Page 228: ...ard Fig 6 30 6 5 Accessories 6 5 1 Power output socket The tractor is equipped with power output socket of the back trailer The socket is installed on junction plate of quick change connector in the rear of the tractor Specific position is shown in the figure Fig 6 31 Power socket of the tractor power socket of implement Standard socket Power socket of the tractor with seven pins ...

Page 229: ...sions which interfere with the operation of the existing electronic or other components of the tractor This is particularly a problem with the following types of equipment Radio CB radio receiving equipment Mobile telephone ETACS GSM and so on As for installation of other mobile remote communication systems such as radio device telephone attentions must be paid to the following supplementary instr...

Page 230: ...Electrical system 229 requirements 6 6 Electrical Schematic Diagram ...

Page 231: ...r supply and starter 仪表及信号系统 Instrumentation and signaling system 喇叭 Loudspeakers 制动 Brake 灯光及信号系统 Lighting and signaling system 点火锁 Ignition lock 功能 Function 位置 Position 电压调节器 Voltage regulator 发电机 Power generator ...

Page 232: ... gauge 转速表 Tachometer 水温表 Water temperature gauge 充电指示灯 Charge lamp 燃油传感器 Fuel sensor 转速传感器 Speed sensor 水温传感器 Water temperature sensor 离合状态指示灯 Preheating indicator light 预热指示 Preheating indicator 位置灯指示 Position light indicator 右转向指示 Right steering indicator 左转向指示 Left steering indicator 近光灯指示 Low beam light 远光灯指示 High beam light 喇叭开关 Horn switch ...

Page 233: ... 制动开关传感器 Brake switch sensor 闪光器 Flasher 危险报警开关 Hazard warning light switch 转向开关 Steering switch 左转向灯 Left steering indicator 右转向灯 Right steering light 驾驶室转向灯 Cab steering light 前位灯 Front position light 位置灯 Position light 驾驶室位置灯 Cab position light 后位灯 Rear position light 灯管总开关 Master lighting switch 位置 Position 端子 Terminal 变光开关 Dimmer switch ...

Page 234: ...h for work lights on cab or rear wo 后工作灯 驾驶室机型不带 Rear work lights not provided for tracto 驾驶室工作灯 Work lights on cab 驾驶室电器装置 Electrical devices in cab 驾驶室CD收放机 CD player in cab 风扇 Fan 雨刮器 Windscreen wiper 端子 Terminal 位置 Position 侧壁灯 Side wall light 暖风系统 Heating system 空调系统 Air conditioning system 空调及暖风系统二选一 Select either air conditioning or heating ...

Page 235: ...234 7 On board Spare Parts Tools and Quick wear Parts ...

Page 236: ...nk 35A light green piece 1 5 Engine on board spare parts On board tools and accessories set 1 Provided by manufacturer of accessories of engine 6 Seal rings for lifter assembly set 1 Provided by the lifter manufacturer non pusher type model 7 1 2 7 1 2 On board spare tools No Code Name Quantity Remark 1 GB T 3390 1 Sleeve 10 12 5 A L 1 2 Sleeve 13 12 5 A L 1 3 Sleeve 16 12 5 A L 1 4 Sleeve 18 12 5...

Page 237: ...13 Double end wrench 18 21 1 14 Double end wrench 24 27 1 15 Double end wrench 30 34 1 16 Double end wrench 36 41 1 17 GB T 4953 Slip joint pliers 165mm 1 18 GB T 10640 Phillips screwdriver 1 100 3 B 1 19 GB T 10639 Screwdrivers for flat tip screws 100 0 6 4Ⅰ 1P 1 20 GB T 1164 Lever type grease gun A400 1 21 GB T 5356 Allen wrench 8 1 22 Engine on board spare parts 1 Set Provided by manufacturer o...

Page 238: ...gether with the tractor set 1 Provided by manufacturer of accessories of engine 7 1 4 Important 1 The tools spare parts and documents of the engine should be checked against the packing list of the diesel engine 2 The list of tools and spare parts provided together with the engine is for reference only and subject to change without notice 7 2 Quick wear Part The quick wear parts of FL35 70HP serie...

Page 239: ...window glass piece 1 Used for cab 6 Left door glass piece 1 Used for cab 7 Right door glass piece 1 Used for cab 8 Left widow glass piece 1 Used for cab 9 Right widow glass piece 1 Used for cab 10 Rear windshield glass piece 1 Used for cab 11 Rearview mirror assembly piece 2 Used for cab 12 Fuse plate 10A piece 2 13 Fuse plate 15A piece 2 14 Fuse plate 20A piece 2 15 Fuse plate 25A piece 2 16 Fuse...

Page 240: ... Used for cab 24 12 P21W 5W Rear position brake light bulb piece 2 25 Engine quick wear part piece 1 See the engine specification for details Important 1 All the spare parts tools and quick wear parts listed above are dedicated parts for the tractor Please use them properly in repair and maintenance or store them properly to prevent loss Installed parts getting lost could affect the performance of...

Page 241: ...240 ...

Page 242: ...241 8 Maintenance Specification ...

Page 243: ...up the machine on the steering wheel If necessary place warning mark surrounding the tractor Notice Any maintenance operation must be conducted on suitable platform whose height is higher than 1500mm to guarantee safety Notice Some of the illustrations in this manual show the tractor with panels or guards and panels removed for the sake of clarity Never use the tractor unless these panels and guar...

Page 244: ...e limited period Lack of daily maintenance may cause unnecessary fault so that lifetime of the machine has been shortened Danger The engine can be started by using the key only sitting at the driving position Don t try to use short circuit starting motor terminal to start the engine When the shift lever or safety circuit of the clutch is bypassed the tractor will start to go forwards It will cause...

Page 245: ... If the tractor undertakes extremely heavy work or is used in environment with lots of dust regular maintenance frequency shall be enhanced Strictly abide by recommended maintenance interval period What s more recommended lubricant and liquid can only be used 8 1 2 Cleaning tractor and hitched implements Notice The tractor can be cleaned after all parts have been cooled 8 1 3 Important Sprinkler o...

Page 246: ...m the distributor of DEUTZ FAHR Utilization of any other oil that has not been recommended may seriously damage the tractor If the tractor has not been maintained as per the recommended maintenance interval period and stipulated lubricant has not been used the tractor will lose the warranty qualification Warning Guarantee that any vessel for storing the lubricant is absolutely clean The funnel and...

Page 247: ...ion al Standard Viscosity grade of engine oil sump fuel injection pump engine oil of speed controller and oil bath type air cleaner will comply with viscosity classification of Society of Automotive Engineers SAE If the temperature is less than 5 SAE10W will be used if the temperature is more than 5 SAEl5W 40 multi grade oil that is generally used all the year around will be used Quality grade com...

Page 248: ... transmission and hydraulic pressure execution standard JB T7282 14 Internation al Standard MFll35 of Massey Ferguso Company or M2C 86A of Ford Company or Common oil J20A of John Deer Company G0 central drive of front drive axle National standards Nl00D dual purpose oil for transmission and hydraulic pressure execution standard JB T7282 7 Internation al Standard MFll35 of Massey Ferguso Company or...

Page 249: ...titute API 8 3 Service Cycle Technical service cycle will be confirmed for FL35 70HP series tractor in accordance with number of accumulative working hours Service is divided into technical maintenance per shift working for every 10h technical service when working for 50h technical service when working for 200h technical service when working for 400h technical service when working for 800h and tec...

Page 250: ...tion will be conduced when working every 10 50 200 and 400 hours 5 800 Designated maintenance operation will be conduced when working every 10 50 200 400 and 800 hours 6 1600 Designated maintenance operation will be conduced when working every 10 50 200 400 800 and 1600 hours Table 8 3 Frequency Items that will be maintained Work to be conducted Refer to index code of guideline Lubricatio n Dry mo...

Page 251: ...emand 8 5 4 Hydraulic steering X Demand 8 5 5 Cooling liquid X Demand 8 5 6 Free stroke of clutch pedal X Demand 8 5 7 Service brake X Demand 8 5 8 Fuel oil quantity X Demand 8 5 9 Electronic system X Demand 8 5 10 Tire inflation pressure X Demand 8 5 11 Every 50 work hours Check belt tension of the engine X Demand 8 6 1 Two end shafts of steering cylinder X Demand 8 6 2 ...

Page 252: ...eel drive front axle pendulum shaft X Demand 8 6 4 Front shaft central swing pin bushing X Demand 8 6 5 Bolts nuts in key parts X Demand 8 6 6 Reach 200 hours Work to be performed when and after operating time reaches 200 hours Fuel filter X Deman d 8 7 1 Spin on type oil filter X Deman d 8 7 2 Hydraulic pressure oil suction Filter of lifter X Deman d 8 7 3 Engine sump lubricating oil X Deman d 8 ...

Page 253: ...med when and after operating time reaches 400 hours Hydraulic oil of the transmission system X Demand 8 8 1 Lifter hydraulic oil X Demand 8 8 2 Working stroke of parking brake X Demand 8 8 3 Respirator filter element X Deman d 8 8 4 Front wheel drive lubricating grease for tractor with 2WD X Demand 8 8 5 Oil level of central drive of front drive axle X Demand 8 8 6 Lubricating grease of master pin...

Page 254: ...ter of fuel tank of hydraulic steering X Demand 8 8 9 Every 800 work hours Work to be performed when and after operating time reaches 800 hours Fuel tank of hydraulic steering and pipeline X Demand X Deman d 8 9 1 Fuel tank X Deman d 8 9 2 Gap of exhaust valve of engine X Demand 8 9 3 Fuel oil injection pump X Demand 8 9 4 Lubricating oil of transmission system X Deman d 8 9 5 Hydraulic oil of lif...

Page 255: ... Notice 1 Check whether flexible pipe has leakage or not or whether it has been dismantled together with other components whether bolt is loosened or not and whether sundries are accumulated or not Before utilization please block leakage to guarantee flexible pipe is pressed and to tighten loosening bolt Notice 2 Correct lubricant will be used and product type is shown in the table lubricant liqui...

Page 256: ...ransmission belt Comprehensive overhaul must be conducted for the engine after 12 000 working hours 8 4 Enter into Engine Compartment Lift hood Danger Watch out that moved part has shear hazards when starting and closing hood or rising its position Danger Watch out heated part when rising the hood Some parts of the engine may reach very high temperature which is easy to cause burn For tractors equ...

Page 257: ...ifter if it is not enough it will be increased Check liquid level of engine oil sump the tractor will be parked on the horizontal ground Check will be conducted after the engine has stopped working for 15min 4 Lubricating grease listed in the maintenance table 8 1 5 Check inflation pressure of front and rear tires if pressure is not enough it will be inflated 6 Check free stroke of main and auxili...

Page 258: ... replacing oil or checking oil level The engine need be operated for several minutes before checking oil level of the engine oil Shut off the engine check oil level after one minute Check oil level of engine oil Take out the oil gauge in the front left of engine oil sump use dust free duster cloth to clean oil dip rod return and then take it out again to check oil level If it is between the maximu...

Page 259: ...rking shown by arrow add lubricating oil to the specified level And re install it Fig 8 4 Important The correct operations and maintenances of the air filter are directly related to the service life of engine Ensure to keep clean the air filter Check clean and replace oil once every work shift during farmland operations When the tractor is working with harvester elevating the position of primary f...

Page 260: ... charging the storage battery Notice It will be charged by using 12V charger Danger Gas released from the storage battery is easily exploded therefore the storage battery must be kept away from electric spark or open fire Battery storage or charged environment requires great ventilation Prevent acid electrolyte from contacting skin or clothes Warning Please cut off power supply when there is not e...

Page 261: ...e connected solidly to prevent fusion and corrosion when starting Amphenol connector shall be coated with Vaseline Protect cleanliness of external terminal of storage battery Output voltage of the engine will be regularly checked to confirm whether it complies with standard or not Voltage is 14 2 0 25 V Notice When the battery is being charged indoor air will be smooth and far away from open fire ...

Page 262: ...k for oil trace If no oil trace it indicates that remaining oil in the tank is sufficient Find out and remove cause for oil leakage Remove the oil tank Add oil until oil level reaches the intermediate scale on the oil dipstick Then refit the oil tank Be sure there is no leakage of hydraulic steering oil tank oil pipe and connections Otherwise steering failures will occur Regularly clean and replac...

Page 263: ...er frequently check the antifreeze concentration according to ambient temperature If necessary timely recover to normal concentration 2 As for the tractor that has not used anti freezing solution when water temperature is reduced to below 70 water shall be discharged completely under the situation that the engine is under idle running to prevent cooling water from freezing and damaging the engine ...

Page 264: ...this can result in the release bearing overheat hence the clutch malfunction Therefore it is necessary to regularly check and adjust the clearance The gap between releasing lever and end clearance of release bearing of the clutch is between 2 and 2 5mm Height difference of end sockets of three releasing levers is not more than 0 2mm Adjustment Loosen the lock nut Turn the adjusting nut so that the...

Page 265: ...ss of utilization the bearing will be dismantled for cleaning and immersed into melted high temperature lithium base grease until the bearing is filled with lubricating grease It will be taken out after it is cooled Surface of it will be cleaned before installing it at the original position Important 1 When using the clutch please pay attention to rapidly and completely separate and softly and smo...

Page 266: ...raw bar Working stroke of brake pedal is between 100mm and 120mm Specific adjustment method of actuating mechanism of brake is Loosen the nut Adjust the draw bar so that the total travel of brake pedal reaches 100mm 120 mm and the free travels of left and right pedals are roughly equals Tighten the lock nut ...

Page 267: ...lel length is equal it means that adjustment is proper otherwise it need adjusted again If it has not been adjusted properly for several times interior part of the brake shall be checked Danger Free strokes of left and right braking pedals of the tractor must be consistent otherwise the tractor will suddenly turn to one side to cause accident when emergency braking 8 5 9 Check of fuel oil amount F...

Page 268: ...out fuel oil in the fuel tank when operating the engine Should the engine stops running because fuel is used up be sure to bleed air from the fuel injection system after refueling Notice Don t inject oil to fuel tank in places with open fire or in sealed place No smoking when filling oil Please shut off the engine before filling oil Fig 8 10 ...

Page 269: ... Warning Please abide by rules for environmental protection Any fluid petroleum diesel and cooling liquid or filter and battery must be discarded in accordance with applicable laws and regulations Drain water from Sedimentation glass Sedimentation glass must be regularly drained or after the tractor is put into use in the winter ...

Page 270: ...pressure Tire pressure will be checked by using pressure meter Inflation pressure of tire is shown in the technical specification of the tractor Important If tire pressure is too high or too low it will shorten the lifetime of the tire and will cause adverse influence to driving and control of the tractor Notice When replacing tire or regularly maintaining or repairing the tractor shall be put up ...

Page 271: ...k the whole belt if any damage please immediately replace Warning If the transmission belt of the cooling device has been damaged the cooling system of the engine cannot be operated normally it is prohibited to open the engine Transmission belt of the engine Front view of the engine 1 Pulley of AC generator 2 Fan pulley 3 Idle pulley 4 Pulley crankshaft Fig 8 13 Adjustment of tensity of transmissi...

Page 272: ...justment method is as below Loosen fixed nut on the regulating support of the generator Wrench the generator to tension the adhesive tape Tighten fixed nut on the regulating support of the generator Fig 8 14 8 6 2 Lubrication for two end shafts of steering cylinder 8 6 2 1 Two wheel drive tractor Apply grease to nipple and using a grease gun Fig 8 15 8 6 2 2 8 6 2 2 Four wheel drive tractor ...

Page 273: ...to nipple and using a grease gun Fig 8 16 Fig 8 17 8 6 2 3 8 6 3 Front shaft kingpin bushing for tractor with 2WD Apply grease to nipple using a grease gun Fig 8 18 8 6 4 8 6 4 Four wheel drive front axle pendulum shaft ...

Page 274: ...g 8 19 Lubricate the front support with pivot on the front shaft Use lubricating grease pump to inject lubricating grease via the nozzle of the lubricating grease gun position shown in the drawing Fig 8 20 8 6 5 8 6 5 Front shaft central swing pin bushing for tractor with 2WD Apply grease to nipple using a grease gun Fig 8 21 8 6 6 8 6 6 Check and tighten bolts nuts of key parts to specified torqu...

Page 275: ... matters Torque wrenches must be used when the main bolts and nuts of the tractor are tightened Check and tighten bolts nuts of the following key parts to the specified torque every time after working 50 hours Front wheel Bolts nuts between hub with wheel disk Nuts between wheel disk with rim Fig 8 21 1 Rear wheel ...

Page 276: ...im Bolts nuts between hub with wheel disk Flange fastening bolts nuts for stepless adjustable wheel hub Bolts for rear ballast Fig 8 21 2 Front ballast Bolts for fixing ballast support Bolts Nuts for fixing ballast Fig 8 21 3 Fig 8 21 4 ...

Page 277: ...nut Assembly location Thread specification Tightening torque N m Front wheel Rim and wheel disk M16X1 5 10 9 270 320 M16x1 5 8 8 199 243 M14X1 5 10 9 178 218 wheel disk and wheel hub wheel disk and wheel hub M18X1 5 10 9 397 457 M16X1 5 10 9 265 311 M14X1 5 10 9 178 218 M12X1 25 10 9 106 130 Rear wheel Flanges for step less M16X1 5 10 9 270 320 ...

Page 278: ...eed be wasted as per requirements of relevant provisions will be properly disposed in accordance with codes on environmental protection 8 7 2 Notice If high pressure fuel or petroleum contacts eyes it may cause serious burn blindness and even death It is not easy to observe high pressure liquid leakage which can be checked by using paperboard or wood chip Keep your hands away from it When checking...

Page 279: ...ant flammable materials Warning Engine cannot be used continuously if fuel is to be used out If the engine shuts down for lack of fuel oil please discharge air in the fuel injection system Warning Abide by safety regulations for storing fuel oil in the fuel tank Warning Please shut off the engine if oil need be added Diesel splashed on the vehicle body will be cleared in time Important Please guar...

Page 280: ...for 200h Fig 8 22 8 7 2 Maintenance of spin on type oil filter Notice Filter contains compressed gas or oil All repairs will comply with specification provided by the manufacturer Notice Collect oil that has been used in suitable vessel and send to authorized collection center Danger Please prevent heat oil from burning skin when discharging please be careful ...

Page 281: ...ed for spin on type oil filter 4 Tighten new filter 5 Re start the engine and check its sealing property after it has been under idler running for several minutes Fig 8 23 Shut off the engine re check oil level after it is cooled if necessary and inject oil from oil filler Notice Don t inject oil that is different to existing oil including type and viscosity Fig 8 24 8 7 3 Maintenance of hydraulic...

Page 282: ... it must be replaced with new filter element Fig 8 25 8 7 4 8 7 4 Lubricating oil of engine sump will be replaced Notice Collect oil that has been used in suitable vessel and send to authorized collection center 8 7 5 Notice Energy accumulator contains compressed gas or oil Please refer to manual provided by the manufacturer before repair Danger When the engine is heated there is burning danger Wh...

Page 283: ...t side of the oil sump 3 Loosen the fuel drain plug on the left side of the tractor Fig 8 26 Danger Please prevent heat oil from burning skin when discharging please be careful 4 After all oil has been discharged from the oil sump sealing gasket of purge cock will be checked If it need be replaced it will be replaced before screwing the purge cock Fig 8 27 ...

Page 284: ...heck oil level after it is cooled if necessary and inject oil from oil filler Fig 8 28 Notice It is prohibited to inject oil that is different from existing engine oil grade or viscosity 8 7 5 Replacement of lubricating oil for oil bath air filter Unlock the lower hook of filter disassemble the bottom oil pan fully discard the dirty oil and thoroughly clean it with kerosene or diesel Meanwhile cle...

Page 285: ...situations Park the tractor on horizontal plane Engine must be closed for at least 5 minutes parking brake must be used Hydraulic control valve pole must be in the neutral position All hydraulic cylinders must be retracted Pull out the oil dipstick as shown in right figure Oil gauge will be cleaned with dust free duster cloth and placed back Then it will be re taken out to check oil level Check wh...

Page 286: ...ifter hydraulic oil Danger Be careful for discharging when using hot oil may cause serious burning 8 8 3 Check whether oil level is normal or not place the tractor under the following situations Park the tractor on horizontal plane Engine must be closed for at least 5 minutes parking brake must be used Hydraulic control valve pole must be in the neutral position All hydraulic cylinders must be ret...

Page 287: ... it will be re taken out to check oil level Check whether oil level complies with requirements or not A Maximum oil level B Minimum oil level If failing to comply with oil level requirement please inject engine oil specified in the table of lubricant and reference dosage The oil filler port is located on the top of lifter box as shown in figure Fig 8 32 Fig 8 33 Fig 8 34 ...

Page 288: ...287 Fig 8 35 ...

Page 289: ...ntrol lever must be completely lifted when using parking brake Important If you need park on abrupt slope with the gradient of more than 15 slope gradient 33 place chuck underneath rear wheel and fix the tractor In any way the tractor should not be parked on abrupt slope Fig 8 36 ...

Page 290: ... filter element is located on the left rear end of the tractor Clean this filter element as per technical specification once every 400 working hours If this filter element is difficult to clean or is damaged replace it with new filter element Specific steps are as below 1 Unscrew the respirator cover Fig 8 37 1 Take out the respirator filter element 2 Clean the respirator filter element and the re...

Page 291: ...authorized collection center Notice If skin or eye is injured by high pressure fuel and oil it may cause serious burning blindness and even death Leakage of high pressure liquid may not be seen When seeking for leakage one piece of hard cardboard or wood will be used It is prohibited to use both hands Safety glasses will be worn to protect your eyes If any liquid is permeated into skin please imme...

Page 292: ...he screw plug oil level will be checked via the oil filler Add grease till the grease reaches the lower edge of filler port Important Sealing gasket will be replaced when removing the screw plug Fig 8 40 Check vent valve Regularly clear vent valve Fig 8 41 8 8 7 Add lubricating grease of master pin oil cup of front drive axle ...

Page 293: ...e of high pressure liquid may not be seen When seeking for leakage one piece of hard cardboard or wood will be used It is prohibited to use both hands Safety glasses will be worn to protect your eyes If any liquid is permeated into skin please immediately seek for treatment from medical workers with experience for handling special problems 8 8 9 Notice The tractor will be parked on flat ground whe...

Page 294: ...ling gasket will be replaced when removing the screw plug 8 8 9 Cleaning and maintenance of filter of hydraulic steering oil tank Filter of hydraulic steering oil tank will be cleaned and maintained after the tractor has been worked for 400 hours 1 Cover of hydraulic steering oil tank 2 Filter screen 3 Fixed hood of filter element 4 Spring 5 Filter element 6 Hydraulic steering oil tank Fig 8 44 Sp...

Page 295: ... steering oil tank 7 Inject oil to required oil level 8 Install cover of hydraulic steering oil tank 8 9 Maintain Every 800 Hours 8 9 1 Check and maintenance of hydraulic steering fuel tank and pipeline Danger Please prevent heat oil from burning skin when discharging please be careful Notice Collect oil that has been used in suitable vessel and send to authorized collection center Notice Energy a...

Page 296: ...lve steering wheel under parking state of the tractor to release steering hydraulic oil when it is heated Add suitable hydraulic oil pressure after it has been discharged Oil way will be deflated after oil has been injected Fig 8 45 Air bleeding method for oil lines Manually rotate steering wheel to one side loosen corresponding steering oil tube if it is hard to steer Oil tube will be locked tigh...

Page 297: ...d Warning When injecting oil switch of the engine will be turned off and any leaked diesel on the tractor will be cleared Warning Don t use out fuel oil in the fuel tank when operating the engine If the engine of the tractor stops operation as fuel has been used out air must be pumped from the fuel injection system Notice Don t inject oil to fuel tank in places with open fire or in sealed place No...

Page 298: ...taining fuel tank of the engine 1 The tractor will be parked on the horizontal ground and engine will be closed for cooling 2 One suitable vessel will be placed below oil drain outlet 3 Remove purge cock 4 Flush fuel tank 5 Install and tighten purge cock 6 Add fuel from oil filler 8 9 3 Adjust gap of air intake and exhaust valve of the engine ...

Page 299: ...p Keep your hands away from it When checking please wear safety glasses to protect your eyes If the skin is burned by liquid please immediately seek for professional treatment The authorized service center has the right to conduct this maintenance operation Refer to maintenance manual of the engine 8 9 5 Replace lubricating oil of transmission system Warning Abide by laws and regulations on enviro...

Page 300: ...or eye is injured by high pressure fuel and oil it may cause serious burning blindness and even death Leakage of high pressure liquid may not be seen When seeking for leakage one piece of hard cardboard or wood will be used It is prohibited to use both hands Safety glasses will be worn to protect your eyes If any liquid is permeated into skin please immediately seek for treatment from medical work...

Page 301: ... container underneath each of the drain ports of left and right brakes 8 Remove purge cock of oil drain outlet of brake Fig 8 49 Danger Please prevent heat oil from burning skin when discharging please be careful 9 After lubricating oil has been completely discharged the purge cock will be tightened 10 Replace the oil filter on the right side of gearbox ...

Page 302: ...quid level is too low oil will be added to required level Notice Sealing gasket will be replaced when removing the screw plug 8 9 6 Hydraulic oil of lifter Warning Abide by laws and regulations on environmental protection All liquid oil diesel and cooling liquid filter and battery must be discarded in accordance with applicable laws and regulations 8 9 7 Notice Energy accumulator contains high pre...

Page 303: ...injured by high pressure fuel and oil it may cause serious burning blindness and even death Leakage of high pressure liquid may not be seen When seeking for leakage one piece of hard cardboard or wood will be used It is prohibited to use both hands Safety glasses will be worn to protect your eyes If any liquid is permeated into skin please immediately seek for treatment from medical workers with e...

Page 304: ...njected to required liquid level from the oil filler Configuration 1 oil filler is shown in the figure Configuration 2 oil filler is shown in the figure Fig 8 52 Fig 8 53 7 The engine will be closed for adequate cooling after the engine has been operated for five minutes 8 Check whether liquid level complies with requirements or not If the liquid level is too low oil will be added to required leve...

Page 305: ...tem of the engine Notice If the engine is still heated don t take out the cover of the radiator If heated radiator is opened under high pressure boiling liquid and vapor will flow out which will cause serious injury to the driver and other persons near it Before removing the cover of radiator the engine will be closed for cooling the circuit 8 10 2 ...

Page 306: ...n valve in the bottom of the water tank shall be opened The water drain valve will be closed after cleaning In addition water will be added to make engine operate for several minutes and then water will be discharged After the engine has been cooled new anti freezing solution or cooling water will be added in accordance with provisions Fig 8 54 8 10 2 Cooling system of the engine that has used ant...

Page 307: ...imit 6 Shut off the engine exhaust the system and fill it with water and then re start the engine to reach about 1000rpm and operate for 5 minutes 7 Re exhaust the system 8 Cooling liquid will be used to fill the circuit so that the engine will be operated for several minutes If necessary cooling liquid will be supplemented to the system Important 1 In winter frequently check the antifreeze concen...

Page 308: ... in the specification provided by the manufacturer before any repair Notice If skin or eye is injured by high pressure fuel and oil it may cause serious burning blindness and even death Leakage of high pressure liquid may not be seen When seeking for leakage one piece of hard cardboard or wood will be used It is prohibited to use both hands Safety glasses will be worn to protect your eyes If any l...

Page 309: ...outlet 3 Loosen the oil drain plug to discharge the liquid Fig 8 56 Danger Please be careful in the process of oil drain hot oil may cause serious burning 4 Loosen the vent bolt to accelerate discharge of oil Fig 8 57 5 After lubricating oil has been completely discharged the purge cock and vent bolt will be re installed ...

Page 310: ...eplaced when removing the screw plug Danger Oil that is different from original oil model type or viscosity cannot be injected 8 10 4 Replacement of lubricating oil of front drive axle final drive Warning Abide by laws and regulations on environmental protection All liquid oil diesel and cooling liquid filter and battery must be discarded in accordance with applicable laws and regulations ...

Page 311: ...rom the medical personnel experienced in handling of such special problems Specific operation for replacement of lubricating oil of front drive axle final drive 1 Park the tractor on flat ground 2 One suitable vessel will be placed underneath the oil drain outlet 3 Rotate the wheel hub to place the screw plug on the bottom Disassemble the screw plug to drain the oil Fig 8 59 4 After the full drain...

Page 312: ...2 Pedal return spring 3 Draw bar weldment 4 Bolt 5 Hex thin nut 6 Adjustment pipe 7 Left handed thread draw bar weldment 8 Return spring of bearing block 9 Release bearing block 10 Release bearing block Adjustment to the double acting clutch include that to the primary clutch and that to eh secondary clutch 30 to 35 free travel 125 135 primary clutch pedal travel 200 220 total travel ...

Page 313: ...hat the distance between release lever end of primary clutch and release lever end of secondary clutch is 8mm and the height difference between release lever ends of secondary clutch is not greater than 0 2mm Tighten the lock nut Lubrication of bearing of clutch Fore bearing of the clutch will be coated with enough lubricating grease when assembling Release bearing needn t be coated with lubricati...

Page 314: ...f brake fluid 8 11 2 2 User need operate the brake to check the brake effect 8 11 2 2 Adjustment of brake operating mechanism Fig 8 62 1 Hand brake control lever 2 Pedal 3 Return spring 4 Left handed thread draw bar fork 5 Nut 6 Draw bar Working stroke of brake pedal is between 100mm and 120mm ...

Page 315: ...d mutually parallel length is equal it means that adjustment is proper otherwise it need adjusted again If it has not been adjusted properly for several times interior part of the brake shall be checked Danger Free strokes of left and right braking pedals of the tractor must be consistent otherwise the tractor will suddenly turn to one side to cause accident when emergency braking 8 11 2 3 Adjustm...

Page 316: ...ll bevel gear This can reduce the bearing pre tightening force Therefore inspection shall be performed periodically at level 3 maintenance Adjustment Measure the width A between the two bearings Apply an axial force of 350N to the bearings Then measure the width B between the two bearings Select a shim which is δ A B in thickness Install the shim in place Tighten the round nuts and lock them using...

Page 317: ...ring 13 Planetary gear shaft 14 Center ring 15 Differential housing The left and right bearing of the differential are also preloaded Wear of the bearing can result in axial play of the big bevel gear This can reduce the bearing pre tightening force Therefore inspection shall be performed periodically at level 3 maintenance Adjustment Tighten the left and right adjusting nuts so that the axial pre...

Page 318: ...ir gear engagement adjustment shall be performed after bearing pre tightening Checking gear backlash Insert a lead sheet between the idle teeth of the large and small bevel gears Rotate the gears to squeeze the lead sheet Then take out the lead sheet and measure its thickness at a point near the large end of gear i e backlash which shall be 0 15mm 0 3mm Make measurements at three points evenly dis...

Page 319: ...ght Adjustment is made by changing the thickness of the shim 2 to cause axial movement of small bevel gear and by adjusting the shim 5 to cause movement of large bevel gear In order not to destroy differential bearing preload be sure to add the shims removed from the bearing block to the bearing block on the other side so that the total number of shims of the left and right bearing blocks remains ...

Page 320: ...sing 6 screws via the differential and bearing blocks In the differential housing there are 2 planetary gears and 2 half shaft gears Shims are fitted between the planetary gears half shaft gears and the differential housing The planetary gears are on the planetary gear shaft At one end of the planetary gear shaft there is a cut Both ends of the cut are clamped by thrust bolts to prevent rotation a...

Page 321: ...ft is connected to the planetary gear carrier via spline and fixed with the locking screw In order to improve engagement of the sun gear with the planetary gears to achieve uniform load distribution no fixed support is provided for the sun gear in other words the sun gear is at the floating status A floating clearance G 0 2 0 3 mm exists between the planetary gear carrier and spacer 8 11 4 2 Final...

Page 322: ...heels shall be capable of flexible rotation Then insert the split pin 4 and install the bearing cap 3 Fig 8 68 3 Oil cup Screw Bearing cap 6 Split pin Adjustment nut Bearing 8 11 6 8 12 Adjustment of Hydraulic Hitch System 8 12 1 Adjustment of safety valve of distributor Important Safety valve of the distributor has been adjusted correctly when delivering Users needn t adjust it If it need be adju...

Page 323: ...ating lever is not in the lowest position so that the hitch mechanism starts lowering In such case once the operating lever is released the operating lever immediately bounces back to neutral position and the lowering is stopped If the operating lever is operated from the neutral position to the lowest position in which case a clear feeling of oriented operating lever is present the hitch mechanis...

Page 324: ...he users are requested to adjust as per the requirements of second adjustment method with reference to above figure during use 2 Adjustment method and requirements 1 Adjust the lifting push plate on the right end of lifting shaft to adjust the height Loosen the nut and adjust the limiting push plate counter clockwise to increase the lifting height and clockwise to reduce 2 While working with drive...

Page 325: ...lowest point of the lifted implement 4 At completion of adjustment tighten fasteners at all places 8 12 2 2 Enforced type oil cylinder adjustment Fig 8 71 Left lift cylinder assembly schematic 1 Locating clamp 2 Locating valve A Lower oil port B Lift oil port ...

Page 326: ... its position is the smaller the lowering extent is The higher its position is the larger the lowering extent is During the lowering if the locating valve is pushed by the locating clamp block the lowering is stopped Adjustment To guarantee the transport safety and reliability of implement when the implement is lifted to the highest point adjust the locating clamp to push down the locating adjustm...

Page 327: ...326 Notice While adjusting the distance between locating clamp block and the locating valve keep the consistent adjustment between two cylinders within an error of 0 0 5mm ...

Page 328: ...front of the diesel engine The front axle bracket is connected to the diesel engine using six bolts The sway shaft is supported by the front and rear ends of the bracket The primary sleeve weldment assembly is put on the sway shaft On both sides of the primary sleeve weldment assembly are the left and right secondary sleeves assemblies which each are fixed with 3 bolts Fig 8 73 ...

Page 329: ... 3 Washer 4 Cushion cover 5 Right steering arm 6 Nut 7 Auxiliary sleeve 8 Primary sleeve 9 Tie rod 10 Bolt 11 Nut 12 Left tie rod 13 Left hand thread nut 14 Left steeri ng arm 15 Drag rod 8 12 3 2 Adjustment of the front shaft ...

Page 330: ...he front wheel toe in Front wheel toe in shall be checked every 500 operating hours of tractor or in the case of serious shake of front wheels or rapid wear of front tires Correct toe in shall be 4 8 mm If actual value is outside the range adjustment shall be made to the wheels Adjustment Park the tractor on the flat ground Turn the steering wheel to the neutral position so that the two front whee...

Page 331: ...ixing bolt and bushing as well as the tie rod fixing nut and bolt Move the secondary sleeve assembly and secondary tie rod to desired position Then tighten the bolts and nut 8 12 4 Structure and adjustment of the steering unit Fig 8 76 Structure chart of hydrostatic steering unit 1 Cross shaped link block 2 Front cover 3 Valve body 4 Spring piece 5 Pin 6 Valve bush 7 Valve element 8 Universal driv...

Page 332: ...l shall be usually checked Inspection method Drop a fluid drip to a blotting paper if the oil stain center is black it indicates that the fluid should be replaced f After the hydraulic oil is replaced with new one the gas in the oil cylinder should be removed completely Gas removal method Loosen the bolt joint of the steering oil cylinder to enable the oil pump to operate at low speed for outflowi...

Page 333: ... to the spring rod to eliminate clearance Ensure the clearance between the plane A of spring plate and the plane B of spring rod is 2mm Then insert the pin Place the draft control spring assembly in the lifter housing Rotate the nut so that the front end of the draft control spring assembly comes into contact with the plane E of the lifter housing Then insert the pin through the nut hole 8 12 5 2 ...

Page 334: ...m to achieve a clearance of 4mm between the inner lift arm and the rear inner surface of the lifter housing At the moment the outer lift arm forms an angle of 60º to the lifter housing bottom Then adjust the draft adjusting lever and the position adjusting cam Adjustment to the draft adjusting lever Adjust the force adjusting push rod until the force adjusting seal gland comes into contact with th...

Page 335: ... valve moves inwardly by 5mm from the outermost position At the moment the force adjusting lever control end is 6 5mm apart to the main control valve end face Then fix the position adjusting cam to the lift shaft using the bolt 8 12 6 Structure and adjustment of front drive axle Fig 8 79 Structure and adjustment of front drive axle assembly 1 Big gear wheel of final drive 2 Passive gear wheel 3 Se...

Page 336: ...bly Gear back lash of bevel gear pair of front central drive and mesh imprint will obtain good mesh imprint by increasing or reducing adjusting pad contact spot it is not less than 50 along the direction of height of tooth and it is not less than 50 along the direction of length of tooth In addition it need be slightly close to little end and suitable gear back lash 0 2 0 4 mm Adjustment method is...

Page 337: ...ain pin Adjustment will be conducted in accordance with gap of gear engagement 0 15 0 25 mm and contact spot it is not less than 50 along the direction of height of tooth and it is not less than 50 along the direction of length of tooth If the gasket is increased the back lash will be reduced After back lash and contact imprint of the wheel gear have been adjusted the distance from 6308 bearing an...

Page 338: ...Operation Instructions 337 9 Troubleshooting ...

Page 339: ...or is transported by a drop frame trailer for a long distance Observe requirements for the maximum width and height specified in the road traffic regulations Check and ensure that the trailer is suitable for transporting the tractor Notice When the tractor is towed a driver must remain in the tractor to control it Danger During towing access to the driver s seat is prohibited absolutely without au...

Page 340: ...to Neutral position Turn on the hazard warning lamp Warning Turn on the hazard warning lamp to indicate that the tractor is being towed Follow relevant national requirements and local safety regulations Follow following instructions during road transportation Drive on the road during light traffic on the road Extra care should be taken near the crossings without traffic control management Drive sl...

Page 341: ... be met 1 When loading unloading the tractor a flat place should be selected 2 The tractor should be loaded unloaded with the help of a special loading unloading platform 3 An assistant must be designated to provide guidance in the site so that no unauthorized personnel approaches the site 4 After loading put the hitch lever to the lowest position apply the hand brake engage the reverse gear remov...

Page 342: ...fixed securely to avoid sudden startup of the truck resulting in risk in roll over of the tractor or falling of the operator Warning When loading unloading the tractor the tractor should drive at minimum speed to avoid risk in roll over or falling of the tractor resulted from excessively high speed 9 3 Hoisting the Tractor Use a hoisting device with sufficient hoisting capacity to hoist the tracto...

Page 343: ...ment The clutch slips 1 The friction plate and pressure plate are oil stained 2 The friction plate is worn unevenly or excessively or the rivet is exposed 3 The disc spring pressure becomes weak 4 The free travel is small and the release levers are not in a same plane It comes into contact with the release bearing 5 The driven plate is deformed 1 Clean it with gasoline and eliminate the oil leakag...

Page 344: ...s weak or broken 3 The engagement sleeve spline is worn 1 Repair or replace it 2 Replace the locking spring 3 Replace the sliding gear with engagement sleeve 9 4 1 3 9 4 1 3 Rear axle faults and troubleshooting Symptoms Causes Solutions The noise from the main drive gets louder 1 A clearance between the driving helical bevel gear bearings appears 2 The gear is engaged abnormally 3 The differential...

Page 345: ...two rear tires is different 1 Adjustment 2 Replace 3 Have the tires inflated according to specified inflation pressure The tractor jitters during startup 1 Free travel of the running clutch pedal is too small 2 The return spring force of the pedal is too small 1 Adjustment 2 Replace The brake is not separated fully and gets heat 1 The parking brake is not released 2 Free travel of the running clut...

Page 346: ...learance between bearings is too big or the bearing is worn seriously 4 The steering kingpin is worn seriously 5 The front wheel rim is deformed seriously 1 Check whether it is fastened securely 2 Adjust the toe in 3 Adjust or replace the bearing 4 Replace the steering kingpin 5 Correct t he front wheel rim The noise is too louder 1 The meshing mark of the front main drive gear is poor 2 The clear...

Page 347: ... does not work normally when turning the steering wheel 5 The oil in the steering oil tank is insufficient 6 The spring force of the safety valve is weak or the ball loses sealing effect The steering wheel is turned lightly at light load and heavily with load being increased 7 The fluid viscosity is too big 8 The ball non return valve in the valve body is failed the steering wheel is turned heavil...

Page 348: ... The open end of the universal driving shaft is broken or deformed 3 The rotor and universal driving shaft are not installed at right position 4 The piston of the steering oil cylinder or the sealing ring of the piston is damaged 1 Replace the release pin 2 Replace the universal driving shaft 3 Re assemble them 4 Replace the piston or sealing ring During hydraulic steering the steering wheel canno...

Page 349: ...oil suction filter is clogged 3 The hydraulic system sucks air 4 The oil pump is worn seriously and internal leakage is serious 5 The main control valve or oil return valve gets stuck 6 The main control valve or oil return valve is worn seriously 7 The safety valve is failed 8 The oil leakage of the oil cylinder gets serious 9 Oil leaks from sealing rings in the distributor 1 Refill sufficient acc...

Page 350: ... 2 Find out the oil leakage point and replace the sealing ring During use of simple hydraulic output no pressure oil is available or the oil pressure is too low 1 The block valve has no cut off oil pipeline 2 The force control handle or position control handle is set at the lowering position 3 The external lifting arm is at the lifting position 4 During use of a quick change connector the valve sp...

Page 351: ...r oil stained 4 The conductor contacts poorly 5 The main contact of the electromagnetic switch is burned out or it contacts poorly 6 The battery is not charged sufficiently or its voltage is too low 1 Replace the bearing with a new one 2 Adjustment 3 Remove the oil stains and use a No 0 non metal sand paper for polishing 4 Tighten the nut firmly 5 Remove the oil stains and use a No 0 non metal san...

Page 352: ...ulator and if discovered that the regulator contact is in poor contact condition it is required to used 0 non metal sand paper for polishing 2 Check whether the battery connector and connecting bolt are loosened and if necessary tighten them 3 Maintenance The battery is over charged the distilled water consumption is too much and electrolyte is leaked from the vent The regulator cannot maintain no...

Page 353: ...352 10 Tractor Storage and Unpack ...

Page 354: ...laced and the tractor should be started every months and operate at low speed for 20 30min so as to inspect whether individual parts have abnormalities Then keep exterior of the tractor clean and dry 10 1 Causes for Damage to the Tractor in Storage Period Main causes for damage to the tractor in storage period are as follows 1 Rusting During storage ingression of airborne dust and moisture into th...

Page 355: ...metal parts that are not painted 9 Loosen the engine fan belt and if necessary remove the belt and package it for storage and then spray rust inhibitor to the pulley groove The tractor surface with paint being peeled off should be re painted 10 Empty diesel in the diesel tank and clean the oil tank 11 Use protective material such as canvass water proof cloth or oil paper and etc to seal the engine...

Page 356: ...is not used it also discharges so the battery should be charged once every month 6 When the tractor is transported by train or truck for a long distance it cannot be engaged in the gear Because the train or truck rocks during transportation the tractor tires also moves forward or backward ceaselessly In case that the tractor is engaged in the gear the tire movement will drive the gear bearing cran...

Page 357: ...ree of the drive belt according to technical requirements See Instructions for Operation and Maintenance of Engine 5 Install the battery and apply Vaseline to the terminals 6 Inspect whether electric circuits and pipelines are fastened 7 Manipulate the tractor as per requirements specified in the Instructions Important For the reason that the FL35 70HP series tractors can be equipped with several ...

Page 358: ...Tractor Storage and Unpack 357 11 Delivery Acceptance and Transportation ...

Page 359: ...s supplied with the machine include spare parts and tools supplied with the machine The articles supplied with the machine base on the requirements specified in the Technical Document of Engine in case of any question contact the dealer 3 Inspect whether the machine is in good condition After the machine is transported its technical conditions may vary so the user may further confirm condition of ...

Page 360: ... tractor should be decelerated during cornering 8 During unloading first release the hand brake engage the forward gear and drive the tractor away from the trailer at minimum speed 9 For the tractor model with a turbocharger cover the exhaust pipe end to protect the rotor being rotated under influence of wind resulting in damage to the bearing that is not lubricated in this case Danger When loadin...

Page 361: ...360 ...

Page 362: ...361 12 Disassembly and Disposal ...

Page 363: ...id environmental pollution Warning The battery is a maintenance free type whose electrolyte is corrosive and cannot be spilled into eyes and onto skin and clothes in case of spillage to human body clean it with clear water and go to the hospital for treatment as soon as possible Dismantling the discarded and damaged battery is prohibited but should be carried out by a professional disposal organiz...

Page 364: ...id drinking by other person causing accidental injury It is prohibited to pour waste down to the ground and into water pipe and to discharge waste into other water sources The waste oil fuel refrigerant brake fluid filter element or battery that has potential hazard should not be discarded at will please consult local environment protection department or recovery center to adopt correct method to ...

Page 365: ...Warranty Contents 364 13 Warranty Contents ...

Page 366: ...blic of China on the Protection of Consumer Rights and Interests 13 2 Non warranty Conditions According to relevant regulations warranty is not given in some conditions For details see the chapters related to three guarantee service card for the FL35 70HP Series tractors Important Some behaviors may invalidate the warranty conditions For details see the Three guarantee Service Card Important If th...

Page 367: ...Main technical specifications of the tractor 366 14 Main Technical Specifications of the Tractor 14 1 Model of Product The meaning of the tractor product model is as follows ...

Page 368: ...ing of FL 500 FL 500C FL 504 FL 504C wheeled tractor is 36 8 kW kilowatt 50PS The power rating of FL 554 FL 554C FL 554 1 FL 554C 1 wheeled tractor is 40 4 kW kilowatt 55PS The power rating of FL 604 FL 604C wheeled tractor is 44KW kilowatt 60PS The power rating of FL 704 1 FL 704C 1 wheeled tractor is 51 5KW kilowatt 70PS Executive standard GB T 15370 1 General requirement of agricultural tractor...

Page 369: ...n 1300 1250 Front wheel adjustment mode Fixed Continuo usly adjustabl e Fixed Continuo usly adjustabl e Fixed Rear wheel mm 1200 1300 1400 1500 common 1300 1300 1500 Rear wheel adjustment mode Adjustable stepwise adjustable steplessly Ground clearanc e Minimum ground clearance mm 265 400 325 400 325 Agricultural ground clearance mm 325 450 375 450 375 Minimu m radius of turning circle Conducting s...

Page 370: ...Closed bevel gear Closed bevel gear Closed bevel gear Front differential unit Closed type two planetar y bevel gears Closed type two planetar y bevel gears Closed type two planetar y bevel gears Front final drive Spiral bevel gear Spiral bevel gear Spiral bevel gear Running System Frame Without frame Tire pressure Front wheel kPa 118 138 field operatio ns 167 176 transpor t operatio ns 167 186 fie...

Page 371: ...th Upper hitch point φ25 2 451 Lower hitch point φ28 7 45 Plowing depth adjustment method Force adjustment position adjustment force position integrated control position adjustment floating control Maximum lifting force of the system 610 mm after hitch point kN 5 8 6 62 7 5 Opening pressure of safety valve MPa 17 5 0 5 Hydrauli c output Type Simple hydraulic output or multi way valve Quantity Simp...

Page 372: ... Front position light 12V 5W 2 Rear combinati on light Width lights 5W turn signals 21W brake lights 21W and reflectors red one on each side Rear working light 12V 35W 2 Trailer socket 1 seven hole socket with a plug Monitoring and warning device Combinati on instrumen t 1 piece with tachometer engine hour meter water temperature gauge fuel gauge Warning device 1 Charging indicator light left and ...

Page 373: ...t mode Continuous ly adjustable Fixed Fixed Rear wheel mm 1200 1300 1400 1500 common 1300 1300 1500 Rear wheel adjustment mode Adjustable stepwise adjustable steplessly Ground clearance Minimum ground clearance mm 400 325 325 Agricultural ground clearance mm 450 375 375 Minimum radius of turning circle Conducting single side braking m 3 3 0 3 3 8 0 3 4 3 0 3 No single side braking is conducted m 3...

Page 374: ...ront wheel kPa 167 186 field operations 225 245 transport operations 118 138 field operations 167 176 transport operations 118 138 field operations 167 176 transport operations Rear wheel kPa 118 138 field operations 167 176 transport operations Tire specification Standard Front wheel 6 0 16 8 3 20 8 3 20 Rear wheel 12 4 28 Brake system Service brake Wet type disc brake Parking brake Mechanical ma...

Page 375: ...put one pair of hydraulic outputs 2 pair of hydraulic outputs 3 pair of hydraulic outputs Specifications M22 1 5 PTO shaft Type Rear semi independent type Specifications Type 1 φ35 6 teeth or φ38 8 teeth Revolving speed r min 540 760 or 540 1000 Lower limit of nominal power of PTO shaft kW 31 3 34 4 Towing device Diameter of connecting pin mm 40 Connecting pin mm 577 Electric instrument system Ele...

Page 376: ...ing light select for tractor equipped with an air brake and low oil pressure warning light 3 Reflector 4 Safety warning label FL554 FL604 Items Unit FL554 FL604 Type 4 4 wheeled tractor 4 4 wheeled tractor Rated traction force kN 14 5 15 Overall dimension Length including front ballast and rear hitch mm 3970 Width common wheel track and measured from outer edge of standard tire mm 1620 Height Meas...

Page 377: ...erential unit Four planet gear closed type Differential lock Pin type Rear final drive Planetary gear Front axle Front axle Front drive axle Drive shaft Drive shaft in the center Drive shaft in the center Front main drive Closed bevel gear Closed bevel gear Front differential unit Closed type two planetary bevel gears Closed type two planetary bevel gears Front final drive Spiral bevel gear Spiral...

Page 378: ...ng depth adjustment method Force adjustment position adjustment force position integrated control position adjustment floating control Maximum lifting force of the system 610mm after hitch point kN 9 1 9 9 Opening pressure of safety valve MPa 17 5 0 5 Hydraulic output Type Simple hydraulic output or multi way valve Quantity Simple hydraulic output one pair of hydraulic outputs 2 pair of hydraulic ...

Page 379: ... 2 Rear combination light Width lights 5W turn signals 21W brake lights 21W and reflectors red one on each side Rear working light 12V 35W 2 Trailer socket 1 seven hole socket with a plug Monitoring and warning device Combination instrument 1 piece with tachometer engine hour meter water temperature gauge fuel gauge Warning device 1 Charging indicator light left and right turn indicator lights ind...

Page 380: ... adjustment mode Adjustable stepwise adjustable steplessly Ground clearance Minimum ground clearance mm 370 Agricultural ground clearance mm 430 Minimum radius of turning circle Conducting single side braking m 4 4 0 3 No single side braking is conducted m 4 8 0 3 Structure mass kg 2190 Minimum operating mass kg 2360 Mass distributing Front wheel kg 1020 Rear wheel kg 1340 Ballast Front ballast kg...

Page 381: ...lation air brake Steering system Method Front wheel hydraulic steering Steering unit Cycloid rotary valve type full hydraulic steering Working device Hydraulic system type Center open semi split type center open split type Hydraulic oil pump Gear pump CBN E316 Distributor Slide valve type Oil cylinder Diameter stroke mm 100 116 70 110 Type Single action Double action Hitch point dimension mm Rear ...

Page 382: ...nstrument system Electrical system 12V negative grounding dual wire system Power generator Model JFW17 JFW17P 01 JFW19 Voltage V 14 Power kW 0 75 1 Regulator Model Included in the electrical box Regulating voltage V 14 Starter Model QDJ1409F P QDJ1409 Voltage V 12 Power kW 3 7 Storage battery Model 6 QW 120 Voltage V 12 Capacity A h Ampere hour 120 Quantity 1 Light and signal device Headlamp 12V 5...

Page 383: ...hour meter water temperature gauge fuel gauge Warning device 1 Charging indicator light left and right turn indicator lights indicator lights for position lights and indicator light for high beam headlight 2 Air brake fault warning light select for tractor equipped with an air brake and low oil pressure warning light 3 Reflector 4 Safety warning label ...

Page 384: ...l mm 1200 1500 common 1300 1300 15 Rear wheel adjustment mode Adjustable stepwise adjustable steple Ground clearance Minimum ground clearance mm 265 400 325 Agricultural ground clearance mm 325 450 375 Minimum radius of turning circle Conducting single side braking m 3 8 0 3 3 3 0 3 3 8 No single side braking is conducted m 4 3 0 3 3 7 0 3 4 3 Structure mass kg 2060 1890 216 Minimum operating mass...

Page 385: ... Tire pressure Front wheel kPa 118 138 field operations 167 176 transport operations 167 186 field operations 225 245 transport operations 118 fie ope 167 tra ope Rear wheel kPa 118 138 field operations 167 17 Tire specification Standard Front wheel 7 50 16 6 0 16 8 3 Rear wheel 11 2 28 12 4 28 Brake system Service brake Wet type disc brake Parking brake Mechanical manual brake Trailer brake contr...

Page 386: ... Opening pressure of safety valve MPa 16 0 0 5 Hydraulic output Type Simple hydraulic output or multi way Quantity Simple hydraulic output one pair of outputs 3 pair of hydraulic outputs Specifications M22 1 5 PTO shaft Type Rear non independent or semi indepe Specifications Type 1 φ35 6 teeth or φ38 8 teet Revolving speed r min 540 760 or 540 1000 Lower limit of nominal power of PTO shaft kW 21 9...

Page 387: ...2 12V 10W 2 Rear combination light Width lights 5W turn signals 21W br each side Rear working light 12V 55W 4 Trailer socket 1 seven hole socket with a plug Monitoring and warning device Combination instrument 1 piece with tachometer engine hour Warning device 1 Charging indicator light left lights for position lights and indicato 2 Air brake fault warning light brake and low oil pressure warning ...

Page 388: ... Adjustable stepwise adjustable steplessly Ground clearance Minimum ground clearance mm 400 325 325 Agricultural ground clearance mm 450 375 375 Minimu m radius of turning circle Conducting single side braking m 3 3 0 3 3 8 0 3 4 3 0 3 No single side braking is conducted m 3 7 0 3 4 3 0 3 4 7 0 3 Structure mass kg 2005 2275 2500 Minimum operating mass kg 2145 2415 2640 Mass distributi ng Front whe...

Page 389: ... 118 138 field operations 167 176 transport operations 118 138 field operations 167 176 transport operations Rear wheel kPa 118 138 field operations 167 176 transport operations Tire specificati on Standar d Front wheel 6 0 16 8 3 20 8 3 20 Rear wheel 12 4 28 Brake system Service brake Wet type disc brake Parking brake Mechanical manual brake Trailer brake control Inflation air brake Steering syst...

Page 390: ...lti way valve Quantity Simple hydraulic output one pair of hydraulic outputs 2 pair of hydraulic outputs 3 pair of hydraulic outputs Specifications M22 1 5 PTO shaft Type Rear semi independent type Specifications Type 1 φ35 6 teeth or φ38 8 teeth Revolving speed r min 540 760 or 540 1000 Lower limit of nominal power of PTO shaft kW 31 3 34 4 Towing device Diameter of connecting pin mm 40 Connectin...

Page 391: ...ur meter water temperature gauge fuel gauge Warning device 1 Charging indicator light left and right turn indicator lights indicator lights for position lights and indicator light for high beam headlight 2 Air brake fault warning light select for tractor equipped with an air brake and low oil pressure warning light 3 Reflector 4 Safety warning label FL554C FL604C Items Unit FL554C FL604C Type 4 4 ...

Page 392: ...kg 2640 2640 Mass distributing Front wheel kg 1050 1020 Rear wheel kg 1590 1340 Ballast Front ballast kg 108 144 Rear ballast kg 90 180 Transmission Clutch Single disk dry type double acting clutch Transmission Combined type 4 3 1 1 Gear shift with sliding sleeve Rear axle Main drive Helical bevel gear pair Differential unit Four planet gear closed type Differential lock Pin type Rear final drive ...

Page 393: ...split type Hydraulic oil pump Gear pump CBN E316 Distributor Slide valve type Oil cylinder Diameter stroke mm 100 116 75 110 Type Single action Double action Hitch point dimension mm Rear three point hitch Class 2 Connecting hole width Upper hitch point φ25 2 451 Lower hitch point φ28 7 45 Plowing depth adjustment method Force adjustment position adjustment force position integrated control positi...

Page 394: ...egulating voltage V 14 Starter Model QDJ1409F P QDJ1409 Voltage V 12 Power kW 3 7 Storage battery Model 6 QW 120 Voltage V 12 Capacity A h Ampere hour 120 Quantity 1 Light and signal device Headlamp 12V 55 60W combined type Front steering light 12V 21W 4 Front position light 12V 5W 2 12V 10W 2 Rear combination light Width lights 5W turn signals 21W brake lights 21W and reflectors red one on each s...

Page 395: ...idth common wheel track and measured from outer edge of standard tire mm 1828 Height to the cab roof and equipped with standard tires mm 2580 Wheel base mm 2071 Wheel tread standard tires Front wheel mm 1250 1350 common 1350 Front wheel adjustment mode Fixed Rear wheel mm 1300 1450 1500 common 1450 1300 1500 Rear wheel adjustment mode Adjustable stepwise adjustable steplessly Ground clearance Mini...

Page 396: ...ve Spiral bevel gear Running System Frame Without frame Tire pressure Front wheel kPa 118 138 field operations 167 176 transport operations Rear wheel kPa 118 138 field operations 167 176 transport operations Tire specification Standard Front wheel 8 3 24 Rear wheel 14 9 30 Brake system Service brake Wet type disc brake Parking brake Mechanical manual brake Trailer brake control Inflation air brak...

Page 397: ...ne pair of hydraulic outputs 2 pair of hydraulic outputs 3 pair of hydraulic outputs Specifications M22 1 5 PTO shaft Type Rear independent Specifications Type 1 φ35 6 teeth or φ38 8 teeth Revolving speed r min 540 760 or 540 1000 Lower limit of nominal power of PTO shaft kW 43 75 Towing device Diameter of connecting pin mm 40 Connecting pin mm 577 Electric instrument system Electrical system 12V ...

Page 398: ...12V 55W 4 Trailer socket 1 seven hole socket with a plug Monitoring and warning device Combination instrument 1 piece with tachometer engine hour meter water temperature gauge fuel gauge Warning device 1 Charging indicator light left and right turn indicator lights indicator lights for position lights and indicator light for high beam headlight 2 Air brake fault warning light select for tractor eq...

Page 399: ...0 105 90 105 Displacement L 2 311 2 672 2 67 Compression ratio 18 1 18 1 18 4 1 Nominal power kW 25 8 29 4 Nominal speed r min 2350 2400 Max torque speed N m r min 129 1550 1750 155 160 1600 1800 155 1680 1800 Fuel consumption rate in rated condition g kW h 258 248 245 Oil consumption rate in rated condition 2 04 1 6 1 2 Lubricating method Forced splash lubrication Starting method Electrical start...

Page 400: ...umption rate in rated condition 1 6 1 2 Lubricating method Forced splash lubrication Starting method Electric startup Cooling method Forced water cooled Air filter type Dry or wet type FL500 FL500C FL504 FL504C FL554 1 FL554C 1 FL554 FL554C Items Unit FL500 FL504 FL500C FL504C FL554 1 FL554C 1 FL554 FL554C Engine Manufacturer Anhui Quanchai Engine Co Ltd Zhejiang Xinchai Co Ltd Anhui Quanchai Engi...

Page 401: ... condition g kW h 248 245 248 245 Oil consumption rate in rated condition 1 6 1 2 1 6 1 2 Lubricating method Forced splash lubrication Starting method Electrical startup Cooling method Forced water cooled Air filter type Dry or wet type FL604 FL604C Items Unit FL604 FL604C Manufacturer Anhui Quanchai Engine Co Ltd Zhejiang Xinchai Co Ltd Trademark and brand Quanchai Xinchai Model QC4105T60 A4K43T6...

Page 402: ... 249 1600 1725 Fuel consumption rate in rated condition g kW h 248 245 Oil consumption rate in rated condition 1 6 1 2 Lubricating method Forced splash lubrication Starting method Electric startup Cooling method Forced water cooled Air filter type Dry or wet type FL704 1 FL704 1C Items Unit FL704 1 FL704 1C Engine Manufacturer Zhejiang Xinchai Co Ltd Anhui Quanchai Engine Co Ltd ...

Page 403: ...4 Compression ratio 17 1 Nominal power kW 51 5 Nominal speed r min 2300 2400 Max torque speed N m r min 279 1600 1725 265 275 1600 1800 Fuel consumption rate in rated condition g kW h 245 248 Oil consumption rate in rated condition 1 2 1 6 Lubricating method Forced splash lubrication Starting method Electrical startup Cooling method Forced water cooled Air filter type Dry or wet type ...

Page 404: ... FL404 FL400C FL404C FL450 FL454 FL450C FL454C Gear 8F 4R Forward gear Reverse gear Forward gear Reverse gear Forward gear Reverse gear Low 1 2 33 3 45 2 65 3 94 2 65 3 94 Low 2 3 37 5 01 3 85 5 71 3 85 5 71 Low 3 4 61 6 83 5 25 7 79 5 25 7 79 Low 4 7 10 10 53 8 10 12 1 8 10 12 1 High 1 9 99 11 40 11 40 High 2 14 50 16 53 16 53 High 3 19 79 22 57 22 57 High 4 30 49 34 78 34 78 Gear 8F 8R Forward R...

Page 405: ...79 17 68 19 79 17 68 High 4 30 49 27 24 30 49 27 24 30 49 27 24 Gear 12F 12R Forward gear Reverse gear Forward gear Reverse gear Forward gear Reverse gear Low 1 2 33 2 08 2 65 2 37 2 65 2 37 Low 2 3 37 3 01 3 85 3 44 3 85 3 44 Low 3 4 60 4 11 5 25 4 69 5 25 4 69 Low 4 7 10 6 34 8 10 7 23 8 10 7 23 Medium 1 5 90 5 27 6 73 6 01 6 73 6 01 Medium 2 8 55 7 64 9 75 8 71 9 75 8 71 Medium 3 11 67 10 43 13...

Page 406: ...eoretical speeds shown in the table are determined with engine speed of 2200r min and standard rear tires FL500 500C 504 504C 554 1 554C 1 Theoretical speed of tractor Unit km h Model FL500 FL504 FL500C FL504C FL554 1 FL554C 1 Gear 8F 4R 8F 4R Forward gear Reverse gear Forward gear Reverse gear Low 1 2 65 3 94 2 65 3 94 Low 2 3 85 5 71 3 85 5 71 Low 3 5 25 7 79 5 25 7 79 Low 4 8 10 12 1 8 10 12 1 ...

Page 407: ...37 3 01 Low 3 4 60 4 11 4 60 4 11 Low 4 7 10 6 34 7 10 6 34 High 1 9 99 8 93 9 99 8 93 High 2 14 50 12 95 14 50 12 95 High 3 19 79 17 68 19 79 17 68 High 4 30 49 27 24 30 49 27 24 Gear 12F 12R 12F 12R Forward gear Reverse gear Forward gear Reverse gear Low 1 2 65 2 37 2 65 2 37 Low 2 3 85 3 44 3 85 3 44 Low 3 5 25 4 69 5 25 4 69 Low 4 8 10 7 23 8 10 7 23 Medium 1 6 73 6 01 6 73 6 01 ...

Page 408: ...31 08 34 78 31 08 Notice 1 Theoretical speeds shown in the table are determined with engine speed of 2400r min r min and 12 4 28 standard rear tires FL554 554C 604 604C Theoretical speed of tractor Unit km h Model FL554 FL554C FL604 FL604C Gear 12F 12R 12F 12R Forward gear Reverse gear Forward gear Reverse gear Low 1 2 25 1 97 2 25 1 97 Low 2 3 26 2 85 3 26 2 85 Low 3 4 44 3 90 4 44 3 90 Low 4 6 9...

Page 409: ... 39 20 10 High 1 9 72 8 52 9 72 8 52 High 2 14 10 12 36 14 10 12 36 High 3 19 25 16 88 19 25 16 88 High 4 29 91 26 22 29 91 26 22 FL704 1 704C 1 Theoretical speed of tractor Unit km h Model FL704 1 FL704 1C Gear 12F 12R Forward gear Reverse gear Low 1 2 24 1 97 Low 2 3 26 2 86 Low 3 4 44 3 90 Low 4 6 91 6 0 Medium 1 5 66 4 95 ...

Page 410: ...Appendix 409 Medium 2 8 20 7 19 Medium 3 11 20 9 81 Medium 4 17 39 15 25 High 1 9 72 8 52 High 2 14 10 12 36 High 3 19 25 16 87 High 4 29 91 26 22 ...

Page 411: ...Appendix 410 15 Appendix ...

Page 412: ...Heilongjiang Nenjiang Agricultural Implement Factory Suspended three spade plow 1L 325 Tillage depth 18 22 cm Suspended three spade plow 1L 427 Tillage depth 14 18 cm Suspended four spade plow 1L 425 Tillage depth 18 22 cm FL400 FL404 FL450 FL454 FL500 FL504 Suspended four spade plow 1L 425 Tillage depth 18 22 cm 1L 427 Tillage depth 14 18 cm Suspended Five spade plow 1L 520 Tillage depth 16 20 cm...

Page 413: ...nufacturing Co Ltd FL400 FL404 34 blade light harrow IBY 3 4 Tillage depth 8 12cm Tillage width 340cm Xuzhou Huaxing Agricultural Implement Co Ltd FL450 FL454 FL500 FL504 FL550 FL554 FL604 24 balde medium duty harrow 1BJ 2 2 Heilongjiang Nenjiang Agricultural Implement Factory Haerbin Hongwei Technology Co Ltd Haerbin Woer Technology Co Ltd Sowing implement FL350 FL354 FL400 FL404 FL450 FL454 FL50...

Page 414: ...h 8 10 cm Hongxinglong Implement Factory Lianyungang Rotary Plough Factory 1ZSN 260 FL550 FL554 FL604 1ZSN 260 1ZSN 280 FL400 FL404 FL450 FL454 FL500 FL504 FL550 FL554 FL604 Straw chopper 4JH I 5 Working width 150cm stubble 2 8 cm Combined implement FL400 FL404 FL450 FL454 FL500 FL504 Stubble breaking rotary tilling ridging and overturning machine SGTN 140 Working width 140cm forming 2 ridges per ...

Page 415: ... implements etc To select implements suitable for tractor and soil main technical parameters of implements must be determined according to the model power of tractor and the conditions of working area such as soil resistance and agronomic requirements as well as taking into consideration of our recommendations The unit will be affected adversely if the matching is unreasonable Users shall determin...

Page 416: ...ery Co Ltd in Shandong Linshu County Economic Development Zone zip code 276715 This Company will enter the related information in the sheet of your feedback into the computer for storage in order to implement high quality Three Guarantees services For your cooperation and strong support we express our heartfelt thanks User Information Feedback Form Model of product Tractor Factory No Engine Manufa...

Page 417: ...otice This sheet of feedback should be truthfully filled in by the owner or driver in order to understand the use status of the tractor and do well in customer s services Any copy of the feedback sheet is effective ...

Reviews: