3.3.4 NVR54-4KS2/NVR54-16P-4KS2/NVR44-4KS2/
NVR44-16P-4KS2/NVR44-4KS2/L/NVR44-16P-4KS2/L/
NVR54-24P-4KS2/NVR54-16P-4KS2E/NVR58-I/NVR58-I/L/NVR54-
I/NVR54-I/L/NVR52-I/NVR52-I/L/NVR42-I/NVR42-8P-I/NVR44-I/
NVR48-I/NVR608-32-4KS2/NVR44-4KS2/I/NVR44-16P-4KS2/I/
NVR48-4KS2/I/NVR48-16P-4KS2/I/NVR48-EI/NVR48-16P-EI/
NVR44-EI/NVR44-16P-EI
Background Information
Different models have different number of HDDs.
Procedure
Step 1
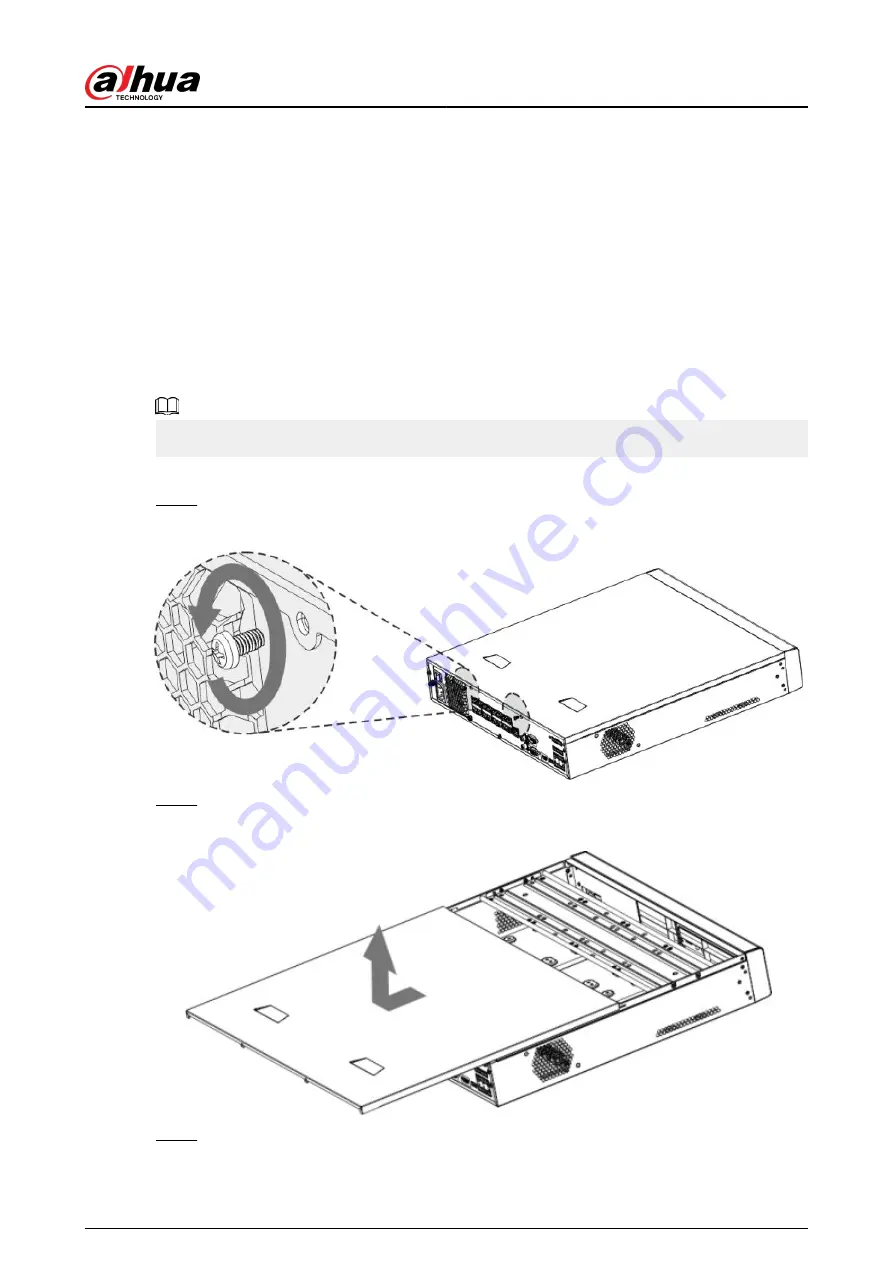
Remove the fixing screws on the rear panel of the device.
Figure 3-17 Remove screws
Step 2
Remove the case cover along the direction shown in the following arrow.
Figure 3-18 Remove cover
Step 3
Remove the screws on the sides of HDD bracket to take out the bracket.
●
1.5U device has one HDD bracket. For the way to remove the bracket, see Figure 3-19
User's Manual
85
Summary of Contents for NVR2104-I2
Page 1: ...ZHEJIANG DAHUA VISION TECHNOLOGY CO LTD V2 3 3 Network Video Recorder User s Manual...
Page 84: ...Figure 2 98 Alarm input port 1 User s Manual 71...
Page 132: ...Figure 5 8 Unlock pattern login User s Manual 119...
Page 147: ...Figure 5 23 AcuPick human detection User s Manual 134...
Page 151: ...Figure 5 27 Shortcut menu 1 User s Manual 138...
Page 217: ...Figure 5 93 Custom search 2 Step 8 Configure the search conditions as needed User s Manual 204...
Page 326: ...Figure 5 197 TCP IP Step 2 Click to configure the NIC card and then click OK User s Manual 313...
Page 376: ...Figure 5 247 Pattern login User s Manual 363...
Page 412: ...Figure 5 285 File management Step 2 Click Add User s Manual 399...


