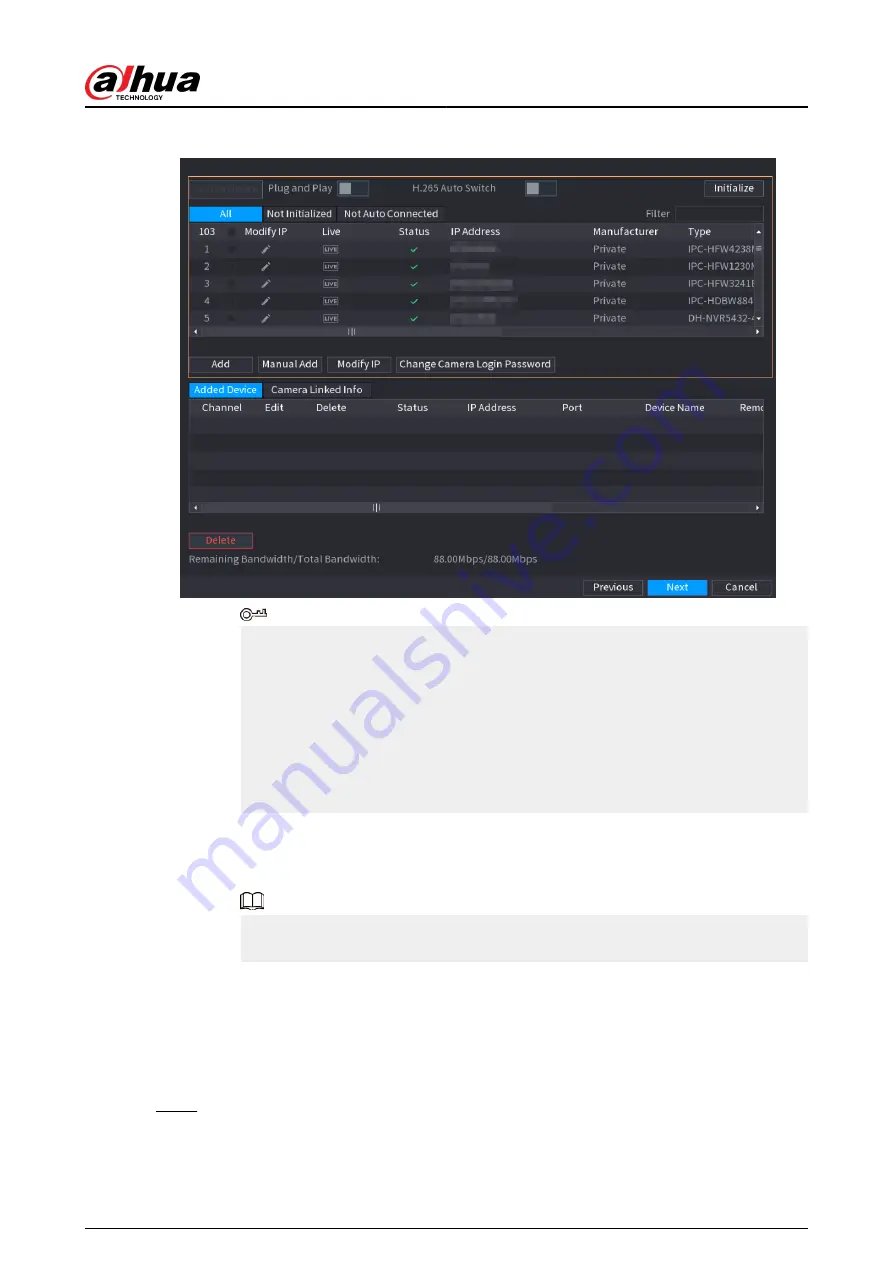
Figure 5-6 Search device
●
To view the live image of a camera, click LIVE and then enter the username and
password. You can only view live images of cameras accessed through private
protocol.
●
To filter the remote devices, select device name from the Filter drop-down list.
●
To filter out the uninitialized devices, click the Not Initialized tab, and then you
can initialize the devices remotely.
●
To view all remote devices added through plug and play, click the Not Auto
Connected tab. You can remove devices added through plug and play, and they
can be automatically added again after plug and play is enabled.
2. (Optional) Enable Plug and Play.
When Plug and Play is enabled, the Device automatically adds cameras on the same
LAN.
For uninitialized cameras, the Device automatically initializes them before adding
them.
3. Enable H.265 Auto Switch
When H.265 Auto Switch is enabled, the video compression standard of added
remote devices is switched to H.265 automatically.
4. Double-click a camera, or select a camera and then click Add to register it to the
Added Device list.
5. Click Next.
Step 5
Manage HDD. You can view HDD name, physical position, health status, capacity, and
more.
User's Manual
117
Summary of Contents for NVR2104-I2
Page 1: ...ZHEJIANG DAHUA VISION TECHNOLOGY CO LTD V2 3 3 Network Video Recorder User s Manual...
Page 84: ...Figure 2 98 Alarm input port 1 User s Manual 71...
Page 132: ...Figure 5 8 Unlock pattern login User s Manual 119...
Page 147: ...Figure 5 23 AcuPick human detection User s Manual 134...
Page 151: ...Figure 5 27 Shortcut menu 1 User s Manual 138...
Page 217: ...Figure 5 93 Custom search 2 Step 8 Configure the search conditions as needed User s Manual 204...
Page 326: ...Figure 5 197 TCP IP Step 2 Click to configure the NIC card and then click OK User s Manual 313...
Page 376: ...Figure 5 247 Pattern login User s Manual 363...
Page 412: ...Figure 5 285 File management Step 2 Click Add User s Manual 399...


