Icon
Description
Electronic mouse. You can use this icon to move the mouse to control
PTZ direction.
Quick positioning key. Click this icon to select a place, and the screen will
be focused and centered on the selected place.
4. Click Add.
The calibration point will be displayed on the list at lower-right corner.
Step 5
Click to save the newly added calibration point.
Step 6
Repeat Step 2 to Step 5 to add more calibration points.
Set 3–8 calibration points for a speed dome.
Step 7
Click Apply.
5.9.16 Video Quality Analytics
When conditions such as blurry, overexposure, or the color changes appear on the screen, the
system triggers the alarm.
●
This function takes effect only when the remote IPC supports video quality analytics.
●
This function is available on select models.
5.9.16.1 Configuring Video Quality Analytics
Procedure
Step 1
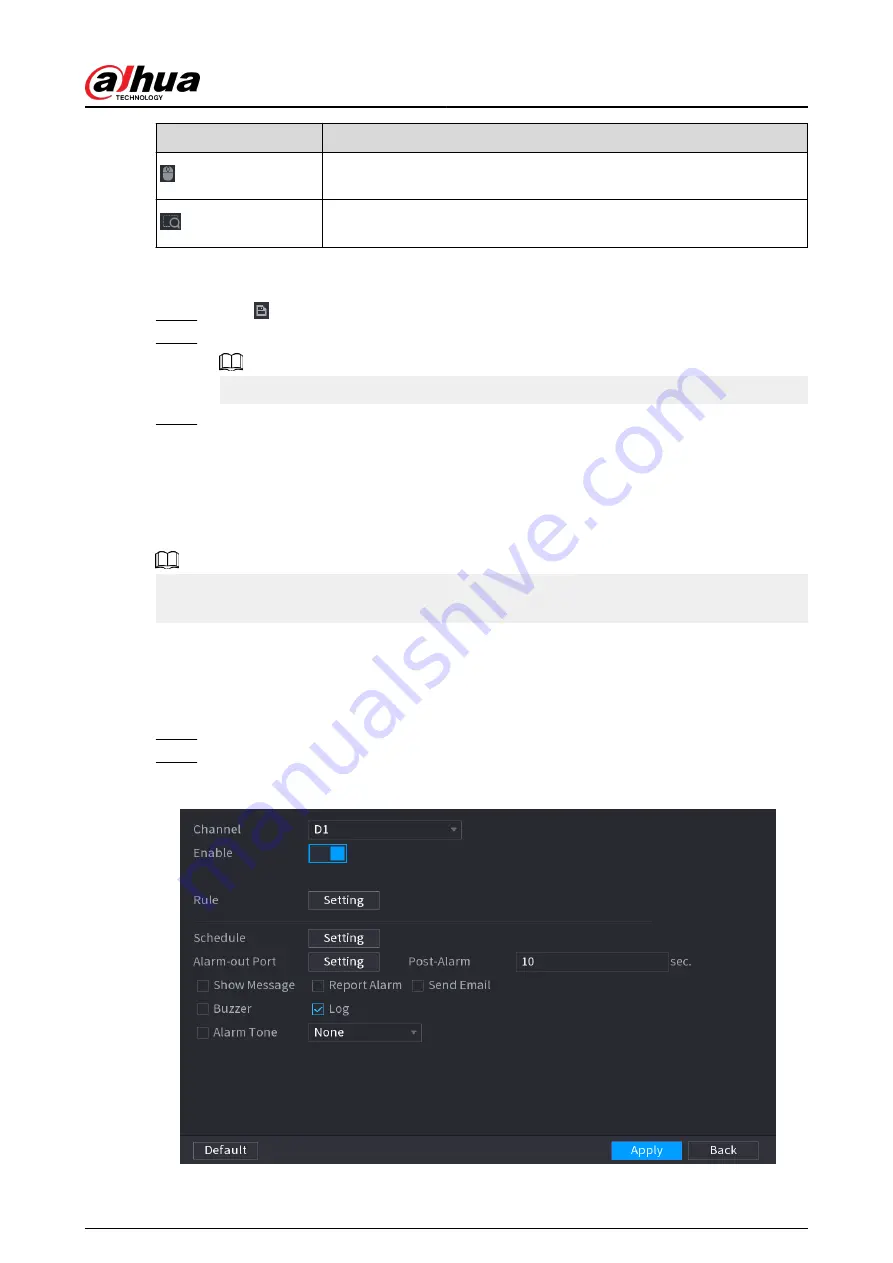
Select Main Menu > AI > Parameters > Video Quality Analytics.
Step 2
Select a channel and click Enable.
Figure 5-178 Video quality analytics
User's Manual
291
Summary of Contents for NVR2104-I2
Page 1: ...ZHEJIANG DAHUA VISION TECHNOLOGY CO LTD V2 3 3 Network Video Recorder User s Manual...
Page 84: ...Figure 2 98 Alarm input port 1 User s Manual 71...
Page 132: ...Figure 5 8 Unlock pattern login User s Manual 119...
Page 147: ...Figure 5 23 AcuPick human detection User s Manual 134...
Page 151: ...Figure 5 27 Shortcut menu 1 User s Manual 138...
Page 217: ...Figure 5 93 Custom search 2 Step 8 Configure the search conditions as needed User s Manual 204...
Page 326: ...Figure 5 197 TCP IP Step 2 Click to configure the NIC card and then click OK User s Manual 313...
Page 376: ...Figure 5 247 Pattern login User s Manual 363...
Page 412: ...Figure 5 285 File management Step 2 Click Add User s Manual 399...


