69
Chapter 4 Storage Management
• Do not use any of the following words for the name of a volume as these words are reserved for internal use by
the TeraStation: array
x
, authtest, disk
x
, global, homes, info, lost+found, lp, mediacartridge
x
, msdfs_root, mt-
daapd, printers, ram, spool, usbdisk
x
. Any instances of “x” denote a number (for example: array1 or disk3)
1
From Settings, click
Storage
.
2
Click the settings icon (
) to the right of “LVM”.
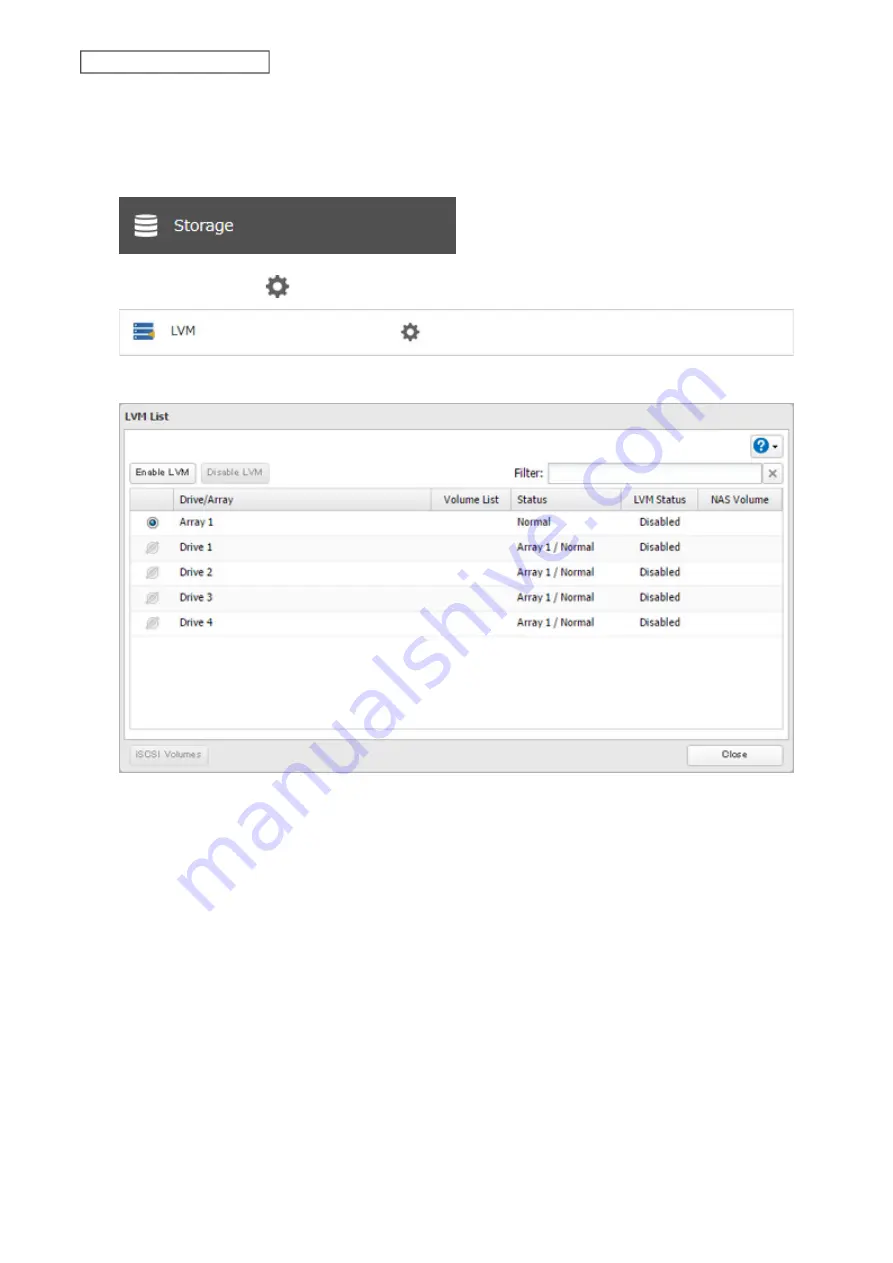
3
Select the drive or array where the volume will be located and click
Enable LVM
.
4
The “Confirm Operation” screen will open. Enter the confirmation number, then click
OK
.
5
Click
OK
.
Summary of Contents for TeraStation 3010
Page 29: ...28 Chapter 3 File Sharing 3 Click Create User...
Page 32: ...31 Chapter 3 File Sharing 3 Click Add Group...
Page 71: ...70 Chapter 4 Storage Management 6 Click Edit under NAS Volume 7 Click Create Volume...
Page 88: ...87 Chapter 5 Backup 4 Enter the backup device access key and click OK 5 Click Add...
Page 111: ...110 Chapter 5 Backup 3 Click Select Backup Disk 4 Select the shared folder then click Use Disk...
Page 113: ...112 Chapter 5 Backup 7 Time Machine will count down from 120 seconds then backup will begin...
Page 125: ...124 Chapter 6 Cloud Services and Remote Access 5 Click Edit...
Page 137: ...136 Chapter 6 Cloud Services and Remote Access 4 Click the Options tab 5 Click Edit...
Page 147: ...146 Chapter 6 Cloud Services and Remote Access 4 Click the Options tab...
Page 148: ...147 Chapter 6 Cloud Services and Remote Access 5 Click Edit...
Page 176: ...175 Chapter 7 Advanced Features 11Click the NFS Rules tab 12Click Add...
Page 205: ...204 Chapter 7 Advanced Features 3 Click FQDN Mapping 4 Click Add...


