169
Chapter 7 Advanced Features
3
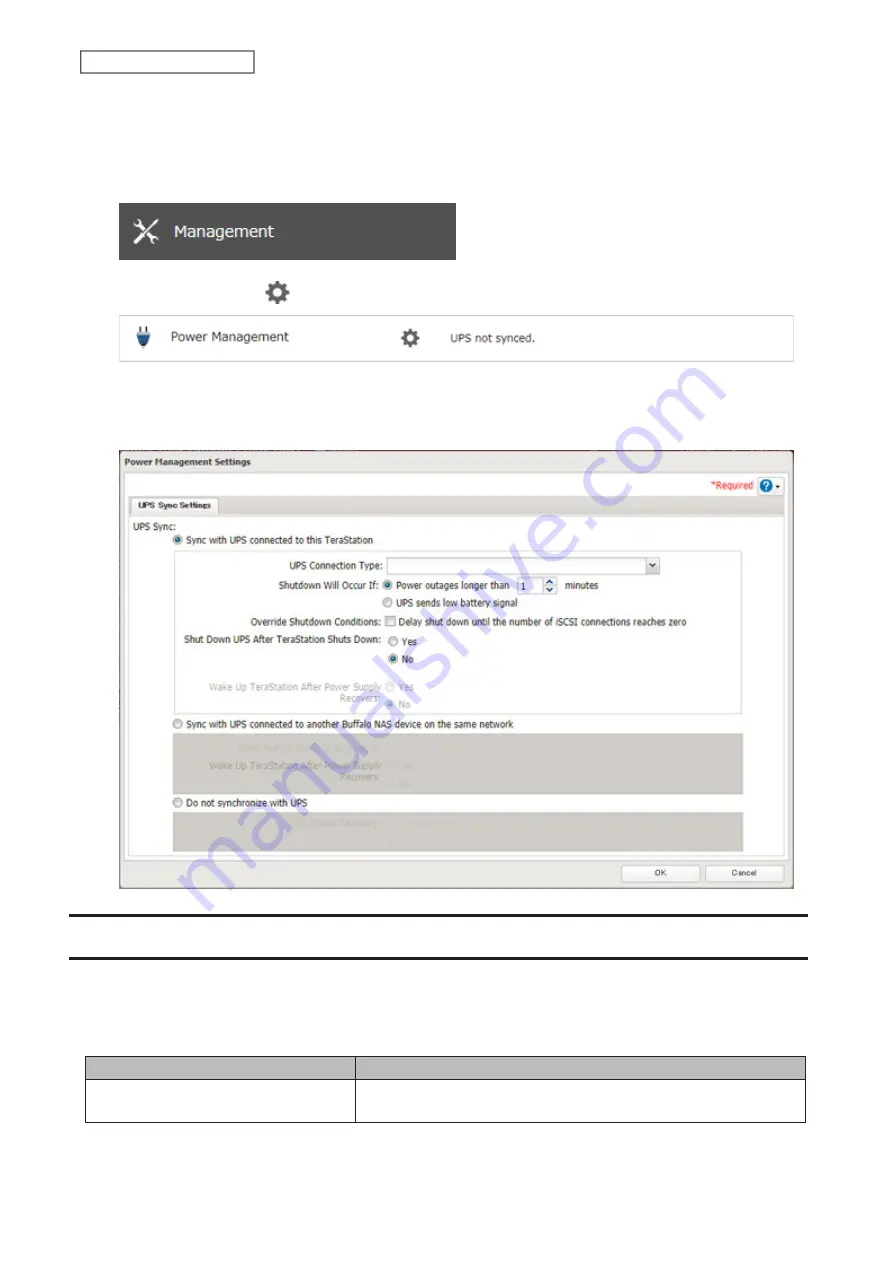
Connect the UPS and TeraStation.
4
Turn on the UPS, then the TeraStation.
5
From Settings, click
Management
.
6
Click the settings icon (
) to the right of “Power Management”.
7
Click
Edit
.
8
Configure the desired settings, then click
OK
.
Port Trunking
Two Ethernet cables can be used to establish two separate communication routes, providing LAN port redundancy
and improving communication reliability. The use of two Ethernet cables enables access to the TeraStation even if
one of the cables becomes disconnected.
The port trunking modes that can be set on the TeraStation are shown below:
Trunking Mode
Characteristics
Active-backup
Only one NIC slave in the bond is active. A different slave becomes
active if and only if the active slave fails.
Summary of Contents for TeraStation 3010
Page 29: ...28 Chapter 3 File Sharing 3 Click Create User...
Page 32: ...31 Chapter 3 File Sharing 3 Click Add Group...
Page 71: ...70 Chapter 4 Storage Management 6 Click Edit under NAS Volume 7 Click Create Volume...
Page 88: ...87 Chapter 5 Backup 4 Enter the backup device access key and click OK 5 Click Add...
Page 111: ...110 Chapter 5 Backup 3 Click Select Backup Disk 4 Select the shared folder then click Use Disk...
Page 113: ...112 Chapter 5 Backup 7 Time Machine will count down from 120 seconds then backup will begin...
Page 125: ...124 Chapter 6 Cloud Services and Remote Access 5 Click Edit...
Page 137: ...136 Chapter 6 Cloud Services and Remote Access 4 Click the Options tab 5 Click Edit...
Page 147: ...146 Chapter 6 Cloud Services and Remote Access 4 Click the Options tab...
Page 148: ...147 Chapter 6 Cloud Services and Remote Access 5 Click Edit...
Page 176: ...175 Chapter 7 Advanced Features 11Click the NFS Rules tab 12Click Add...
Page 205: ...204 Chapter 7 Advanced Features 3 Click FQDN Mapping 4 Click Add...


