172
Chapter 7 Advanced Features
5
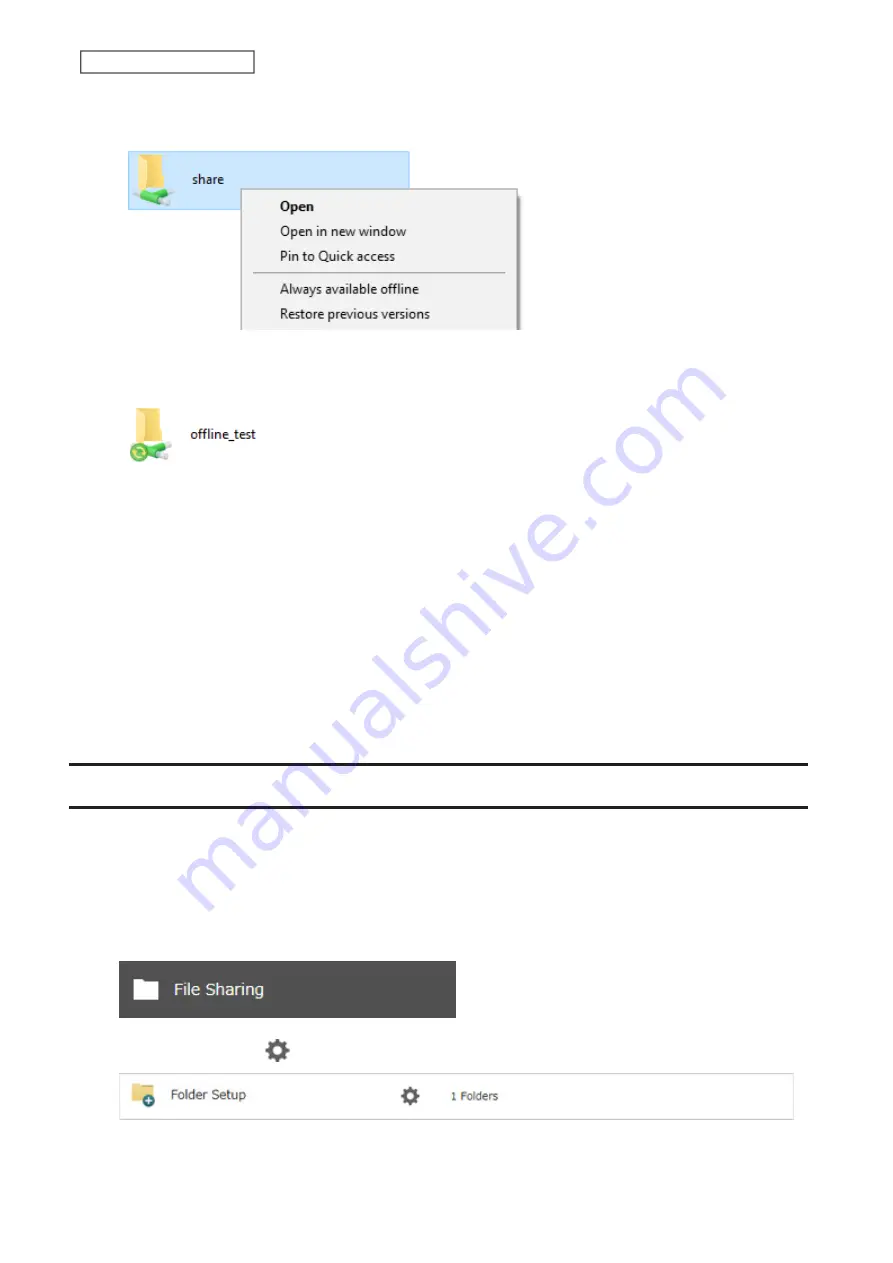
From File Explorer, right-click the icon of the shared folder on the TeraStation for which you have set the offline
feature, then click
Always available offline
. If the offline file wizard opens, follow the procedure on the screen.
6
When the offline settings and synchronization settings are completed, the files and folders set appear as
shown:
7
If the computer is disconnected from the network after synchronization is completed, the offline file function
can be used.
Offline files can be accessed by the original Universal Naming Convention (UNC) where the data was saved.
Notes:
• If you cannot access offline files, try the following procedure:
(1) Reconnect the computer to the network.
(2) From Control Panel, change the view to the icon view and click
Sync Center
. Click
Sync All
to synchronize all
offline files.
(3) Disconnect the computer from the network and verify that you can access offline files.
• If you have configured the recycle bin for the shared folder, temp files may be created in the recycle bin.
Accessing from an NFS Client
Note:
(US customers only) Buffalo’s customer support will help configure the NFS settings on your TeraStation, and
will support VMware and Windows clients but will not provide support for configuring your Linux or other UNIX
clients. There are various types of UNIX and the procedures for configuring NFS with them will vary considerably.
For help configuring your NetWare, Linux, or other UNIX clients for NFS support, please consult each client’s own
documentation and support.
1
From Settings, click
File Sharing
.
2
Click the settings icon (
) to the right of “Folder Setup”.
3
Choose the shared folder that will be accessible from the NFS client.
Summary of Contents for TeraStation 3010
Page 29: ...28 Chapter 3 File Sharing 3 Click Create User...
Page 32: ...31 Chapter 3 File Sharing 3 Click Add Group...
Page 71: ...70 Chapter 4 Storage Management 6 Click Edit under NAS Volume 7 Click Create Volume...
Page 88: ...87 Chapter 5 Backup 4 Enter the backup device access key and click OK 5 Click Add...
Page 111: ...110 Chapter 5 Backup 3 Click Select Backup Disk 4 Select the shared folder then click Use Disk...
Page 113: ...112 Chapter 5 Backup 7 Time Machine will count down from 120 seconds then backup will begin...
Page 125: ...124 Chapter 6 Cloud Services and Remote Access 5 Click Edit...
Page 137: ...136 Chapter 6 Cloud Services and Remote Access 4 Click the Options tab 5 Click Edit...
Page 147: ...146 Chapter 6 Cloud Services and Remote Access 4 Click the Options tab...
Page 148: ...147 Chapter 6 Cloud Services and Remote Access 5 Click Edit...
Page 176: ...175 Chapter 7 Advanced Features 11Click the NFS Rules tab 12Click Add...
Page 205: ...204 Chapter 7 Advanced Features 3 Click FQDN Mapping 4 Click Add...


