150
Chapter 6 Cloud Services and Remote Access
3
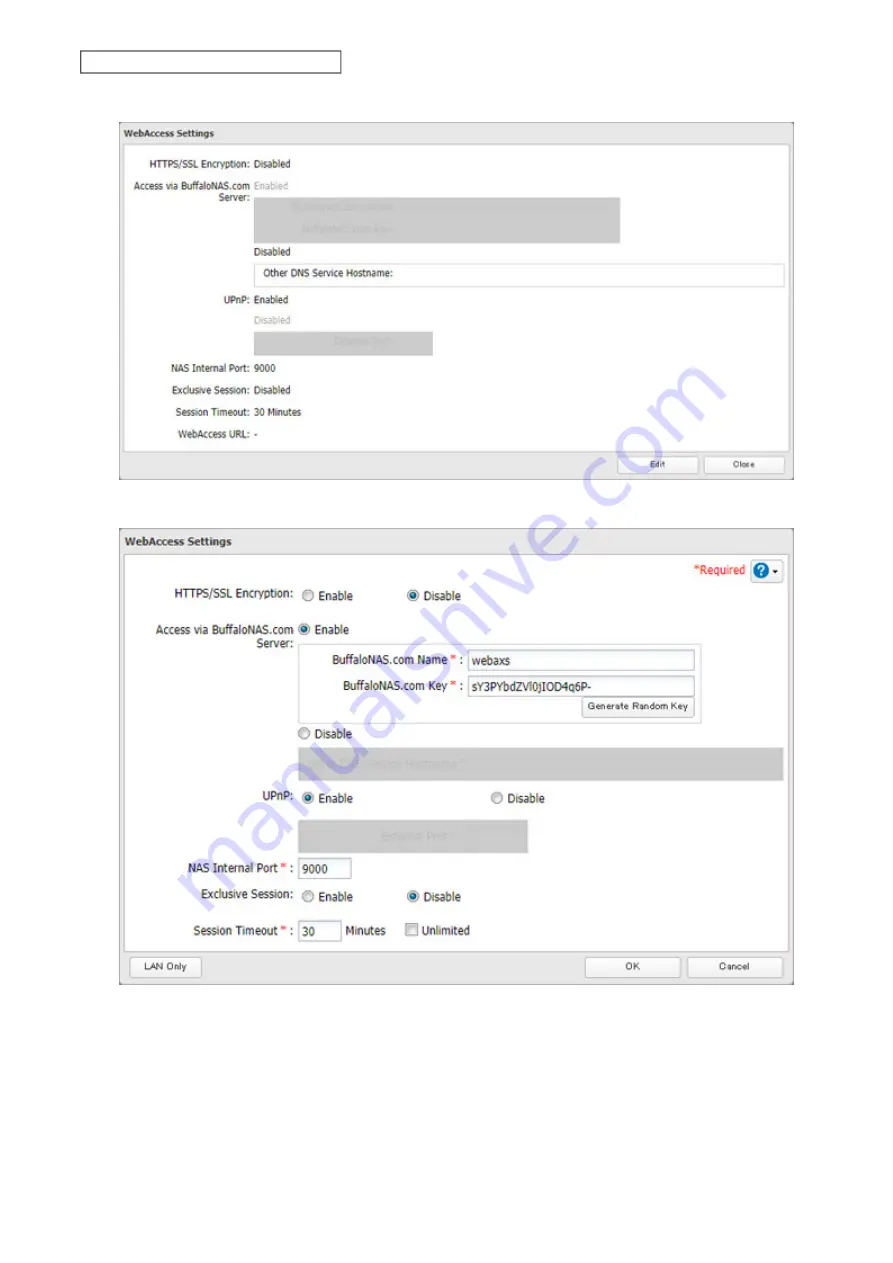
Click
Edit
.
4
Configure the desired settings, then click
OK
.
• To use SSL encryption for more secure data transfers, enable “HTTPS/SSL Encryption”.
• You may use the BuffaloNAS.com server as a DNS server, or disable it to use a different DNS server.
• Choose a “BuffaloNAS.com Name” and “BuffaloNAS.com Key” for your WebAccess account. Names and keys
may contain between 3 and 20 alphanumeric characters, underscores (_), and hyphens (-).
• If “Exclusive Session” is enabled, multiple users cannot be logged in to WebAccess at the same time. Only the
last login will be active.
• Enter a time in minutes (1 to 120, or “Unlimited”) before inactive users are logged out of WebAccess.
Summary of Contents for TeraStation 3010
Page 29: ...28 Chapter 3 File Sharing 3 Click Create User...
Page 32: ...31 Chapter 3 File Sharing 3 Click Add Group...
Page 71: ...70 Chapter 4 Storage Management 6 Click Edit under NAS Volume 7 Click Create Volume...
Page 88: ...87 Chapter 5 Backup 4 Enter the backup device access key and click OK 5 Click Add...
Page 111: ...110 Chapter 5 Backup 3 Click Select Backup Disk 4 Select the shared folder then click Use Disk...
Page 113: ...112 Chapter 5 Backup 7 Time Machine will count down from 120 seconds then backup will begin...
Page 125: ...124 Chapter 6 Cloud Services and Remote Access 5 Click Edit...
Page 137: ...136 Chapter 6 Cloud Services and Remote Access 4 Click the Options tab 5 Click Edit...
Page 147: ...146 Chapter 6 Cloud Services and Remote Access 4 Click the Options tab...
Page 148: ...147 Chapter 6 Cloud Services and Remote Access 5 Click Edit...
Page 176: ...175 Chapter 7 Advanced Features 11Click the NFS Rules tab 12Click Add...
Page 205: ...204 Chapter 7 Advanced Features 3 Click FQDN Mapping 4 Click Add...


