53
Chapter 4 Storage Management
4
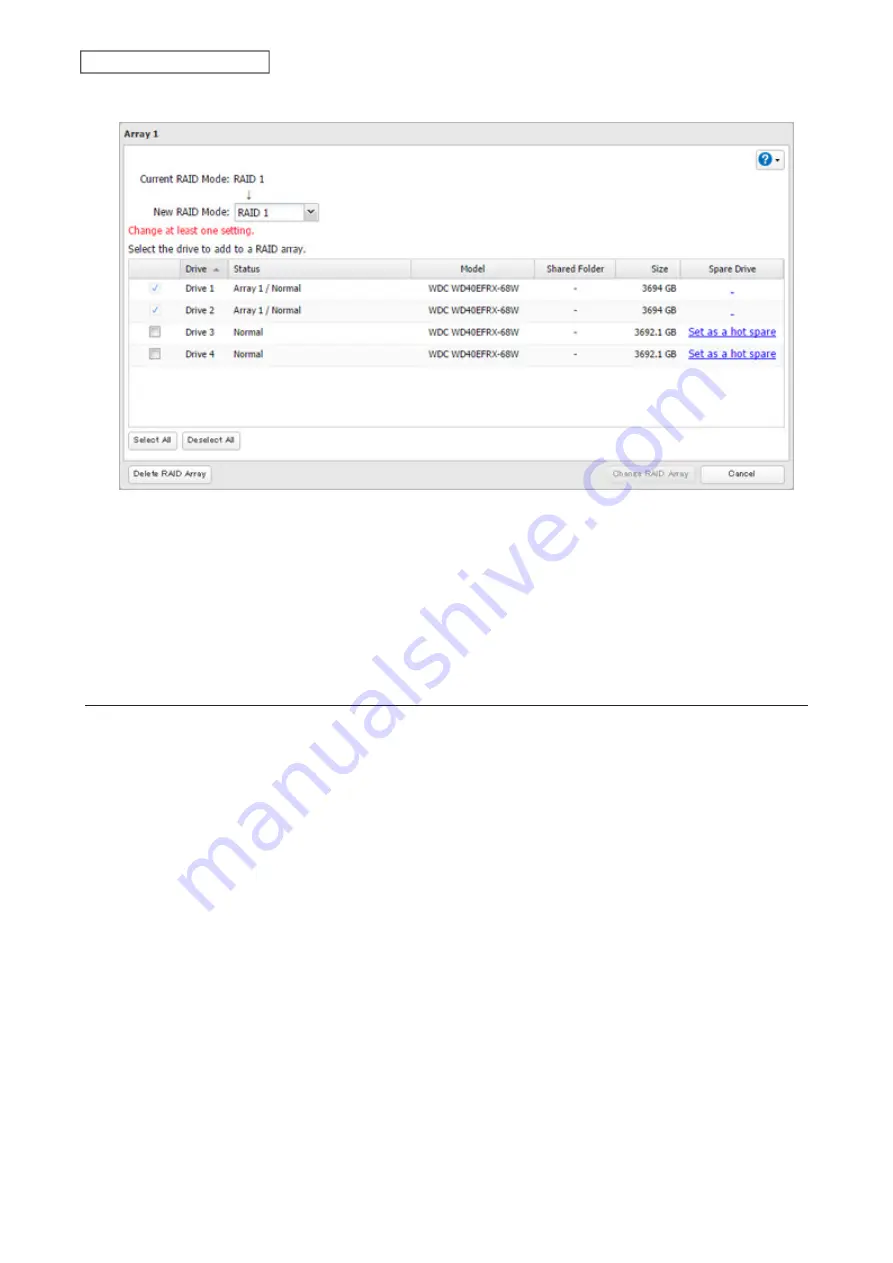
Click
Set as a hot spare
.
5
Click
Yes
.
6
The “Confirm Operation” screen will open. Enter the confirmation number, then click
OK
.
7
Click
OK
when completed.
Note:
To turn the hot spare back to a normal drive, choose
Set as a normal drive
.
Expanding RAID Capacity Without Deleting Data
You can create or expand a RAID array without erasing data on the drive by using RMM (RAID Mode Manager).
If using a TeraStation model whose drives are not fully installed into the slots, such as the TS3410DN TeraStation
model with two drives included, follow the procedure to add a new drive first. Otherwise, refer to the procedures in
this section to configure the RAID array. The following examples use the case of the TS3410DN TeraStation model.
Adding a Drive
The procedure for adding a new drive will vary depending on your device.
1
Open the front cover with the included key.
2
Push the drive’s unlock button for the empty slot and swing the lock mechanism out.
3
Pull out the drive cartridge and remove it from the TeraStation.
4
Insert the new drive (sold separately) into the empty slot with the lock mechanism remaining open and swing
the lock back down until it clicks into place.
5
Close the front cover.
6
When the drive is recognized, the status LED will flash red and the
I32
message will appear on the Dashboard
in Settings and NAS Navigator2.
Summary of Contents for TeraStation 3010
Page 29: ...28 Chapter 3 File Sharing 3 Click Create User...
Page 32: ...31 Chapter 3 File Sharing 3 Click Add Group...
Page 71: ...70 Chapter 4 Storage Management 6 Click Edit under NAS Volume 7 Click Create Volume...
Page 88: ...87 Chapter 5 Backup 4 Enter the backup device access key and click OK 5 Click Add...
Page 111: ...110 Chapter 5 Backup 3 Click Select Backup Disk 4 Select the shared folder then click Use Disk...
Page 113: ...112 Chapter 5 Backup 7 Time Machine will count down from 120 seconds then backup will begin...
Page 125: ...124 Chapter 6 Cloud Services and Remote Access 5 Click Edit...
Page 137: ...136 Chapter 6 Cloud Services and Remote Access 4 Click the Options tab 5 Click Edit...
Page 147: ...146 Chapter 6 Cloud Services and Remote Access 4 Click the Options tab...
Page 148: ...147 Chapter 6 Cloud Services and Remote Access 5 Click Edit...
Page 176: ...175 Chapter 7 Advanced Features 11Click the NFS Rules tab 12Click Add...
Page 205: ...204 Chapter 7 Advanced Features 3 Click FQDN Mapping 4 Click Add...


