196
Chapter 7 Advanced Features
5
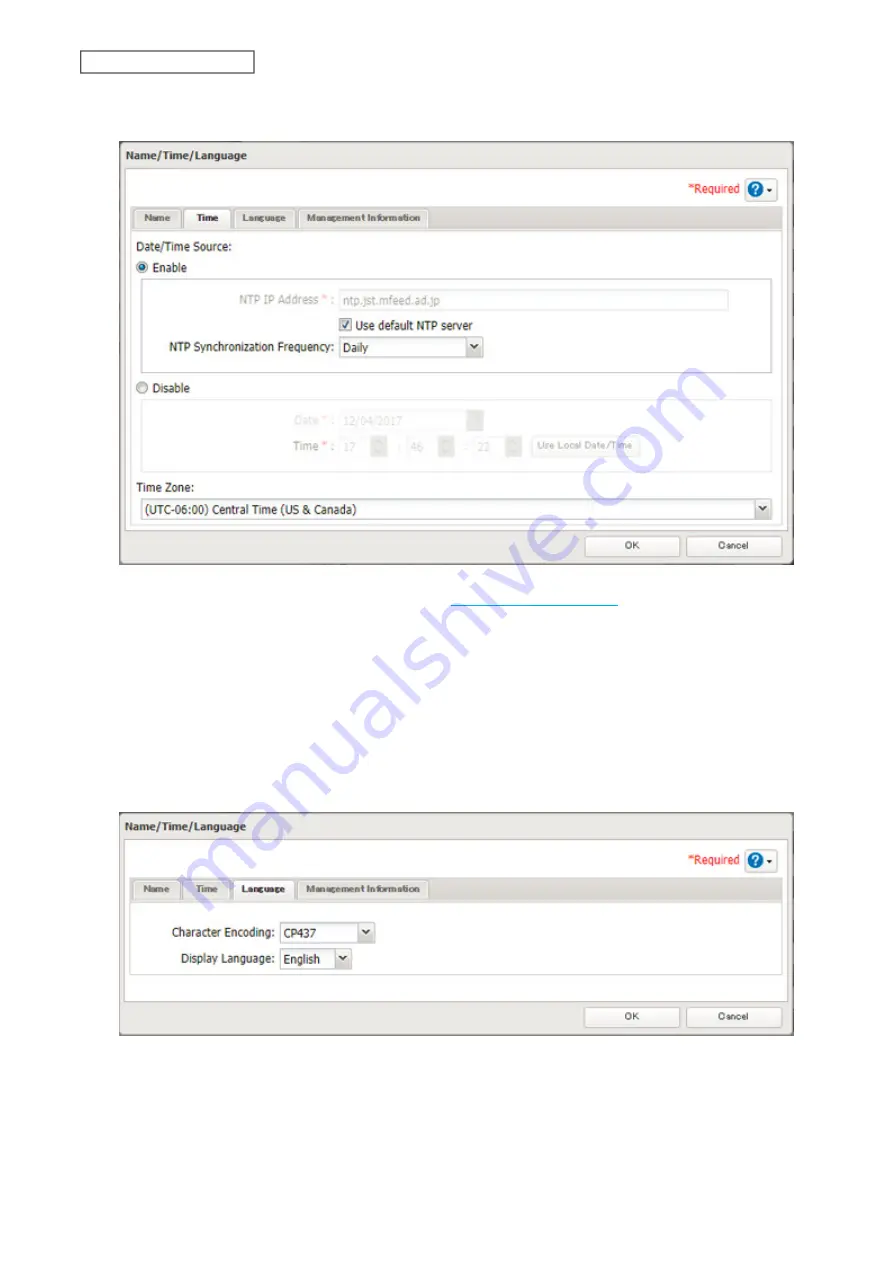
Click the
Time
tab. Enable the NTP server and select the “Use default NTP server” checkbox. If you disable the
NTP function, click
Use Local Date/Time
to use your computer’s time settings for the TeraStation.
By default, the TeraStation adjusts its clock automatically by using a default NTP server. This NTP server belongs
to Internet Multi Feed Inc. For more information, visit
To use a different NTP server, clear the “Use default NTP server” checkbox and enter a new NTP IP address or
its hostname, then click
OK
. If an NTP server is specified by name instead of IP address, make sure that a DNS
server is configured for the TeraStation.
Note:
The internal clocks of the TeraStation and other devices on your network may run at slightly different
speeds. Over a long period of time, your network devices may show somewhat different times, which can
cause network problems. If clocks on your network vary by more than five minutes, unexpected behavior
may occur. For best results, keep all clocks on your network devices set to the same time by adjusting them
regularly, or use an NTP server to correct them all automatically.
6
Click the
Language
tab and select the language to be used.
Note:
This tab changes the language used by the TeraStation for email notifications and other functions. To
change the language displayed in Settings, go to Settings and click
Language
from the menu bar. Choose your
desired language from the drop-down list.
Summary of Contents for TeraStation 3010
Page 29: ...28 Chapter 3 File Sharing 3 Click Create User...
Page 32: ...31 Chapter 3 File Sharing 3 Click Add Group...
Page 71: ...70 Chapter 4 Storage Management 6 Click Edit under NAS Volume 7 Click Create Volume...
Page 88: ...87 Chapter 5 Backup 4 Enter the backup device access key and click OK 5 Click Add...
Page 111: ...110 Chapter 5 Backup 3 Click Select Backup Disk 4 Select the shared folder then click Use Disk...
Page 113: ...112 Chapter 5 Backup 7 Time Machine will count down from 120 seconds then backup will begin...
Page 125: ...124 Chapter 6 Cloud Services and Remote Access 5 Click Edit...
Page 137: ...136 Chapter 6 Cloud Services and Remote Access 4 Click the Options tab 5 Click Edit...
Page 147: ...146 Chapter 6 Cloud Services and Remote Access 4 Click the Options tab...
Page 148: ...147 Chapter 6 Cloud Services and Remote Access 5 Click Edit...
Page 176: ...175 Chapter 7 Advanced Features 11Click the NFS Rules tab 12Click Add...
Page 205: ...204 Chapter 7 Advanced Features 3 Click FQDN Mapping 4 Click Add...


