51
Chapter 4 Storage Management
RAID array will be corrupted so that data will be lost. It is recommended to proceed without changing settings that
make the confirmation screen appear.
Selecting the Action on the Confirmation Screen
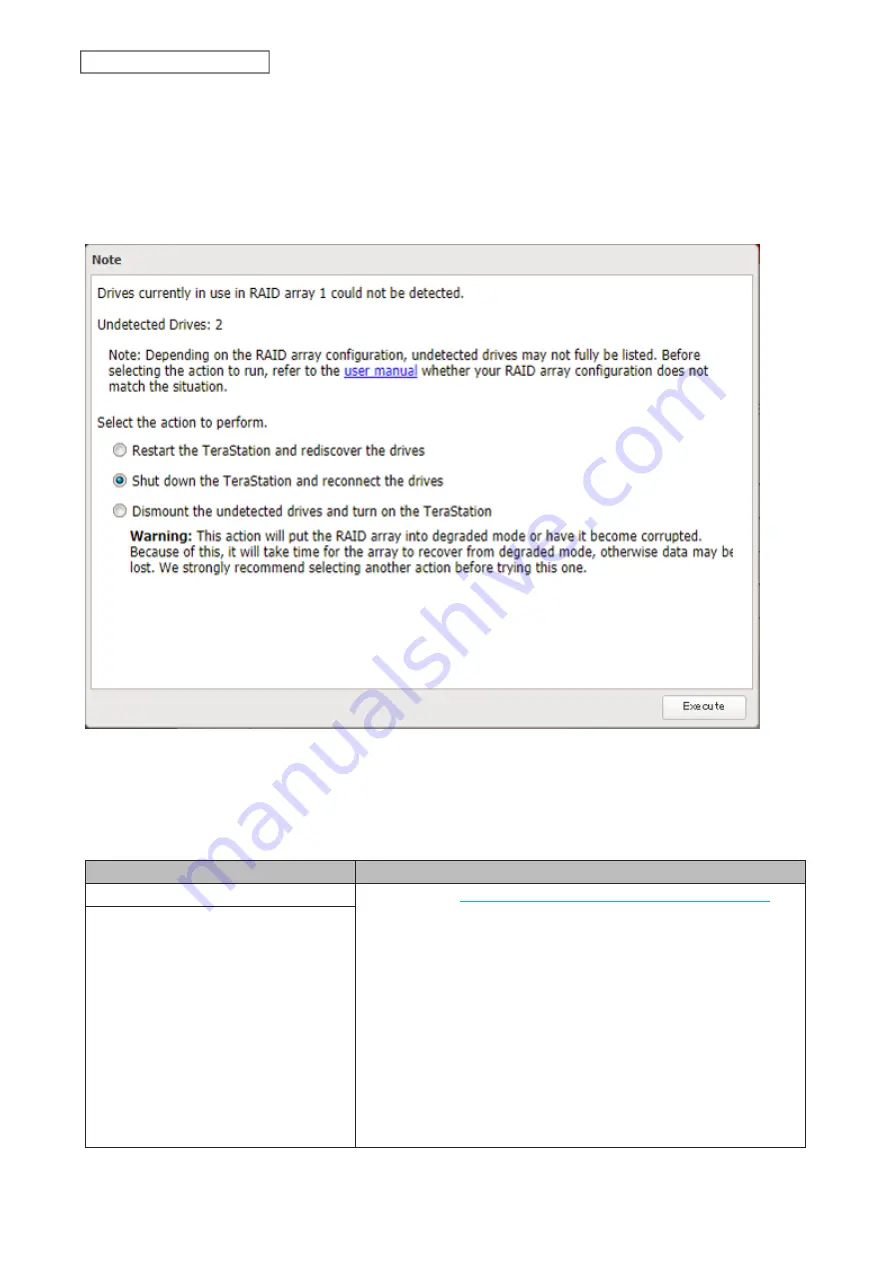
When the confirmation screen is displayed, the following screen will appear after logging in to Settings if the drive
used for the RAID array could not be mounted. Select the action to run when the screen appears.
Conditions and Corrective Actions If Undetected Drives Aren’t Displayed Properly
Even when you configure the NAS to show the confirmation screen if a drive being used for the RAID array cannot
be mounted, undetected drives will not be displayed under the following conditions. If you are using any of the
RAID array configurations below, follow the corrective action.
Conditions
Corrective Actions
RAID 10 has been configured.
1
Refer to the
“Selecting the Action on the Confirmation Screen”
section above on how to access the confirmation screen.
2
Select “Shut down the TeraStation and reconnect the drives” and
click
Execute
.
3
After the TeraStation shuts down, confirm that all drives have
been inserted properly.
4
Press the power button to power on the TeraStation.
5
Log in to Settings and make sure the confirmation screen doesn’t
appear.
Multiple arrays have been configured.
Summary of Contents for TeraStation 3010
Page 29: ...28 Chapter 3 File Sharing 3 Click Create User...
Page 32: ...31 Chapter 3 File Sharing 3 Click Add Group...
Page 71: ...70 Chapter 4 Storage Management 6 Click Edit under NAS Volume 7 Click Create Volume...
Page 88: ...87 Chapter 5 Backup 4 Enter the backup device access key and click OK 5 Click Add...
Page 111: ...110 Chapter 5 Backup 3 Click Select Backup Disk 4 Select the shared folder then click Use Disk...
Page 113: ...112 Chapter 5 Backup 7 Time Machine will count down from 120 seconds then backup will begin...
Page 125: ...124 Chapter 6 Cloud Services and Remote Access 5 Click Edit...
Page 137: ...136 Chapter 6 Cloud Services and Remote Access 4 Click the Options tab 5 Click Edit...
Page 147: ...146 Chapter 6 Cloud Services and Remote Access 4 Click the Options tab...
Page 148: ...147 Chapter 6 Cloud Services and Remote Access 5 Click Edit...
Page 176: ...175 Chapter 7 Advanced Features 11Click the NFS Rules tab 12Click Add...
Page 205: ...204 Chapter 7 Advanced Features 3 Click FQDN Mapping 4 Click Add...


