53
Kaleido-X (7RU)
Installation & Service Manual
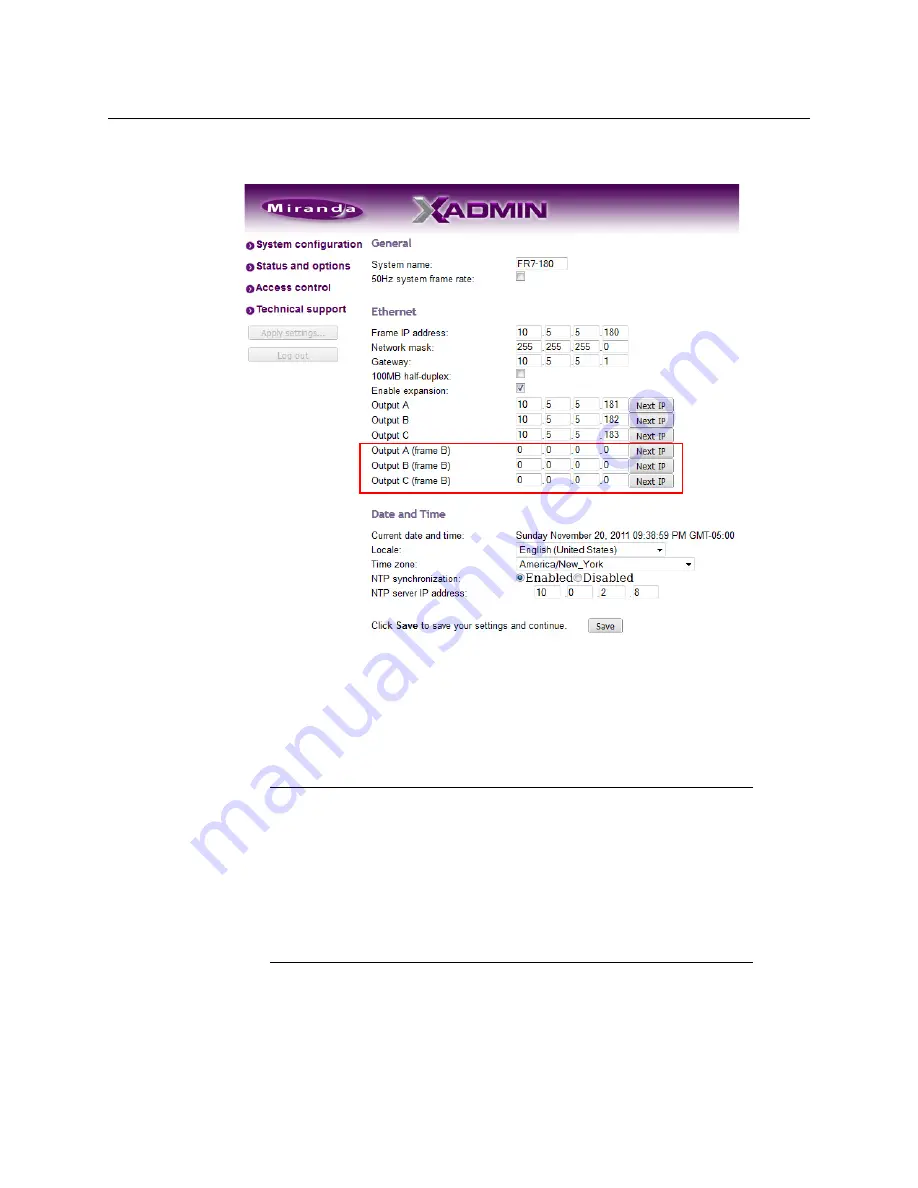
The Output D/EXP IP address is replaced with new lines for the IP addresses of Frame B’s
Output A, B, and C cards.
3 If necessary, change the
System name
and
Frame IP address
(which will apply to both
frames once they are in joined in expansion mode).
4 Enter the IP addresses currently used by
Frame B
’s Output A, B, and C cards.
5 Click
Save
, and then click
Apply settings
in the sidebar.
Frame A
and
Frame B
should reboot automatically. If
Frame B
does not reboot
automatically, perform a hard reboot on
Frame B
only.
6 Open XAdmin, using what is now the expansion system IP address.
7 Click
Status and options
.
8 Verify that status information appears for all of the cards on both frames in the
expansion system (see
Viewing the Status of an Expansion Frame
Notes
• You may see messages on the monitor wall warning you that KX0 heads
are not assigned. This is normal.
• If one or more cards in a Kaleido-X frame is being upgraded (i.e. if a Live
Update is in progress), then it is not possible to apply any changes made
in XAdmin. If you click
Apply settings
in the XAdmin sidebar, an error
message will appear. This restriction also occurs during the first 10 to 20
seconds after a card is inserted into or removed from the frame. Wait until
the upgrade has finished, and then click
Apply settings
again.
Summary of Contents for Grass Valley Kaleido-X
Page 22: ...22 Overview Functional Block Diagrams Simplified Signal Flow Diagram KX0 24Router...
Page 40: ...40 Installation Ventilation...
Page 100: ...100 IP Network Setup Network Considerations for a Multiviewer Cluster...
Page 123: ...123 Kaleido X 7RU Installation Service Manual 9 Click Finish A security warning appears...
Page 152: ...152 System Configuration Enabling Options...
Page 190: ...190 Maintenance Troubleshooting Disposal and Recycling Information...
Page 215: ...215 Kaleido X 7RU Installation Service Manual...


