


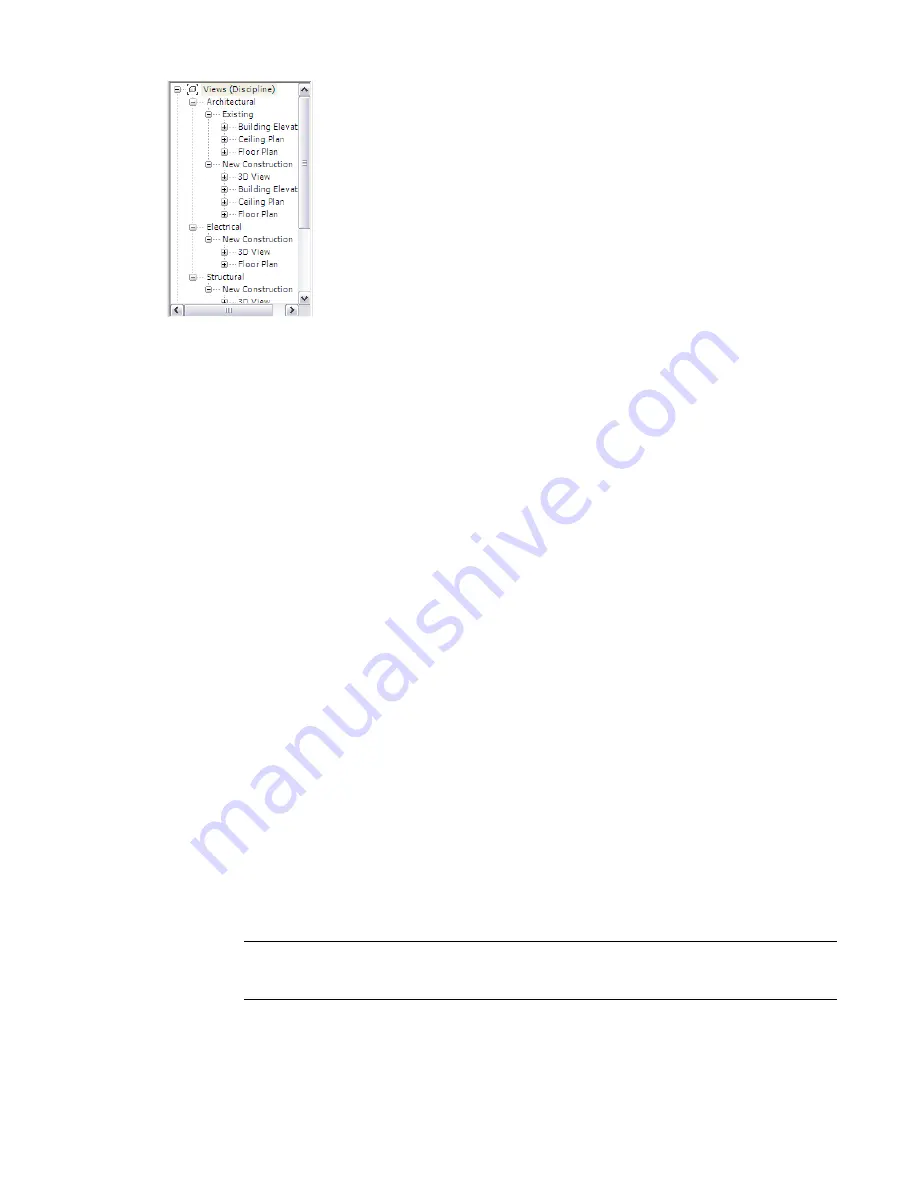
In addition to sorting views, you can also limit the views that display in the Project Browser by applying a
filter. This is useful when you have a project with a large number of views or sheets, and you only want to
view a specific set in the Project Browser.
The properties that you can choose from when creating a sort group or applying a filter to the Project Browser
include project parameters and shared parameters. For more information about project and shared parameters,
see
on page 458.
By default, the Project Browser displays all views (by view type) and all sheets (by sheet number and sheet
name).
Sorting Views or Sheets in the Project Browser
1
Click View tab
➤
Windows panel
➤
User Interface drop-down
➤
Browser Organization.
2
In the Browser Organization dialog, click the Views tab to apply a sort to project views, or click
the Sheets tab to apply a sort to sheets.
3
Select a sort group.
To view the properties of an existing sort group, select it, and click Edit.
For information on creating a sort group or editing an existing sort group, see
Editing a Project Browser Sort Group
on page 257.
4
Click Apply, then click OK.
Creating a Project Browser Sort Group
1
Click View tab
➤
Windows panel
➤
User Interface drop-down
➤
Browser Organization.
2
In the Browser Organization dialog, click the Views tab to create a sort group for project views,
or click the Sheets tab to create a sort group for sheets.
3
Click New.
4
Enter a name for the sort group, and click OK.
5
In the Browser Organization Properties dialog, click the Folders tab.
6
For the first Group By list, select the view or sheet property to group by.
NOTE
Values for the selected property must be defined for each view or sheet for the sort to work
correctly. To edit view or sheet properties, in the Project Browser, right-click the view or sheet name,
and select Properties.
7
If you want only the first few characters of the property value to be considered, select Leading
characters, and specify a value.
256 | Chapter 5 Project Views
Summary of Contents for 256B1-05A761-1301 - AutoCAD Revit Structure Suite 2010
Page 1: ...Revit Architecture 2010 User s Guide March 2009 ...
Page 4: ......
Page 42: ...xlii ...
Page 84: ...42 ...
Page 126: ...84 ...
Page 166: ...124 ...
Page 229: ...Schedule Field Formatting Calculating Totals Specifying Schedule Properties 187 ...
Page 230: ...Schedule with Grid Lines Schedule with Grid Lines and an Outline 188 Chapter 5 Project Views ...
Page 304: ...262 ...
Page 427: ...Defining the first scale vector Defining the second scale vector Resizing Graphically 385 ...
Page 454: ...Before painting applying material to stairs 412 Chapter 8 Editing Elements ...
Page 456: ...414 ...
Page 486: ...444 ...
Page 674: ...632 ...
Page 809: ...Curtain wall Curtain Grid Curtain Walls Curtain Grids and Mullions 767 ...
Page 994: ...952 ...
Page 1016: ...974 ...
Page 1204: ...1162 ...
Page 1290: ...1248 ...
Page 1318: ...1276 ...
Page 1372: ...1330 ...
Page 1382: ...1340 ...
Page 1462: ...1420 ...
Page 1492: ...1450 ...


