


VIGIL Software v8.8 User Manual |
VISIX V-Series All-in-One Cameras
10225 Westmoor Drive, Suite 300, Westminster, CO 80021 | www.3xlogic.com | (877) 3XLOGIC
84
7.4
Network Configuration Menu
TCP/IP SETTING
Steps:
1).
Opening the
Setup Tab>Network Configuration
drop-down menu and clicking the
TCP/IP
link
will open the network
TCP/IP
settings page.
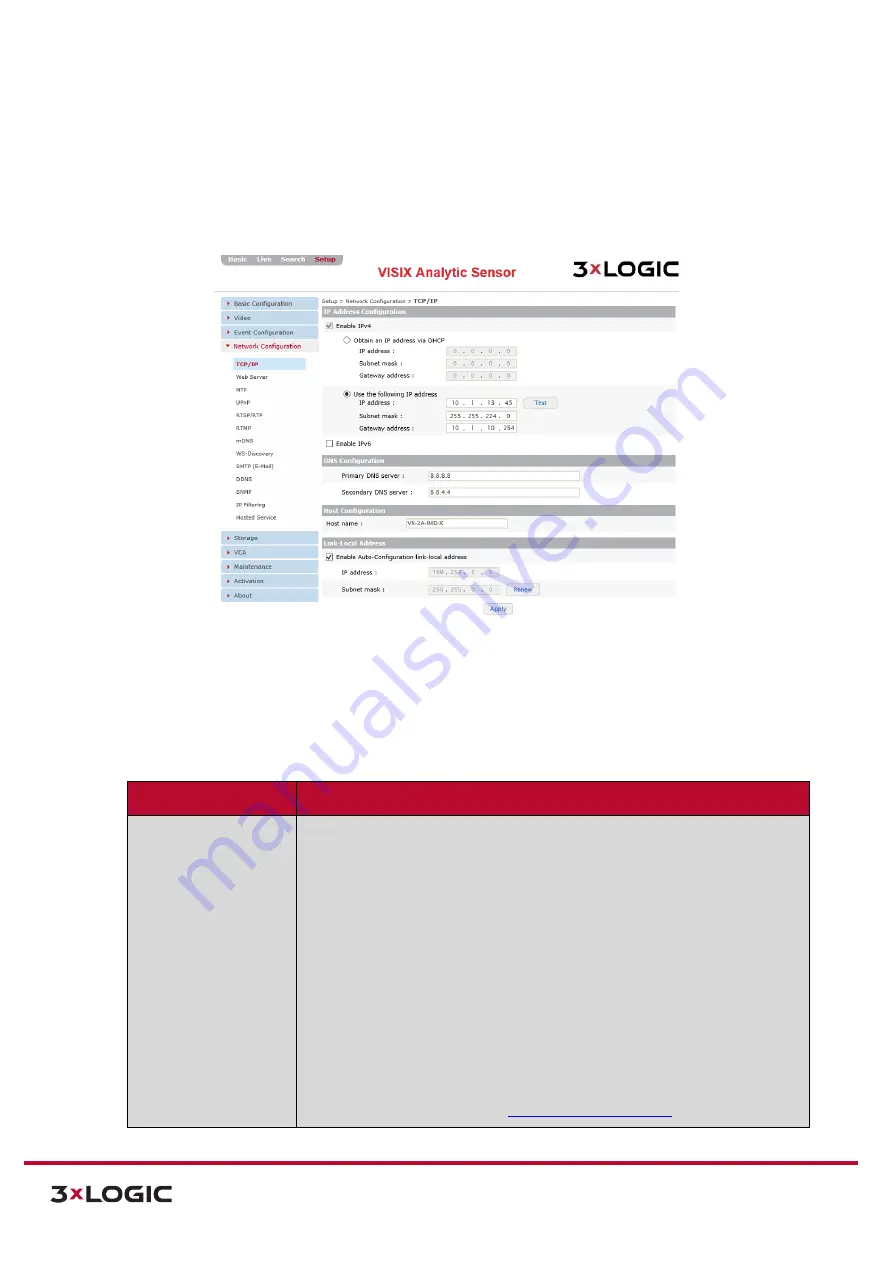
Figure 7-45
: Setup Tab –Network Configuration Menu – TCP/IP Settings
2).
From the
TCP/IP
settings
page, a user may edit a camera’s
TCP/IP settings
.
This includes
all
configurable settings from the
Basic Tab>Camera Configuration> Network settings (IP
Settings, DNS Server settings
pages as well as the ability to enable IPv6 and configure host
name and local link address details). These settings can also be accessed via the
Advanced
Tab>Basic Configuration Menu>Network Settings.
Network Setting
Description
IP Address
Configuration
Select the method by which the cameras will obtain an IP address:
Obtain an IP Address via DHCP
– Select this method to have your
router’s DHCP function automatically assign the camera’s network
connection settings. This method is enabled by default. The
automatically-generated
IP, Subnet Mask and Gateway
addresses will
be listed directly underneath.
i.
Use the following IP Address (Manual Configuration
) – Select
this option to manually enter network connection settings.
IP
Address, Subnet Mask and Gateway Addresses
can be manually
entered directly underneath this setting. Clicking the
Test
button
will confirm the validity of the network connection addresses you
have entered.
ii.
To enable IPv6 protocol, click
Enable IPv6
. For more information
on IPv6 settings, see
, below.


