PRE-OPERATION INSPECTION AND MAINTENANCE
3-7
EASB296069
PRE-OPERATION INSPECTION AND MAINTENANCE
Before riding for break-in operation, practice or a race, make sure the machine is in good operating
condition.
Before using this machine, check the following points.
EASB296070
GENERAL INSPECTION AND MAINTENANCE
TIP
Perform usual maintenance enough so that, in the race course, a confirmation of that and simple set-
ting adjustments may only be left, in order to get enough time to use effectively.
ITEM
inspect
Page
Coolant
Check that coolant is filled up to the radiator cap.
Check the cooling system for leakage.
3-8 – 10
Fuel
Check that a fresh gasoline is filled in the fuel tank.
Check the fuel line for leakage.
1-20
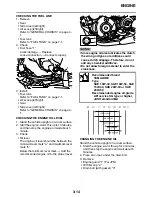
Engine oil
Check that the oil level is correct. Check the crank-
case and oil line for leakage.
3-14 – 16
Gear shifter and clutch Check that gears can be shifted correctly in order and
that the clutch operates smoothly.
3-10 – 11
Throttle grip/Housing
Check that the throttle grip operation and free play
are correctly adjusted. Lubricate the throttle grip and
housing, if necessary.
3-11 – 12
Brakes
Check the play of front brake and effect of front and
rear brake.
3-22 – 28
Drive chain
Check drive chain slack and alignment. Check that
the drive chain is lubricated properly.
3-28
4-66 – 67
Wheels
Check for excessive wear and tire pressure. Check
for loose spokes and have no excessive play.
3-33 – 34
Steering
Check that the handlebar can be turned smoothly and
have no excessive play.
3-34 – 35
Front forks and rear
shock absorber
Check that they operate smoothly and there is no oil
leakage.
3-29 – 33
Cables (wires)
Check that the clutch and throttle cables move
smoothly. Check that they are not caught when the
handlebars are turned or when the front forks travel
up and down.
—
Exhaust pipe
Check that the exhaust pipe is tightly mounted and
has no cracks.
3-13
Rear wheel sprocket
Check that the rear wheel sprocket tightening bolt is
not loose.
4-8 – 9
Lubrication
Check for smooth operation. Lubricate if necessary.
3-11 – 12
3-35 – 36
Bolts and nuts
Check the chassis and engine for loose bolts and
nuts.
1-26 – 27
Lead connectors
Check that the AC magneto, ECU and ignition coil are
connected tightly.
1-7 – 10
Settings
Is the machine set suitably for the condition of the rac-
ing course and weather or by taking into account the
results of test runs before racing? Are inspection and
maintenance completely done?
10-1 – 8
Содержание YZ 2016 Series
Страница 6: ...EASB296006 YAMAHA MOTOR CORPORATION U S A YZ MOTORCYCLE LIMITED WARRANTY...
Страница 10: ......
Страница 31: ...CONTROL FUNCTIONS 1 19 a 2...
Страница 63: ...LUBRICATION POINTS AND LUBRICANT TYPES 2 22...
Страница 66: ...LUBRICATION SYSTEM CHART AND DIAGRAMS 2 25...
Страница 68: ...LUBRICATION SYSTEM CHART AND DIAGRAMS 2 27...
Страница 69: ...LUBRICATION SYSTEM CHART AND DIAGRAMS 2 28 1 Exhaust camshaft 2 Intake camshaft 3 Oil filter element 4 Oil pump...
Страница 70: ...LUBRICATION SYSTEM CHART AND DIAGRAMS 2 29...
Страница 71: ...LUBRICATION SYSTEM CHART AND DIAGRAMS 2 30 1 Camshaft 2 Oil pressure check bolt 3 Oil filter element 4 Oil pump...
Страница 72: ...CABLE ROUTING DIAGRAM 2 31 EASB296066 CABLE ROUTING DIAGRAM...
Страница 74: ...CABLE ROUTING DIAGRAM 2 33...
Страница 76: ...CABLE ROUTING DIAGRAM 2 35...
Страница 78: ...CABLE ROUTING DIAGRAM 2 37...
Страница 80: ...CABLE ROUTING DIAGRAM 2 39...
Страница 82: ...CABLE ROUTING DIAGRAM 2 41...
Страница 84: ...CABLE ROUTING DIAGRAM 2 43...
Страница 86: ...CABLE ROUTING DIAGRAM 2 45...
Страница 239: ...ELECTRIC STARTER 5 40 5 Install Bolt 1 O ring 2 TIP Apply the lithium soap based grease on the O ring New...
Страница 262: ...OIL PUMP AND BALANCER GEAR 5 63 a 2 10 b 2 9 1 b 5 3 a 4 10 5 9 3 E c d 6 7 8 8 b 6...
Страница 282: ...TRANSMISSION 5 83...
Страница 302: ...8 CHECKING THE INTAKE AIR TEMPERATURE SENSOR 8 68 CHECKING THE FUEL INJECTOR 8 68...
Страница 317: ...CHARGING SYSTEM 8 15...
Страница 321: ...COOLING SYSTEM For JPN 8 19...
Страница 351: ...FUEL PUMP SYSTEM 8 49...
Страница 352: ...ELECTRICAL COMPONENTS 8 50 EASB296346 ELECTRICAL COMPONENTS EASB296347 7 8 9 1 3 2 4 5 6...
Страница 354: ...ELECTRICAL COMPONENTS 8 52 11 10 9 2 3 1 6 7 8 4 5...
Страница 356: ...ELECTRICAL COMPONENTS 8 54 EASB296348 CHECKING THE SWITCHES 4 1 3 2 B B Sb B B B B B B B B...
Страница 357: ...ELECTRICAL COMPONENTS 8 55 1 Engine stop switch 2 Neutral switch 3 Clutch switch 4 Start switch...
Страница 378: ...LIST OF SELF DIAGNOSTIC AND FAIL SAFE ACTIONS 9 7...
Страница 392: ...ON OFF ON OFF Gy Gy B B Gy B B B L L B B B B B YZ250FXG 2016 WIRING DIAGRAM B29 28199 11_W D indd 2 2015 06 15 13 19 32...

