Software control: Microscope Control
3-26
User Manual
C O N F I D E N T I A L –
limited rights
Feb 2018
Revision A
Scanning presets
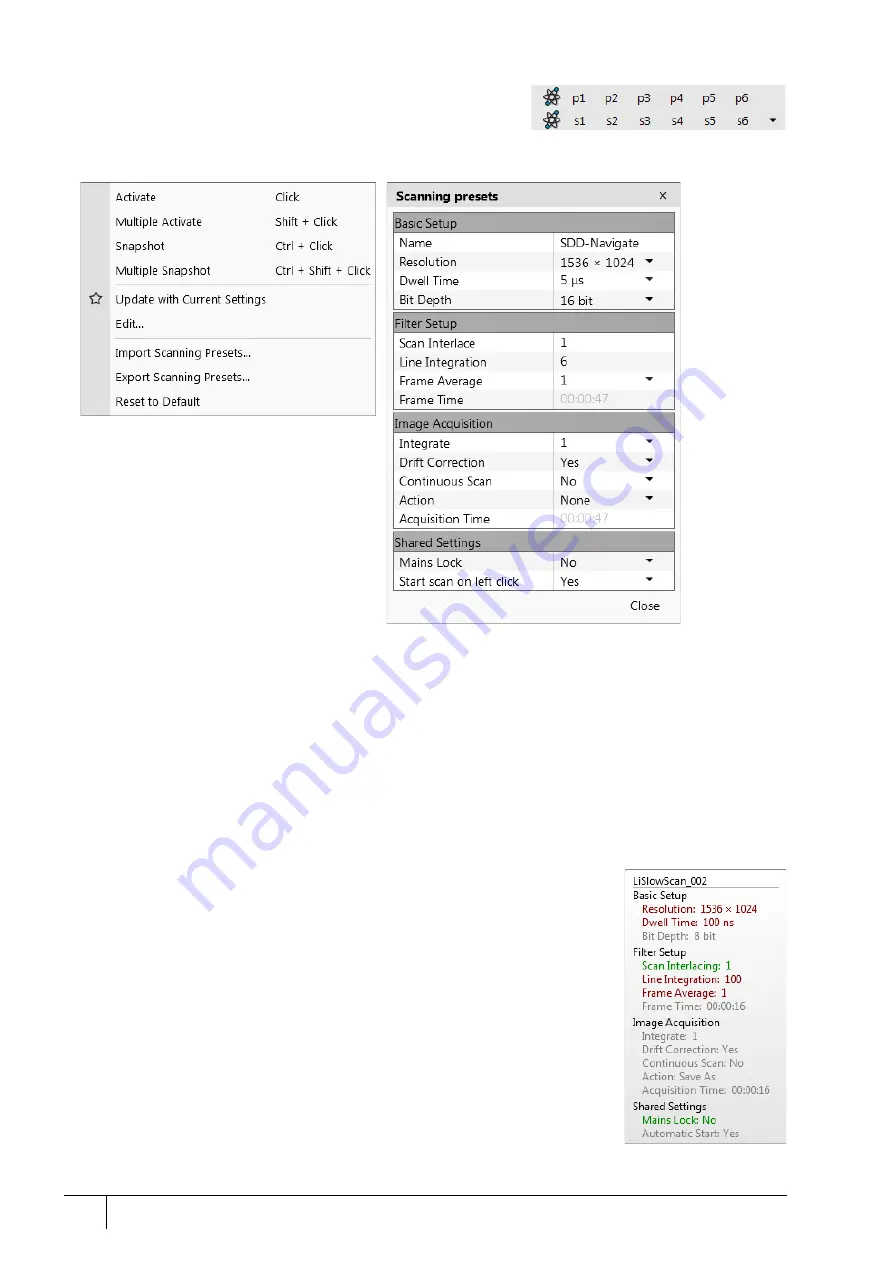
By default, there are 6 factory toolbar
Scanning presets
(labeled
s#)
.
Clicking on any one starts image acquiring with the corresponding
parameters.
Right-clicking on any Scanning preset button calls up the context menu:
•
Clicking on the
Activate
item highlights the button (orange background) and starts image acquisition, or just
activates the preset according to the
Scanning presets
property editor /
Shared Settings
section /
Start scan on left
click
item setting (Yes / No). The
Multiple Activate
item has the same functionality in all compatible displays
(same beam).
Starting image acquisition is also possible using the
Scan
menu /
Active Preset Snapshot
(Ctrl + F2) item.
•
Clicking on the
Snapshot
/
Multiple Snapshot
item starts snapshot acquisition from active / all compatible
displays.
•
Clicking on the
Update with Current Settings
item updates the selected Scanning preset with the actual scanning
settings.
•
Clicking on the
Edit
item opens the selected Scanning preset property editor. It is also possible to use the toolbar
down (expand) / up (hide) arrows with the same effect.
•
It is possible to
Import
/
Export Scanning Presets
from / to a file (.scp).
•
Clicking on the
Reset to Default
item brings all settings to their factory presets.
A tooltip is shown when the mouse cursor hovers over any preset button, giving the
parameters overview. The parameters colors indicate:
•
Green: actual microscope setting matches the column preset
•
Dark red: actual microscope setting differs from the column preset
•
Gray: Value is not relevant when the respective component is switched off


