System Options: Remote Imaging
7-23
C O N F I D E N T I A L
– limited rights
User Manual
Revision A
Feb 2018
Remote Imaging
The Remote Imaging enables connection to the Microscope PC via a network using the VNC Connect application and
remotely controlling the microscope operation. This application is pre-installed and configured on the Microscope
PC and optionally on the Support PC.
For information how to install this functionality, see
Installation Instructions
available on the installation CD. For
more details on the remote connection and its possibilities, see
VNC documentation
available on the installation CD.
Connection to Microscope PC
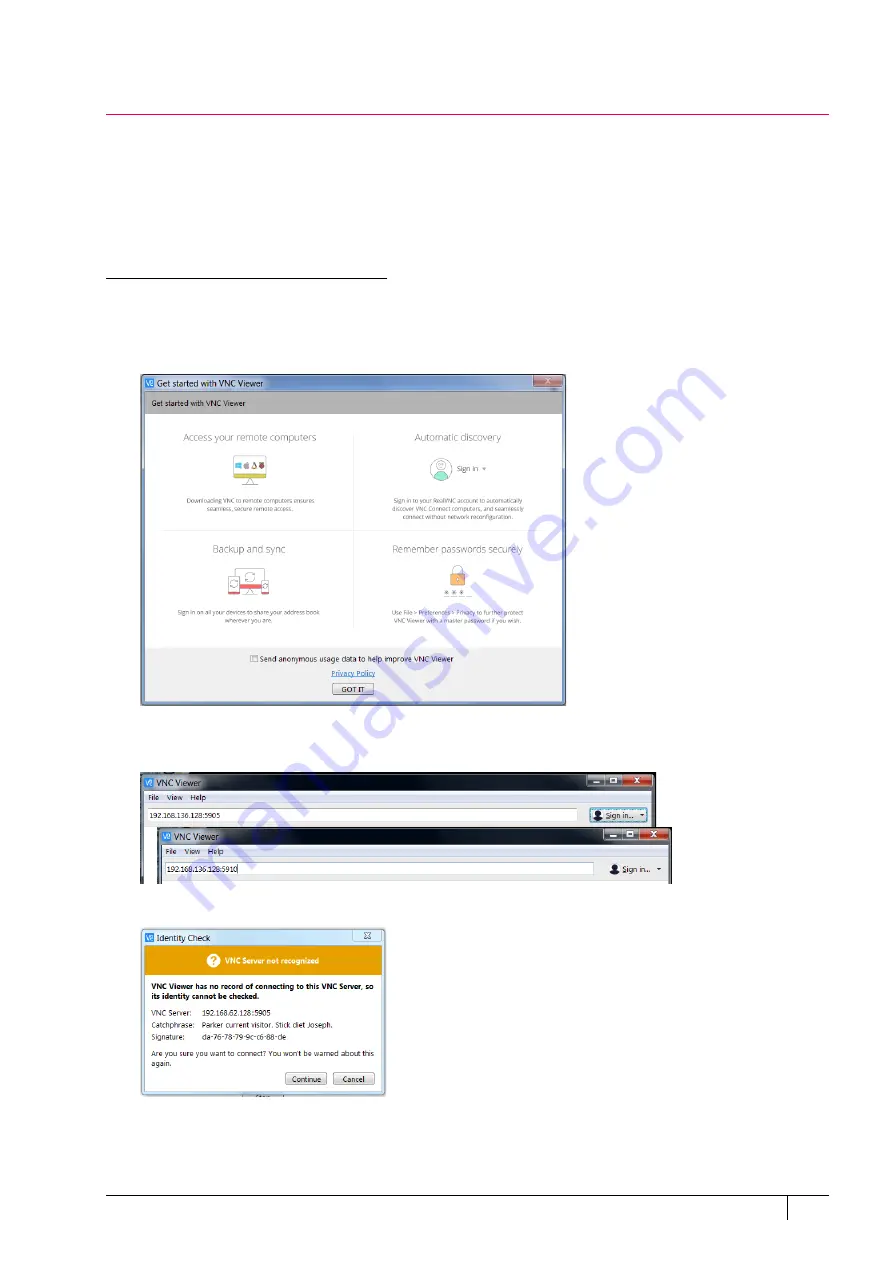
Follow the steps below to connect to a Microscope PC using DNS or IP address. It is assumed, the VNC Viewer
application is downloaded and installed on the remote PC (see the producer’s web pages).
1.
Click the
VNC Viewer
icon on the desktop to start the application.
2.
Uncheck
Send anonymous usage data to help improve VNC Viewer
.
3.
Type the appropriate Support PC / Microscope PC name or IP address followed by port number:
–
:5905
for configuration without optional Support PC
–
:5910
for configuration with optional Support PC
4.
Press Enter button.
5.
Click the
Continue
button in the Identity check dialog.


