• If you specify the "Authentication and High Level Encryption" security level in "Encryption Key Auto
Exchange Settings", also select the "Use session key perfect forward secrecy (PFS)" check box in
the filter action properties screen. If using PFS in Windows, the PFS group number used in phase 2
is automatically negotiated in phase 1 from the Diffie-Hellman group number (set in step 11).
Consequently, if you change the security level specified automatic settings on the machine and
"User Setting" appears, you must set the same the group number for "Phase 1 Diffie-Hellman
Group" and "Phase 2 PFS" on the machine to establish IPsec transmission.
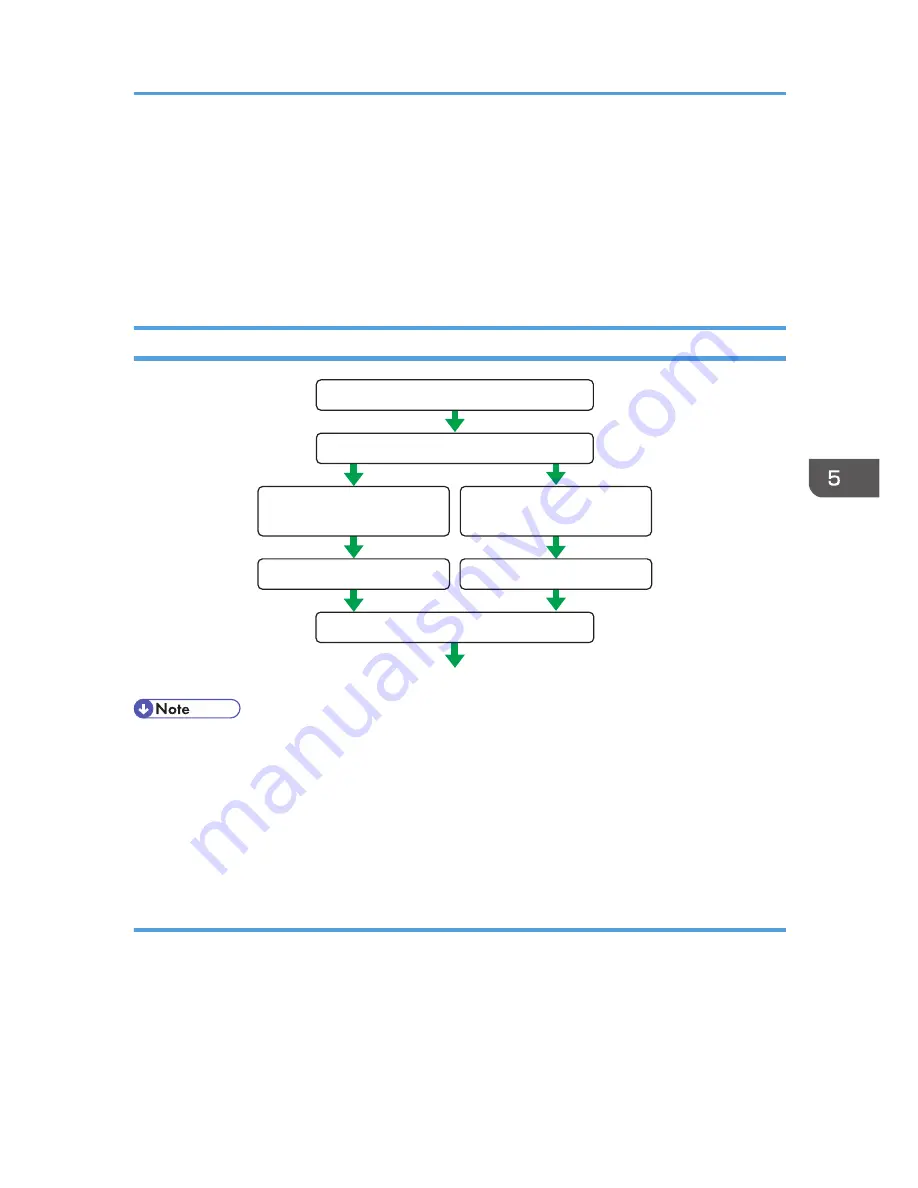
Encryption Key Manual Settings Configuration Flow
CJD016
Activate IPsec settings
Activate IPsec settings
Share IPsec SA items
Confirm IPsec transmission
Set IPsec SA using
Web Image Monitor
Set IPsec SA using
the IPsec setting tool
Decide IPsec SA items
<Machine>
<PC>
• Before transmission, SA information is shared and specified by the sender and receiver. To prevent
SA information leakage, we recommend that this exchange is not performed over the network.
• After configuring IPsec, you can use "Ping" command to check if the connection is established
correctly. However, you cannot use "Ping" command when ICMP is excluded from IPsec
transmission. Also, because the response is slow during initial key exchange, it may take some time
to confirm that transmission has been established.
Specifying Encryption Key Manual Settings
1.
Log in as the network administrator from Web Image Monitor.
2.
Point to [Device Management], and then click [Configuration].
3.
Click [IPsec] under "Security".
4.
Select [Active] for "Encryption Key Manual Settings".
5.
Click [Edit] under "Encryption Key Manual Settings".
Configuring IPsec
165
Содержание Aficio MP C3002
Страница 7: ...6 ...
Страница 15: ...1 Manuals Provided with This Machine 14 ...
Страница 39: ...2 Safety Information 38 ...
Страница 51: ...3 Information for This Machine 50 ...
Страница 54: ...Cover Paper Thickness 0 10 Body Paper Thickness 0 08 Pages in Book 0 Spine Width 0 2011 ...
Страница 60: ......
Страница 65: ...INDEX 235 5 ...
Страница 86: ...1 What You Can Do with This Machine 26 ...
Страница 126: ...2 Getting Started 66 ...
Страница 128: ...7 When the copy job is finished press the Reset key to clear the settings 3 Copy 68 ...
Страница 197: ...Storing the Scanned Documents to a USB Flash Memory or SC Card 6 126D ...
Страница 201: ...7 Document Server 130 ...
Страница 205: ...8 Web Image Monitor 134 ...
Страница 235: ...9 Adding Paper and Toner 164 ...
Страница 303: ...10 Troubleshooting 232 ...
Страница 309: ...MEMO 238 ...
Страница 310: ...MEMO 239 ...
Страница 311: ...MEMO 240 EN GB EN US EN AU D143 ...
Страница 312: ... 2011 ...
Страница 313: ...GB EN D143 7003 US EN AU EN ...
Страница 320: ......
Страница 360: ...3 Installing the Scanner Driver 40 ...
Страница 372: ...5 Troubleshooting 52 ...
Страница 378: ...6 Installing the Printer Driver Under Mac OS X 58 ...
Страница 382: ...3 Quit uninstaller 7 Appendix 62 ...
Страница 386: ...MEMO 66 ...
Страница 387: ...MEMO 67 ...
Страница 388: ...MEMO 68 EN GB EN US EN AU D143 7038 ...
Страница 389: ......
Страница 390: ...EN GB EN US EN AU D143 7038 2011 ...
Страница 392: ......
Страница 398: ...6 ...
Страница 440: ...MEMO 48 EN GB EN US EN AU D143 7042 ...
Страница 441: ......
Страница 442: ...EN GB EN US EN AU D143 7042 2011 ...
Страница 444: ......
Страница 454: ...10 ...
Страница 472: ...1 Getting Started 28 ...
Страница 540: ...3 Restricting Machine Usage 96 ...
Страница 560: ...4 Preventing Leakage of Information from Machines 116 ...
Страница 644: ...8 Set the stamp position 9 Press OK twice 10 Log out 6 Preventing the Leaking of Documents 200 ...
Страница 717: ...7 Press Yes 8 Log out Limiting Machine Operations to Customers Only 273 ...
Страница 724: ...7 Managing the Machine 280 ...
Страница 800: ...Settings User Mach N W File Lv 1 Lv 2 Send File Type R W R R 9 Checking Operation Privileges 356 ...
Страница 829: ......
Страница 830: ...EN GB EN US EN AU D143 7040 2011 ...


