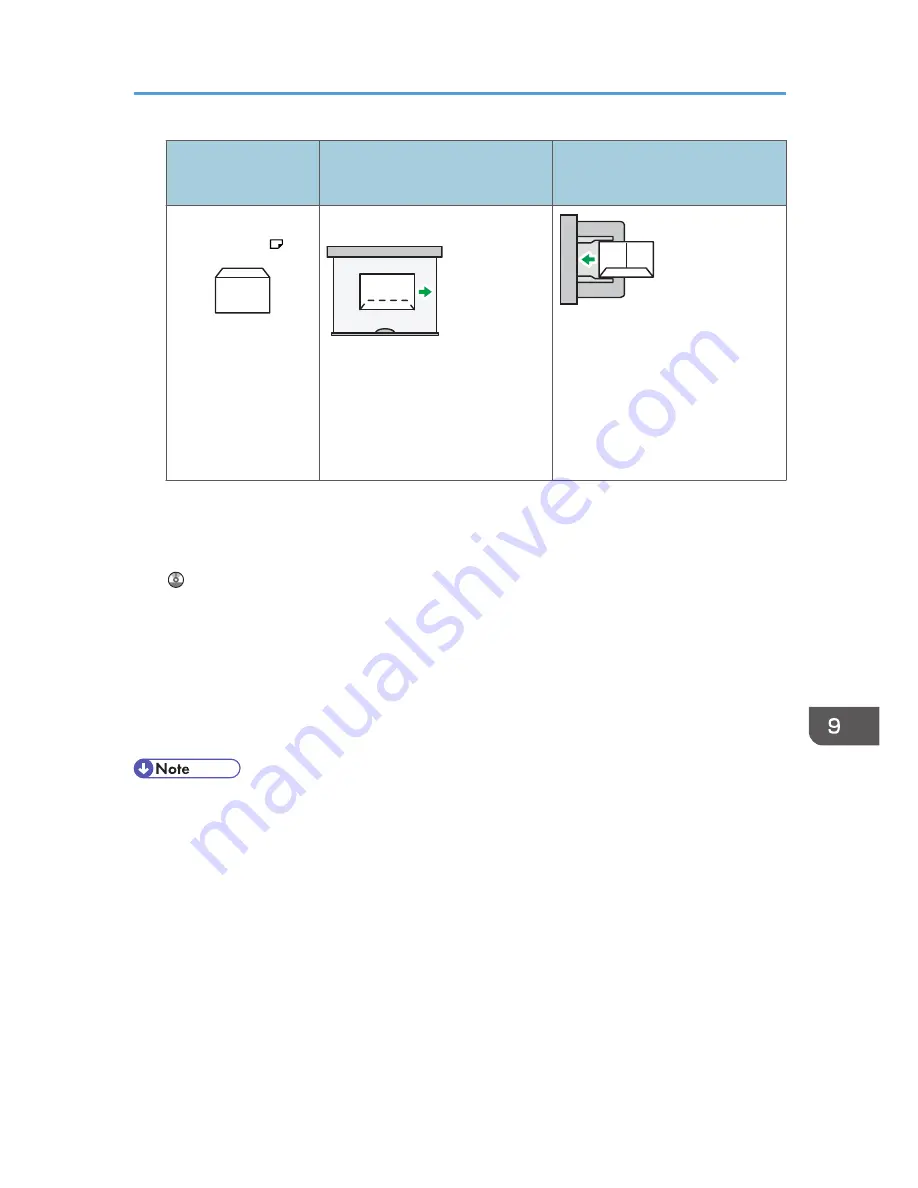
Types of envelopes
Paper trays 2–4
Small size paper tray
Bypass tray
Side-opening
envelopes
*1
• Flaps: closed
• Bottom side of envelopes:
toward the back of the
machine
• Side to be printed: face up
• Flaps: closed
• Bottom side of envelopes:
toward the back of the
machine
• Side to be printed: face down
*1 You cannot load side-opening envelopes in the landscape orientation in Trays 2–4.
When loading envelopes, select "Envelope" as the paper types using both the User Tools and
printer driver and specify the thickness of envelopes. For details, see " Printing on Envelopes", Print
.
To print on envelopes that are loaded with their short edges against the machine body, rotate the
print image by 180 degrees using the printer driver.
Recommended envelopes
For information about recommended envelopes, contact your local dealer.
The size of envelopes that you can load depends on the tray in which you load them. For details,
see p.148 "Recommended Paper Sizes and Types".
• Load only one size and type of envelope at a time.
• The Duplex function cannot be used with envelopes.
• To get better output quality, it is recommended that you set the right, left, top, and bottom print
margin, to at least 15 mm (0.6 inches) each.
• Output quality on envelopes may be uneven if parts of an envelope have differing thicknesses. Print
one or two envelopes to check print quality.
• When copying or printing onto envelopes, the copy/print speed is slower than usual.
• Copied or printed sheets are delivered to the internal tray even if you specified a different tray.
• Flatten out prints if they are creased or curled.
• Check the envelopes are not damp.
Recommended Paper Sizes and Types
159
Содержание Aficio MP C3002
Страница 7: ...6 ...
Страница 15: ...1 Manuals Provided with This Machine 14 ...
Страница 39: ...2 Safety Information 38 ...
Страница 51: ...3 Information for This Machine 50 ...
Страница 54: ...Cover Paper Thickness 0 10 Body Paper Thickness 0 08 Pages in Book 0 Spine Width 0 2011 ...
Страница 60: ......
Страница 65: ...INDEX 235 5 ...
Страница 86: ...1 What You Can Do with This Machine 26 ...
Страница 126: ...2 Getting Started 66 ...
Страница 128: ...7 When the copy job is finished press the Reset key to clear the settings 3 Copy 68 ...
Страница 197: ...Storing the Scanned Documents to a USB Flash Memory or SC Card 6 126D ...
Страница 201: ...7 Document Server 130 ...
Страница 205: ...8 Web Image Monitor 134 ...
Страница 235: ...9 Adding Paper and Toner 164 ...
Страница 303: ...10 Troubleshooting 232 ...
Страница 309: ...MEMO 238 ...
Страница 310: ...MEMO 239 ...
Страница 311: ...MEMO 240 EN GB EN US EN AU D143 ...
Страница 312: ... 2011 ...
Страница 313: ...GB EN D143 7003 US EN AU EN ...
Страница 320: ......
Страница 360: ...3 Installing the Scanner Driver 40 ...
Страница 372: ...5 Troubleshooting 52 ...
Страница 378: ...6 Installing the Printer Driver Under Mac OS X 58 ...
Страница 382: ...3 Quit uninstaller 7 Appendix 62 ...
Страница 386: ...MEMO 66 ...
Страница 387: ...MEMO 67 ...
Страница 388: ...MEMO 68 EN GB EN US EN AU D143 7038 ...
Страница 389: ......
Страница 390: ...EN GB EN US EN AU D143 7038 2011 ...
Страница 392: ......
Страница 398: ...6 ...
Страница 440: ...MEMO 48 EN GB EN US EN AU D143 7042 ...
Страница 441: ......
Страница 442: ...EN GB EN US EN AU D143 7042 2011 ...
Страница 444: ......
Страница 454: ...10 ...
Страница 472: ...1 Getting Started 28 ...
Страница 540: ...3 Restricting Machine Usage 96 ...
Страница 560: ...4 Preventing Leakage of Information from Machines 116 ...
Страница 644: ...8 Set the stamp position 9 Press OK twice 10 Log out 6 Preventing the Leaking of Documents 200 ...
Страница 717: ...7 Press Yes 8 Log out Limiting Machine Operations to Customers Only 273 ...
Страница 724: ...7 Managing the Machine 280 ...
Страница 800: ...Settings User Mach N W File Lv 1 Lv 2 Send File Type R W R R 9 Checking Operation Privileges 356 ...
Страница 829: ......
Страница 830: ...EN GB EN US EN AU D143 7040 2011 ...


