Chapter 2
Installation and Setup
18
Creative Cutter MINI
Figure 18
4
Put mat into cutter when you are ready to cut.
Insert the Mat Into the Cutter
5
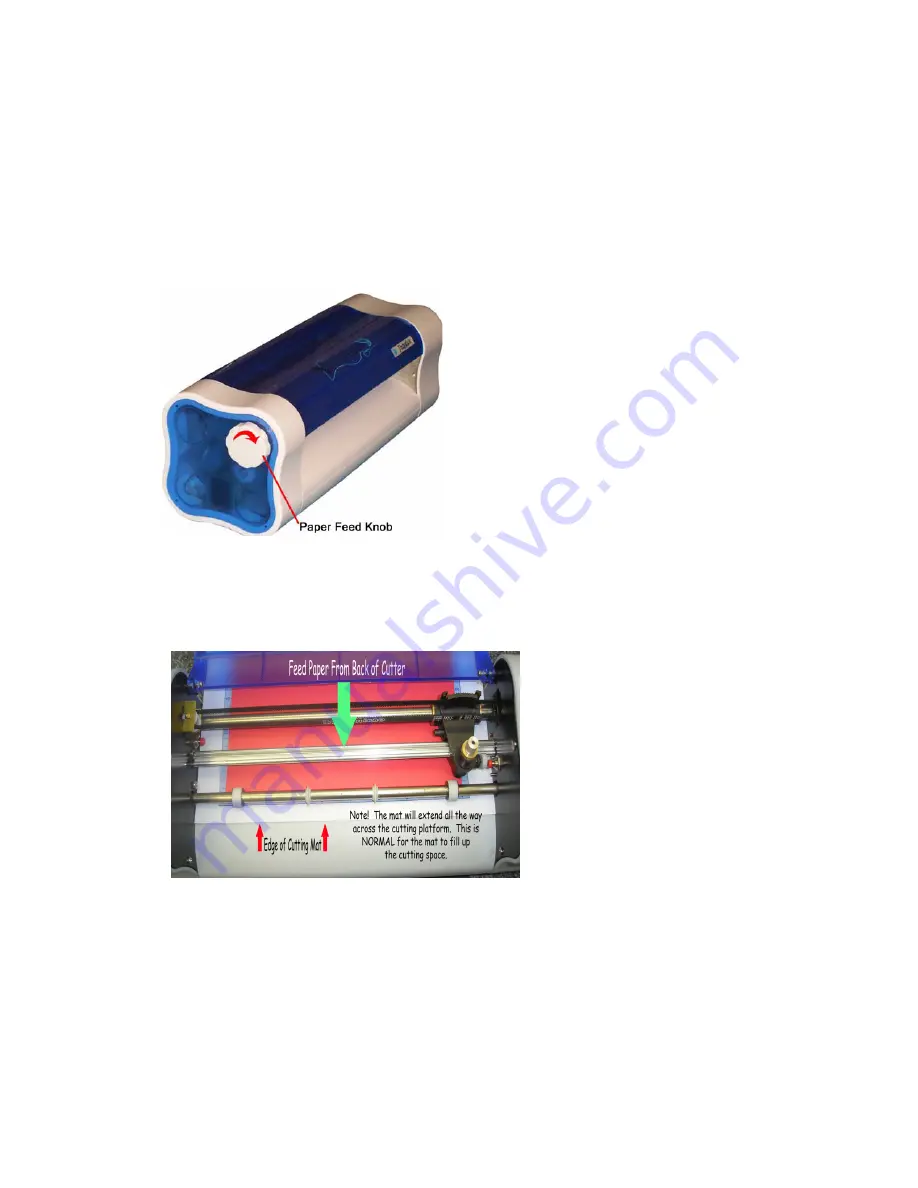
Insert the mat from the back of the cutter.
6
Turn the paper feed knob located on the left side of the cutter foward to move the mat under
the pinch rod. See figure 19 .
Figure 19
7
See figure 20 , this shows how the mat goes into the cutter. When inserted, the bulk of the
mat should extend out the back of your cutter. See figure 21 on page 19.
Figure 20
Содержание Mini Creative Cutter
Страница 1: ...Pazzles Creative Cutter Mini User Guide www pazzles com...
Страница 11: ...Chapter 1 Introduction Creative Cutter MINI 3 If the problem is with cutting check the blade and the mat...
Страница 24: ...Chapter 2 Installation and Setup 16 Creative Cutter MINI Blade Positioning Guide Figure 15...
Страница 38: ...Chapter 3 Basic Procedures for Using the Mini Creative Cutter 30 Creative Cutter MINI...
Страница 88: ...Chapter 4 Creative Cutter Tutorials 80 Creative Cutter MINI...
Страница 111: ...Chapter 5 Manipulating Letters and Shapes Creative Cutter MINI 103 Figure 149...
Страница 112: ...Chapter 5 Manipulating Letters and Shapes 104 Creative Cutter MINI...
Страница 124: ...Chapter 6 Working With Graphics 116 Creative Cutter MINI...
Страница 133: ...Chapter 7 Specialized Cutting and Finishing Techniques Creative Cutter MINI 125...
Страница 134: ...Chapter 7 Specialized Cutting and Finishing Techniques 126 Creative Cutter MINI...
Страница 140: ...Chapter 8 Troubleshooting Guide 132 Creative Cutter MINI...


