Chapter 5
Manipulating Letters and Shapes
102
Creative Cutter MINI
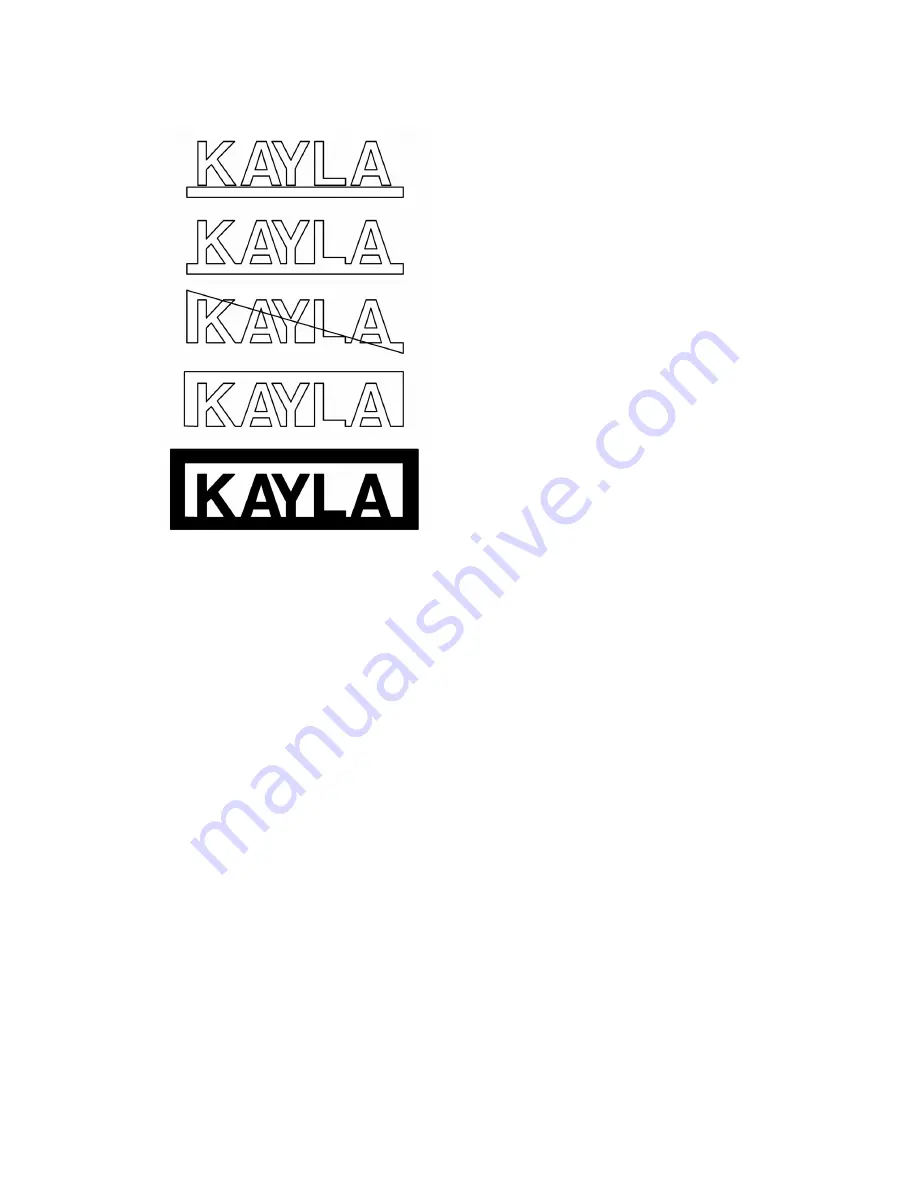
Figure 148
Creating a Word With Attached Letters
1
Type a word.
2
From the
Draw
menu, click
Rectangle
.
3
Draw a rectangle under the word.
4
Duplicate the rectangle (use
ALT
+
D
) and use the arrow key to move the new rectangle
straight above the word. See figure 149.
5
Select both rectangles and the word and weld them together. See “Welding Images and
Words Together” on page 97.
6
Use the
Eraser
tool to erase unnecessary parts of the rectangles.
7
Join the ends of the bottom and top to create sides.
8
Draw a rectangle around the completed word.
Содержание Mini Creative Cutter
Страница 1: ...Pazzles Creative Cutter Mini User Guide www pazzles com...
Страница 11: ...Chapter 1 Introduction Creative Cutter MINI 3 If the problem is with cutting check the blade and the mat...
Страница 24: ...Chapter 2 Installation and Setup 16 Creative Cutter MINI Blade Positioning Guide Figure 15...
Страница 38: ...Chapter 3 Basic Procedures for Using the Mini Creative Cutter 30 Creative Cutter MINI...
Страница 88: ...Chapter 4 Creative Cutter Tutorials 80 Creative Cutter MINI...
Страница 111: ...Chapter 5 Manipulating Letters and Shapes Creative Cutter MINI 103 Figure 149...
Страница 112: ...Chapter 5 Manipulating Letters and Shapes 104 Creative Cutter MINI...
Страница 124: ...Chapter 6 Working With Graphics 116 Creative Cutter MINI...
Страница 133: ...Chapter 7 Specialized Cutting and Finishing Techniques Creative Cutter MINI 125...
Страница 134: ...Chapter 7 Specialized Cutting and Finishing Techniques 126 Creative Cutter MINI...
Страница 140: ...Chapter 8 Troubleshooting Guide 132 Creative Cutter MINI...


