Chapter 2
Installation and Setup
Creative Cutter MINI
7
Install the USB Driver
1
If a USB/Serial device has been installed on your machine before and the drivers that are
about to be installed are different from those installed already, the original drivers need to be
uninstalled.
2
Using the Purple or Gray USB cord, connect the cutter to your computer. See figure 2 on
page 6.
3
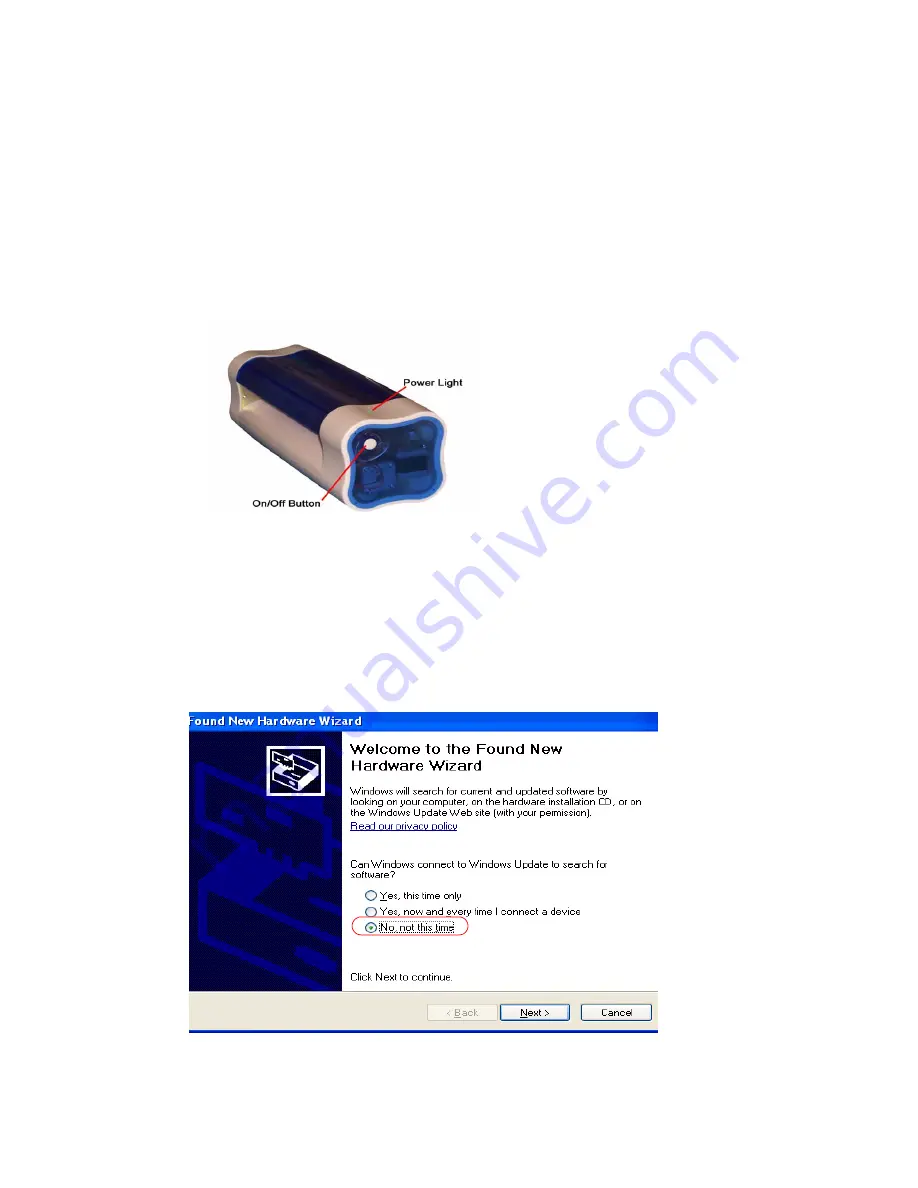
Use the power button to turn on the power to the cutter. See figure 3 .
Figure 3
4
When the
Windows Found New Hardware
wizard open, select “No, not at this time”, then
click
Next
to proceed with the installation.
5
Follow the figures 4 and 5 when the Windows Found New Hardware wizard comes up.
6
On figure 4 , select “
No, Not At This Time.
”
Figure 4
Содержание Mini Creative Cutter
Страница 1: ...Pazzles Creative Cutter Mini User Guide www pazzles com...
Страница 11: ...Chapter 1 Introduction Creative Cutter MINI 3 If the problem is with cutting check the blade and the mat...
Страница 24: ...Chapter 2 Installation and Setup 16 Creative Cutter MINI Blade Positioning Guide Figure 15...
Страница 38: ...Chapter 3 Basic Procedures for Using the Mini Creative Cutter 30 Creative Cutter MINI...
Страница 88: ...Chapter 4 Creative Cutter Tutorials 80 Creative Cutter MINI...
Страница 111: ...Chapter 5 Manipulating Letters and Shapes Creative Cutter MINI 103 Figure 149...
Страница 112: ...Chapter 5 Manipulating Letters and Shapes 104 Creative Cutter MINI...
Страница 124: ...Chapter 6 Working With Graphics 116 Creative Cutter MINI...
Страница 133: ...Chapter 7 Specialized Cutting and Finishing Techniques Creative Cutter MINI 125...
Страница 134: ...Chapter 7 Specialized Cutting and Finishing Techniques 126 Creative Cutter MINI...
Страница 140: ...Chapter 8 Troubleshooting Guide 132 Creative Cutter MINI...


