Chapter 4
Creative Cutter Tutorials
Creative Cutter MINI
55
4
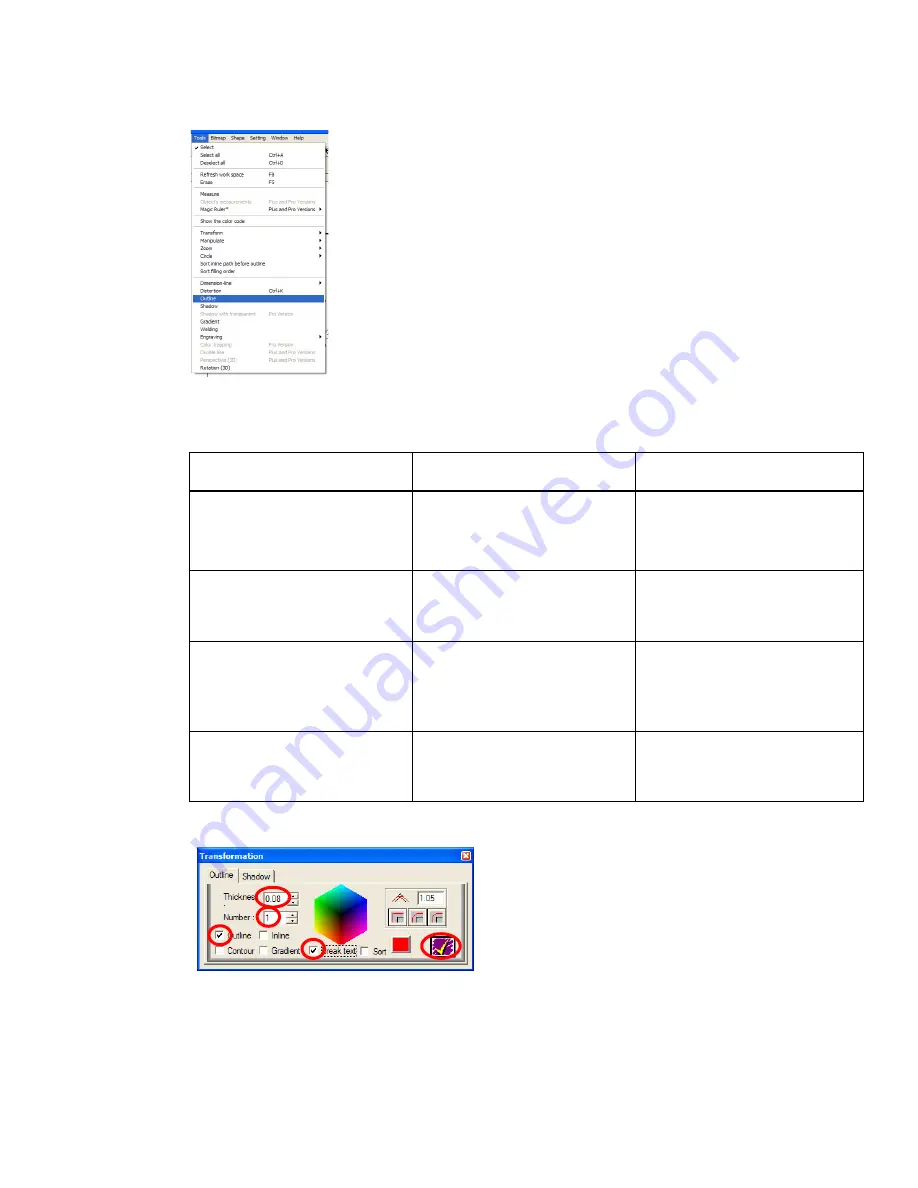
Go to the
Tools
menu at the top at the screen and then click
Outline
.
Figure 83
5
Make the following selections in the
Transformation
box (see figure 84).
Figure 84
6
Click the yellow check mark to accept the outline.
For this setting
Enter this value
Notes
Thickness
0.08
In most cases, widths are
between 0.02 and 0.10.
Number
1
The Number setting specified
the number of outlines. Three
is the maximum possible.
Outline
Click the box to select it.
Then, choose the color of the
outline by clicking on the
rainbow color cube.
Break Text
Click the box to select it.
Check this box so that you
will be able to separate the
title (text) from the outline.
Содержание Mini Creative Cutter
Страница 1: ...Pazzles Creative Cutter Mini User Guide www pazzles com...
Страница 11: ...Chapter 1 Introduction Creative Cutter MINI 3 If the problem is with cutting check the blade and the mat...
Страница 24: ...Chapter 2 Installation and Setup 16 Creative Cutter MINI Blade Positioning Guide Figure 15...
Страница 38: ...Chapter 3 Basic Procedures for Using the Mini Creative Cutter 30 Creative Cutter MINI...
Страница 88: ...Chapter 4 Creative Cutter Tutorials 80 Creative Cutter MINI...
Страница 111: ...Chapter 5 Manipulating Letters and Shapes Creative Cutter MINI 103 Figure 149...
Страница 112: ...Chapter 5 Manipulating Letters and Shapes 104 Creative Cutter MINI...
Страница 124: ...Chapter 6 Working With Graphics 116 Creative Cutter MINI...
Страница 133: ...Chapter 7 Specialized Cutting and Finishing Techniques Creative Cutter MINI 125...
Страница 134: ...Chapter 7 Specialized Cutting and Finishing Techniques 126 Creative Cutter MINI...
Страница 140: ...Chapter 8 Troubleshooting Guide 132 Creative Cutter MINI...


