Chapter 4
Creative Cutter Tutorials
Creative Cutter MINI
45
Step 3: Connect the Letters
1
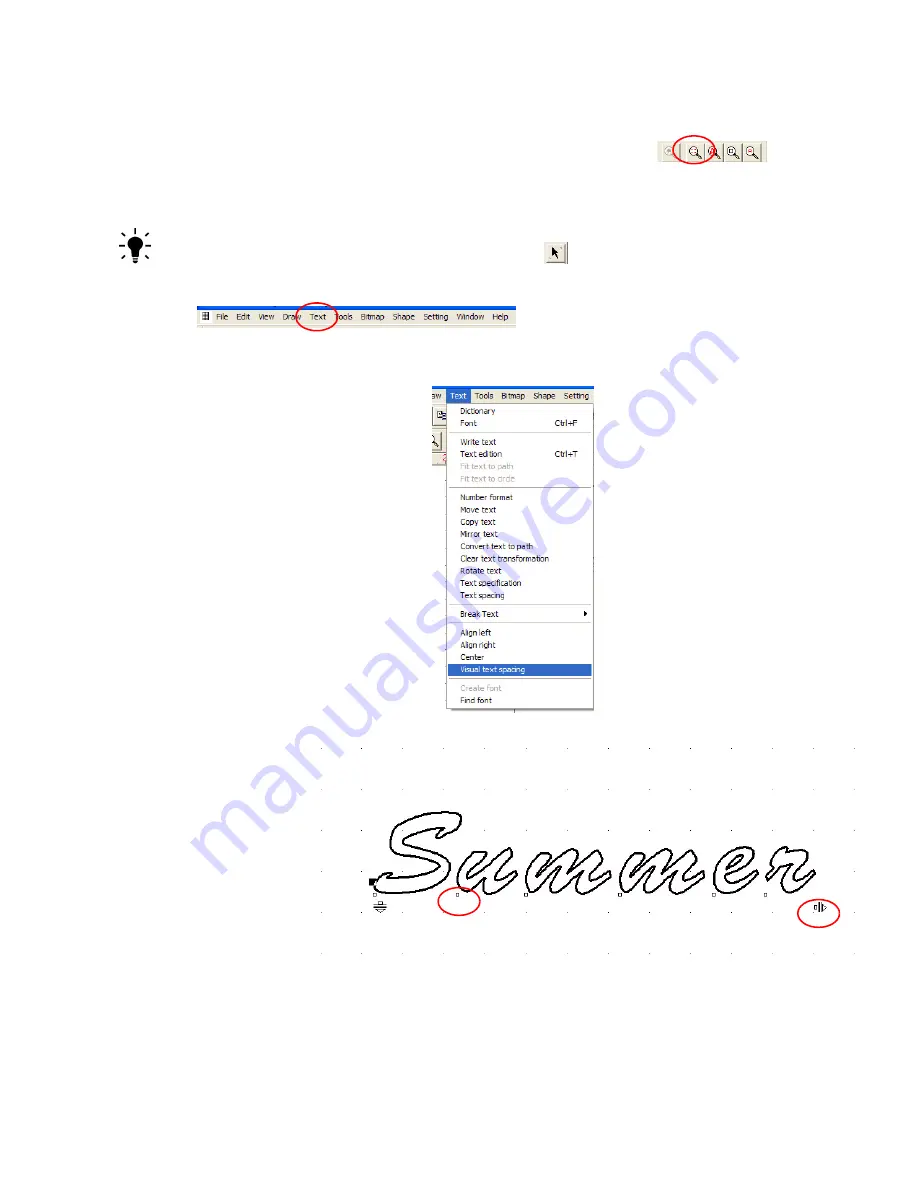
To make it easier to see your work, zoom in on the word. To
do that, find the
Zoom
toolbar and click the
Zoom Selected
icon. See figure 59.
Figure 59
TIP:
Make sure your word is still selected.
Click on the word with the
Select Elements
tool.
2
Click
Text
in the menu bar at the top of the screen.
Figure 60
3
From the
Text
menu, click
V
isual Text Spacing
.
Figure 61
Note that there
is an arrow
pointing to the
right. There
are also small
boxes below
each letter.
Figure 62
Содержание Mini Creative Cutter
Страница 1: ...Pazzles Creative Cutter Mini User Guide www pazzles com...
Страница 11: ...Chapter 1 Introduction Creative Cutter MINI 3 If the problem is with cutting check the blade and the mat...
Страница 24: ...Chapter 2 Installation and Setup 16 Creative Cutter MINI Blade Positioning Guide Figure 15...
Страница 38: ...Chapter 3 Basic Procedures for Using the Mini Creative Cutter 30 Creative Cutter MINI...
Страница 88: ...Chapter 4 Creative Cutter Tutorials 80 Creative Cutter MINI...
Страница 111: ...Chapter 5 Manipulating Letters and Shapes Creative Cutter MINI 103 Figure 149...
Страница 112: ...Chapter 5 Manipulating Letters and Shapes 104 Creative Cutter MINI...
Страница 124: ...Chapter 6 Working With Graphics 116 Creative Cutter MINI...
Страница 133: ...Chapter 7 Specialized Cutting and Finishing Techniques Creative Cutter MINI 125...
Страница 134: ...Chapter 7 Specialized Cutting and Finishing Techniques 126 Creative Cutter MINI...
Страница 140: ...Chapter 8 Troubleshooting Guide 132 Creative Cutter MINI...


