– 163 –
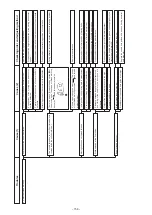
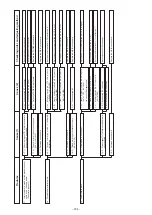
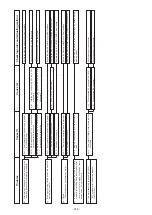
1-A)
Disconnected J16 connector
1-B)
Disconnected J22 connector
(LK-1930 only)
1-C)
Disconnected J81 connector (LK-1910/20)
1-A)
1-A) Item 1 of memory switch No. 38 is set
to "NO". (LK-1930)
1-B)
Memory switch No. 20 is set to "0".
(LK-1910/20)
1-A)
Disconnected J19 connector (LK-1910/20)
Disconnected J17 connector (LK-1930)
1-B)
Disconnected J79 connector
1-A)
Disconnected J18 connector
1-B)
Disconnected J13 (sensor connecting
cord) connector
1-C)
Disconnected J79, J91, and J92
connectors (LK-1910/20)
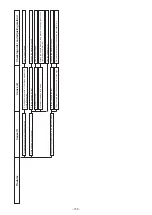
13-1)
Temporary stop switch
←→
MAIN circuit
board have not been connected.
14-1)
Thread breakage detection mode is
rendered ineffective.
14-2)
The machine head has not be grounded.
14-3)
Thread breakage detecting plate and thread
take-up spring is separated when stopping.
14-4)
Defective circuit board
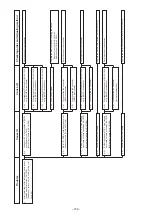
15-1)
Air sensor
←→
MAIN circuit board have not
been connected.
16-1)
Presser magnet
←→
MAIN circuit board
have not been connected.
16-2)
Defective circuit board
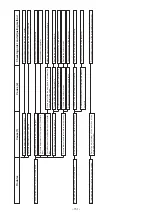
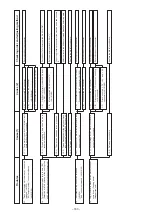
13.
"StopKey Accepted Not trimmed yet" cannot be
released. (LK-1930)
"E5 (Temporary stop)" cannot be released.
(LK-1910/20)
14.
Thread breakage detection fails to work. (E9)
(Detection within 8 stitches at the sewing start
and 3 stitches during sewing cannot be detected.)
15.
"AirPressure Drop" cannot be released.
(LK-1930)
"E AA" cannot be released. (LK-1910/20)
1
6
.
Origin retrieval is made, but the presser does not
come down. (Feeding frame)
(Magnet type only)
Securely connect the connector.
Set the item 1 of memory switch No.38 to “ON”.
Set the memory switch No. 20 to "1".
Check the grounding conductor of the machine head, and connect
it.
Adjust correctly the position of thread breakage detecting plate.
Replace the MAIN circuit board.
Securely connect the connector.
Securely connect the connector.
Securely connect the connector.
Securely connect the connector.
Replace the MAIN circuit board.
Troubles
Cause (1)
Cause (2)
Checking order and adjusting method

