Printing
DS2 Docking Station
240
INDUSTRIAL SCIENTIFIC
Version 9.1 (P/N: 17112798)
12.5. Printing Calibration and Bump Test Certificates
To print calibration or bump test certificates, follow the instructions listed below.
Step Instruction
1.
Open the DSSAC application.
2.
Click on the Instruments option in the navigation pane. The contents pane displays a
list of instruments.
3.
Double-click on the instrument that has the calibration or bump test data for which
you would like to print a certificate.
4.
Click on the Calibrations or Bump Tests tab.
5.
Do one of the following:
Select a Start Date and an End Date, and then click the Display button to
show data for a specific date range.
Click the Show Last button to display the results of the last calibration or
bump test.
6.
Select the entry that you would like to print. You can select multiple calibration
entries by pressing the CTRL key on your keyboard while selecting each entry.
7.
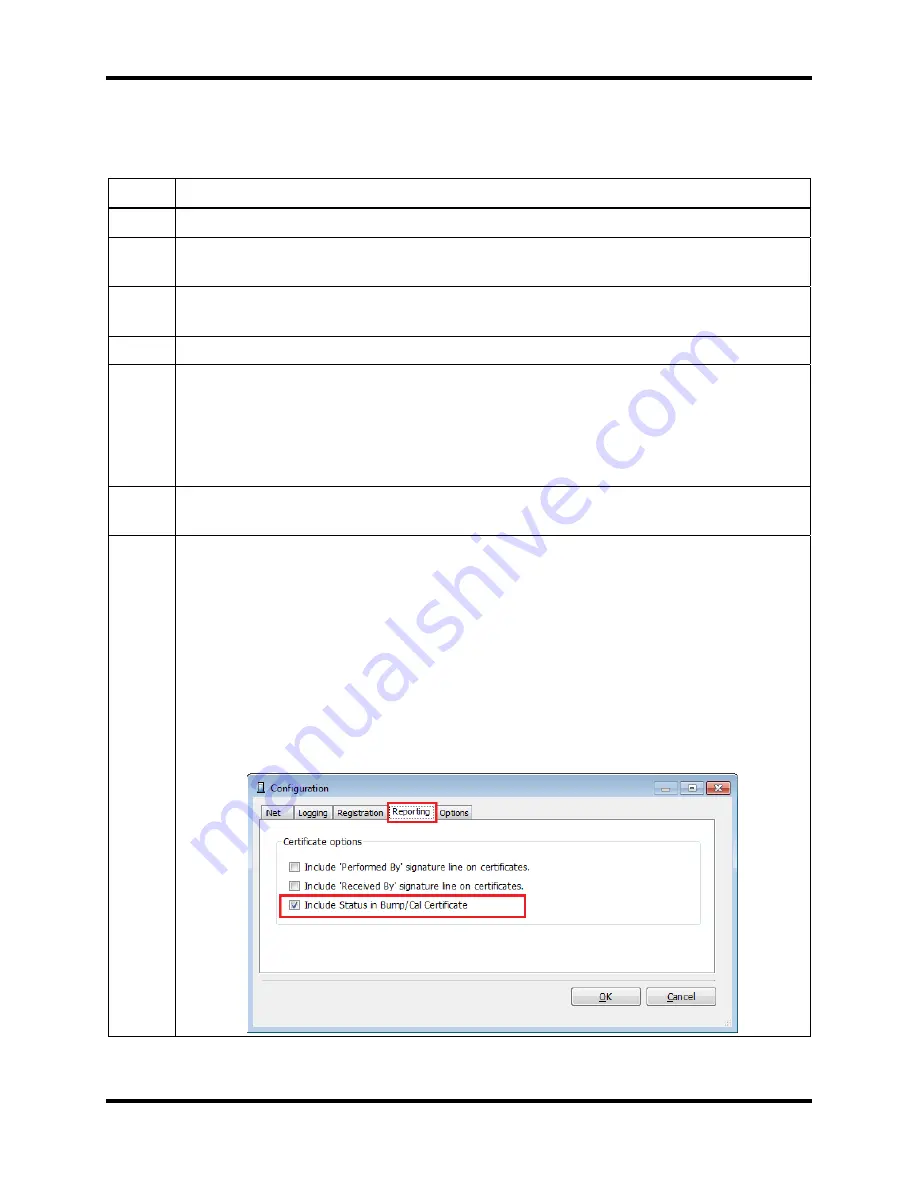
Calibration and bump test certificates may optionally have signature lines printed to
include a Performed By and/or a Received By signature. They can also include the
selected instruments’ Status information. To add the signature lines and/or include
instrument status on the Cal or Bump certificates
Select the View dropdown menu from the DSSAC main tool bar.
Click on Configuration.
The Configuration dialog box will appear as shown. Select the Reporting tab.
Check one or both boxes for the desired signature line, and/or check the box
“Include Status in Bump/Cal Certificate”. Click “OK”.


