280
Layout & Editing
■
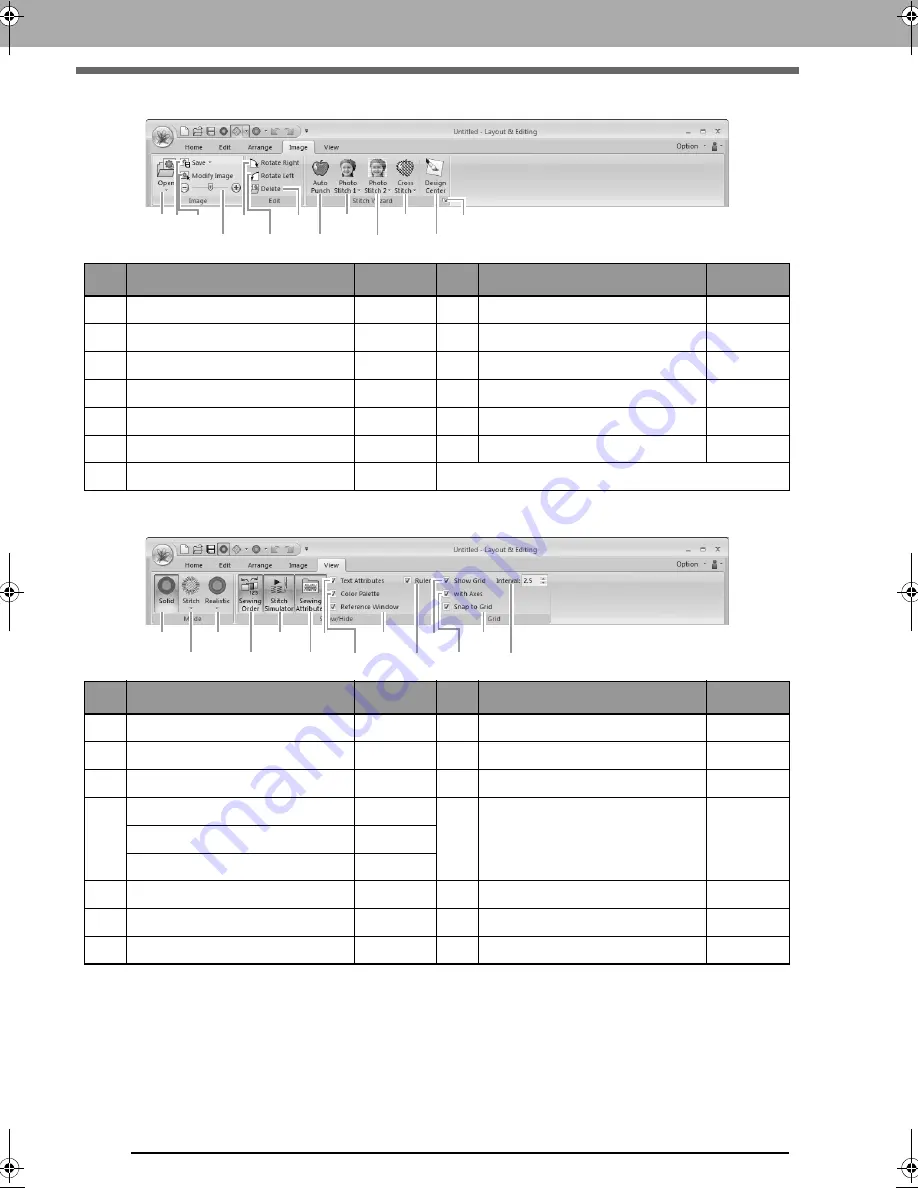
Image tab
■
View tab
No.
Menu
Reference
No.
Menu
Reference
1
Open Image
p. 137
8
Auto Punch Wizard
p. 119
2
Save Image
p. 141
9
Photo Stitch 1 Wizard
p. 122
3
Modify Image
p. 140
10
Photo Stitch 2 Wizard
p. 127
4
Background Image Density
p. 140
11
Cross Stitch Wizard
p. 130
5
Rotate right
p. 141
12
Import to Design Center
p. 136
6
Rotate left
p. 141
13
Image to Stitch Wizard
p. 134
7
Delete Image
p. 141
No.
Menu
Reference
No.
Menu
Reference
1
Solid View
p. 70
8
Color Palette
p. 56
2
Stitch View
p. 70
9
Reference Window
p. 72
3
Realistic View
p. 70
10
Ruler
p. 88
4
Sewing Order
p. 73
11
Show Grid
p. 88
Jump Stitch Trimming
p. 75
Lock
p. 74
5
Stitch Simulator
p. 71
12
Show Grid with Axes
p. 88
6
Sewing Attribute Set
p. 58
13
Snap to Grid
p. 88
7
Text Attribute Setting
p. 94
14
Grid Interval
p. 88
(1)
(2)
(3)
(4)
(5)
(6)
(7)
(8)
(9)
(10)
(11)
(12)
(13)
(1)
(2)
(3)
(4)
(5)
(6)
(7)
(8)
(9)
(10)
(11)
(12)
(13)
(14)
XE8656-001.book Page 280 Monday, May 24, 2010 5:44 PM
Содержание PE-Design Next
Страница 1: ...Instruction Manual ...
Страница 32: ...30 Tutorial 1 Getting Started ...
Страница 175: ...Transferring Data This section describes operations for transferring embroidery designs to embroidery machines ...
Страница 184: ...182 Using the Link Function to Embroider From the Computer ...
Страница 230: ...228 Outputting a Catalog of Embroidery Designs ...
Страница 247: ...Font Creator Custom fonts can be created using Font Creator These fonts can be recalled to be used in Layout Editing ...
Страница 268: ...266 Changing the Settings ...
Страница 269: ...Supplement This section provides hints and detailed techniques for creating even more attractive embroidery ...
Страница 320: ...English XE8656 001 Printed in China ...


