186
Basic Design Center Operations
After selecting the colors to be used for the
outlines, click
OK
.
The line image appears in the Design
Page.
Step 2
Line Image Stage
■
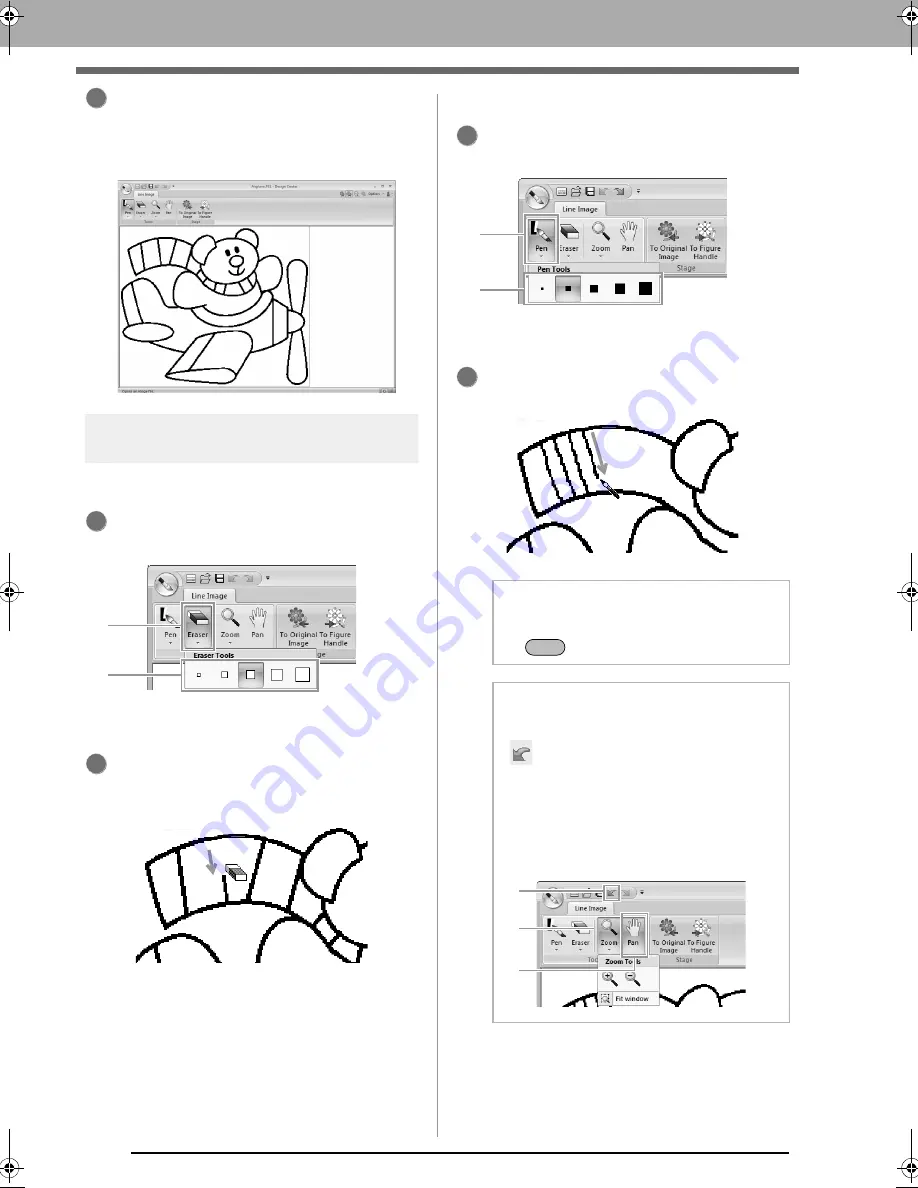
Using the Eraser
To erase a line, select the
Eraser Tools
. Click
1
, then
2
.
Select an Eraser tool according to the size of
the area or thickness of the line to be erased.
Move the pointer over the line to be erased,
and then click the line or drag the pointer to
erase the line.
■
Using the Pen
To draw lines, select the
Pen Tools
. Click
1
,
then
2
.
Select the Pen tool with the desired thickness
of the line to be drawn.
Drag the pointer to draw a line. To add a point,
click in the Design Page.
6
1
1
2
2
b
Memo:
To draw vertical or horizontal lines, hold down
the
key while moving the pointer.
b
Memo:
• If lines are drawn or erased incorrectly, click
(Undo button) (
1
) to undo the last
operation.
• To change the display size, use
Zoom
command (
2
).
• The part of the work area that is displayed
can easily be changed by using the
Pan
tool
(
3
).
1
1
2
2
Shift
1
2
3
design.fm Page 186 Wednesday, May 26, 2010 7:12 PM
Содержание PE-Design Next
Страница 1: ...Instruction Manual ...
Страница 32: ...30 Tutorial 1 Getting Started ...
Страница 175: ...Transferring Data This section describes operations for transferring embroidery designs to embroidery machines ...
Страница 184: ...182 Using the Link Function to Embroider From the Computer ...
Страница 230: ...228 Outputting a Catalog of Embroidery Designs ...
Страница 247: ...Font Creator Custom fonts can be created using Font Creator These fonts can be recalled to be used in Layout Editing ...
Страница 268: ...266 Changing the Settings ...
Страница 269: ...Supplement This section provides hints and detailed techniques for creating even more attractive embroidery ...
Страница 320: ...English XE8656 001 Printed in China ...


