Determination of Shim Thickness for Bevel
Pinion
Thickness of shims to be used on the bevel
pinion varies from one vehicle to another on
account of factors involved in machining and
assembling. Thus, for each vehicle, the thick-
ness of shims necessary for locating pinion in
correct position (for producing a proper backlash
in the mesh between pinion and gear) must be
determined anew at the time of reassembly.
In order to facilitate this determination, a 2-
piece dummy tool (special tool) is made avail-
able. Following procedure is based on use of this
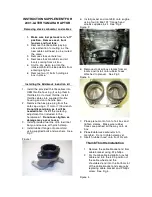
tool and supposes that pinion dummy (one of
the two pieces) is set in carrier, without any
shims, as shown in Fig. 16-20.
Fig. 16-20
Special tool (Bevel pinion
mounting dummy 09926-78310)
l
Set dial indicator on dummy, letting the
indicator spindle protrude 5 to 6 mm from
the bottom of dummy as shown in Fig.
16-21-1.
5 - 6 m m
( 0 . 1 9 7 0.236 in)
16-8
2) Feed dummy pinion with bearings into the
carrier,
positioning it properly, and install
joint flange.
And then tighten bevel pinion nut until
specified starting torque of bevel pinion is
obtained. Refer to item 2) and 3) of “Bevel
Pinion Bearing Preload Adjustment” describ-
ed on next page.
NOTE:
In this case, fit only bearings to bevel pinion.
Don’t fit spacer.
3) Rest dummy with dial indicator on carrier
and pinion dummy, and set dial indicator to
zero.
Fig. 16-21-2
Dummy 2. Pinion dummy Dial indicator
4) Referring to Fig. 16-21-3, note that three
dimensions are involved: “a” “b” and “c”.
The value of “b” is unknown, and is to be
determined now for calculating the required
thickness of shims. The values of “a” and
“c” are given: the sum, “a”
is 94 mm,
which is indicated on the dummy tool.
Fig. 16-21-3
Fig. 16-21-1
Summary of Contents for Samurai 1986
Page 1: ......
Page 9: ...0 9...
Page 10: ...0 6...
Page 11: ...0 7...
Page 12: ...0 8...
Page 13: ...0 9...
Page 14: ...0 10...
Page 15: ...0 11...
Page 19: ...1 2...
Page 20: ...1 3...
Page 119: ...r a l I 29 Fig 4 1 1 Carburetor exploded view 4 3...
Page 120: ...N Fig 4 l 2 Carburetor cross section 4 4...
Page 154: ......
Page 155: ...T c c x 5 5 3...
Page 347: ...Fig 17 1 34 17 12...
Page 348: ...17 13...
Page 353: ...Fig 17 2 12 17 18...
Page 354: ...17 19...
Page 360: ...Fig 17 3 19 Fig 17 3 20 Fig 17 3 21 5 Fig 17 3 23 Ci Fig 17 3 24 Fig 17 3 22 17 25...
Page 424: ...Fig 19 6 1 19 38 19 6 PARKING BRAKE...
Page 448: ...20 13...
Page 450: ...21 2...
Page 475: ...22 5...
Page 476: ...22 6...
Page 477: ...22 7...
Page 478: ...22 8...
Page 479: ...22 9...
Page 480: ......
Page 481: ......


