63 03 452 D3352
112
D3352
.
031.05.08
.
02 10.2015
11 Initial startup
Sirona Dental Systems GmbH
11.7 Setting up the X-ray component via the SIXABCon program
Installation Manual ORTHOPHOS XG 3D / Ceph
Alternatives to the boot service
As an alternative to adding new X-ray components via the boot service,
you also can add them via the
"Automatic search"
or the
"Add component
manually"
function.
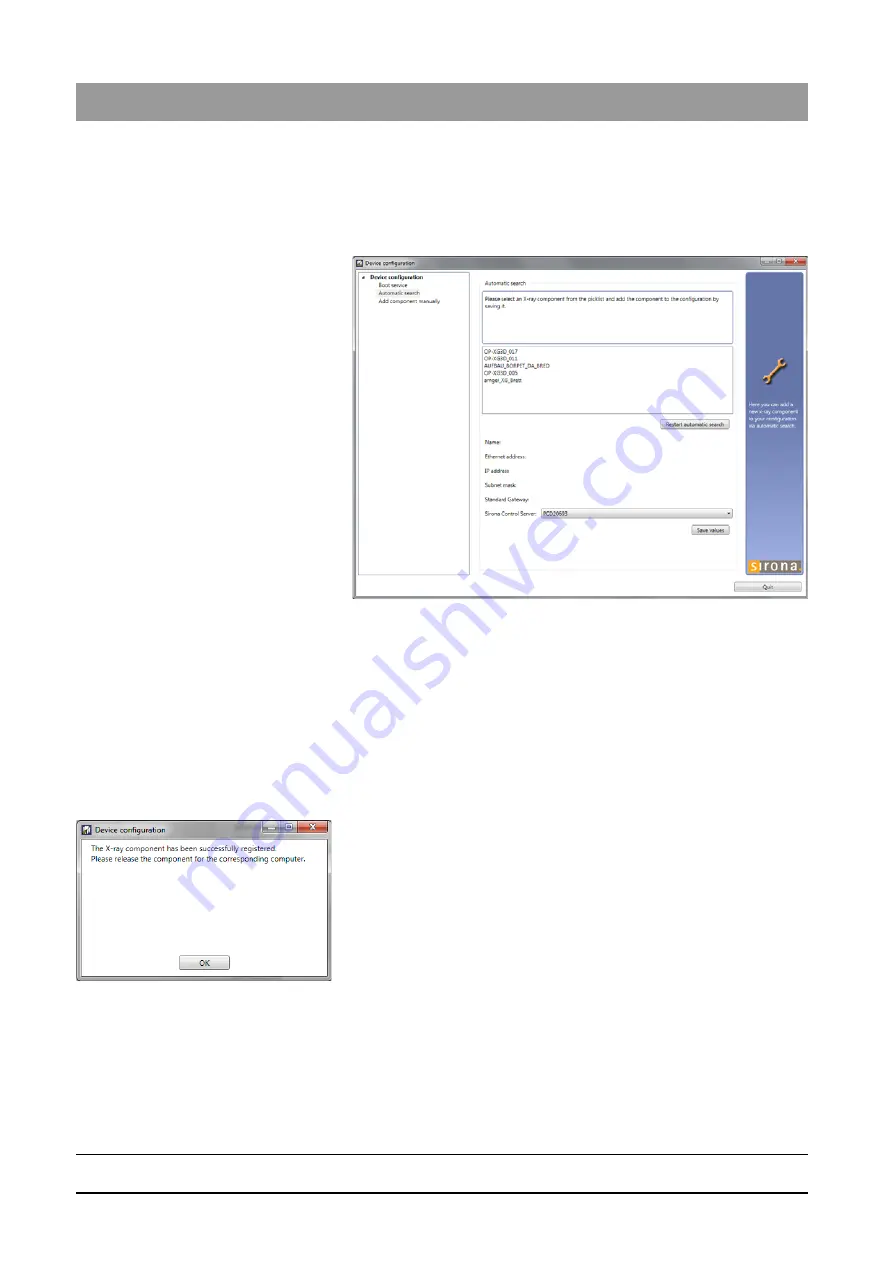
Automatic search
1. Select the
"Automatic search"
element.
The network is searched for existing X-ray components. All X-ray
components found appear in the menu list.
2. Select the desired X-ray component from the list.
The values for the IP address, subnet mask and standard
gateway are automatically imported to the input fields of the
menu.
3. Select the desired RCU in the
"Sirona Control Server"
drop-down
menu.
4. Confirm the settings by clicking on the
"Save values"
button.
The settings are saved.
The
"Device configuration"
dialog window appears and informs
you that the configuration of the X-ray component has been
completed successfully.
5. Confirm this dialog by clicking on the
"OK"
button.
6. Close the
"Device configuration"
menu by clicking on the
"Quit"
button.
The new X-ray component appears in the device list of the menu
"Configuration of the X-ray component"
.
Summary of Contents for Orthophos XG 3D/Ceph
Page 1: ...k W f j NMKOMNR loqelmelp ud Pa L b b Cover page...
Page 2: ......


