6
(9)
Paper select display
This shows the size of paper loaded in each tray.
In the bypass tray area, the paper type appears above
the paper size.
The selected tray is highlighted.
The approximate amount of paper in each tray is
indicated by
. To display the paper tray selection
screen for a tray, touch the tray.
(10) Number of copies display
This shows the number of copies set.
(11) [2-Sided Copy] key
Touch this to make 2-sided copies.
☞
(12) [Output] key
Touch this to select an output function such as sort,
group, offset, staple sort, saddle stitch, or punch.
☞
(13) Customized keys
These 3 keys can be changed to show any 3 settings or
functions that you like. The keys are changed in
"Customize Key Setting" in the system settings
(administrator). Normally the following keys appear:
☞
(page 7)
•
[Special Modes] key
This is the same [Special Modes] key that appears
when the [Job Detail Settings] key is touched.
☞
(page 54)
•
[File] key, [Quick File] key
Touch either key to use the Quick File or File of the
document filing functions. These are the same [File]
and [Quick File] keys that appear when the [Special
Modes] key is touched. For information on the
document filing function, see the Document Filing
Guide.
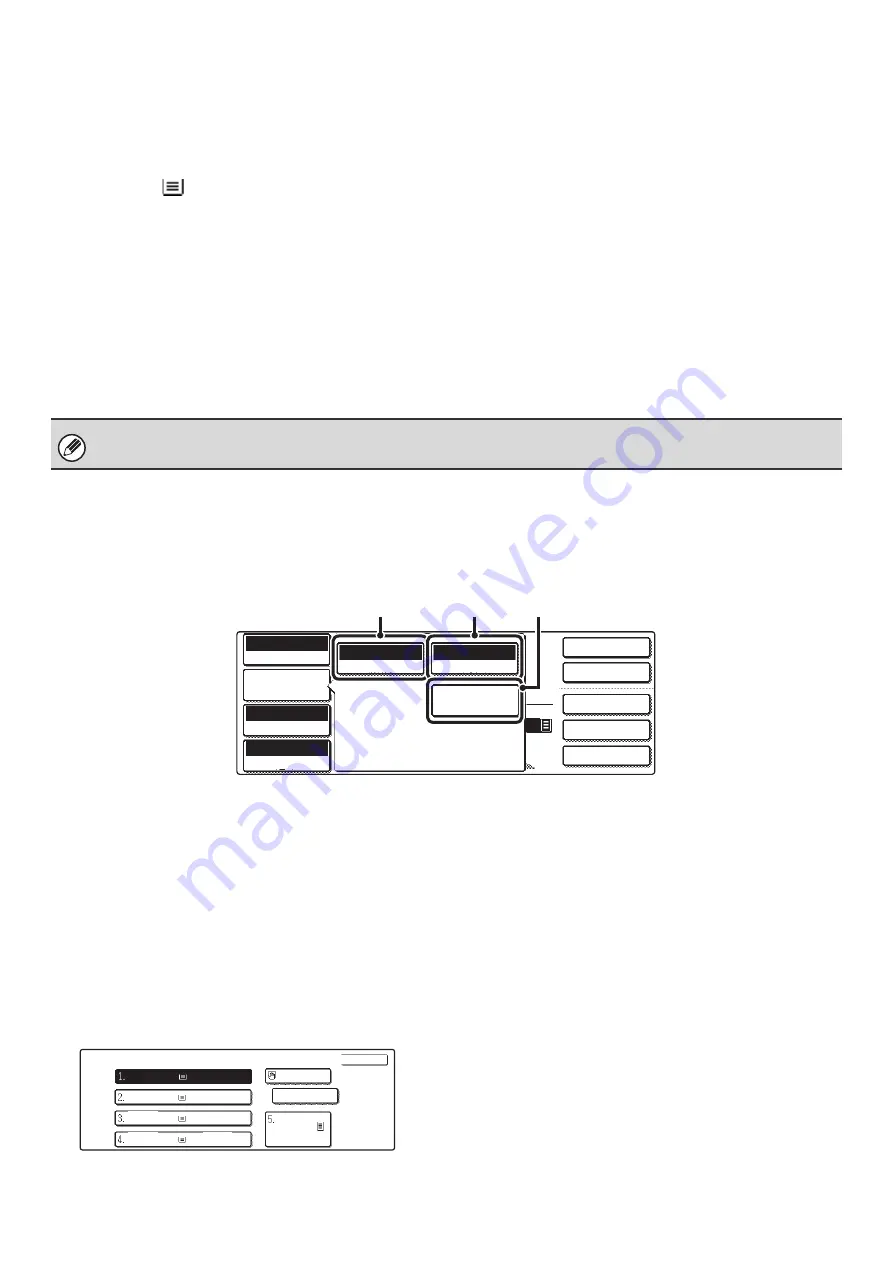
[Job Detail Settings] key
When the [Job Detail Settings] key is touched, keys for selecting the original size and paper settings appear. The
[Special Modes] key also appears to allow the selection of special modes. To close the job detail settings screen and
return to the base screen, touch the [Job Detail Settings] key once again.
(1)
[Original] key
Touch this key to select the original size setting.
☞
(page 33)
(2)
[Paper Select] key
Touch this key to change the paper (tray) that is used.
When the key is touched, each tray and the size and type of
paper in that tray will appear . Touch the key of the paper
tray that you wish to use and then touch the [OK] key.
The paper size and paper type settings for trays 1 to 5
are configured in the system settings.
☞
System Settings Guide "Paper Tray Settings"
For information on the paper size and paper type settings
for the bypass tray, see the "
BYPASS TRAY (Copying on special papers)
" (page 46).
(3)
[Special Modes] key
Touch this key to select special modes such as Margin
Shift, Edge Erase, and Dual Page Copy.
☞
(page 54)
When the system settings screen is displayed, the base screen of copy mode will not appear even if the [COPY] key is
pressed.
2-Sided Copy
Output
Special Modes
File
Quick File
Full Color
Color Mode
Auto
Exposure
100%
Copy Ratio
Auto
Original
Auto
8 x11
Paper Select
Special Modes
Job Detail
Settings
8 x11
1
/
2
Plain
8 x11
1
/
2
1
/
2
(1)
(2)
(3)
8 x11
Plain
Paper Select
OK
OK
A4
Plain
Plain
Plain
Plain
Plain
8 x11
1
/
2
8 x11
1
/
2
8 x11R
1
/
2
8 x14
1
/
2
11x17
1
/
2
Summary of Contents for MX 3501N - Color Laser - Copier
Page 1: ...User s Guide MX 3500N MX 3501N MX 4500N MX 4501N MX 2300N MX 2700N MODEL ...
Page 2: ...System Settings Guide MX 3500N MX 3501N MX 4500N MX 4501N MX 2300N MX 2700N MODEL ...
Page 173: ... mx4500_us_ins book 44 ページ 2005年10月31日 月曜日 午前11時57分 ...
Page 174: ... mx4500_us_ins book 45 ページ 2005年10月31日 月曜日 午前11時57分 ...
Page 176: ...Document Filing Guide MX 3500N MX 3501N MX 4500N MX 4501N MX 2300N MX 2700N MODEL ...
Page 223: ...Scanner Guide MX 3500N MX 3501N MX 4500N MX 4501N MX 2300N MX 2700N MODEL ...
Page 354: ...MX4500 US SCN Z2 Scanner Guide MX 3500N MX 3501N MX 4500N MX 4501N MX 2300N MX 2700N MODEL ...
Page 355: ...Printer Guide MX 3500N MX 3501N MX 4500N MX 4501N MX 2300N MX 2700N MODEL ...
Page 415: ...MX4500 US PRT Z2 Printer Guide MX 3500N MX 3501N MX 4500N MX 4501N MX 2300N MX 2700N MODEL ...
Page 416: ...Facsimile Guide MX FXX1 MODEL ...
Page 605: ...MX FXX1 MODEL MX4500 US FAX Z2 Facsimile Guide ...
Page 606: ...Copier Guide MX 3500N MX 3501N MX 4500N MX 4501N MX 2300N MX 2700N MODEL ...
Page 775: ...MX4500 US CPY Z1 Copier Guide MX 3500N MX 3501N MX 4500N MX 4501N MX 2300N MX 2700N MODEL ...
Page 843: ...MX4500 US USR Z1 User s Guide MX 3500N MX 3501N MX 4500N MX 4501N MX 2300N MX 2700N MODEL ...


