30
8
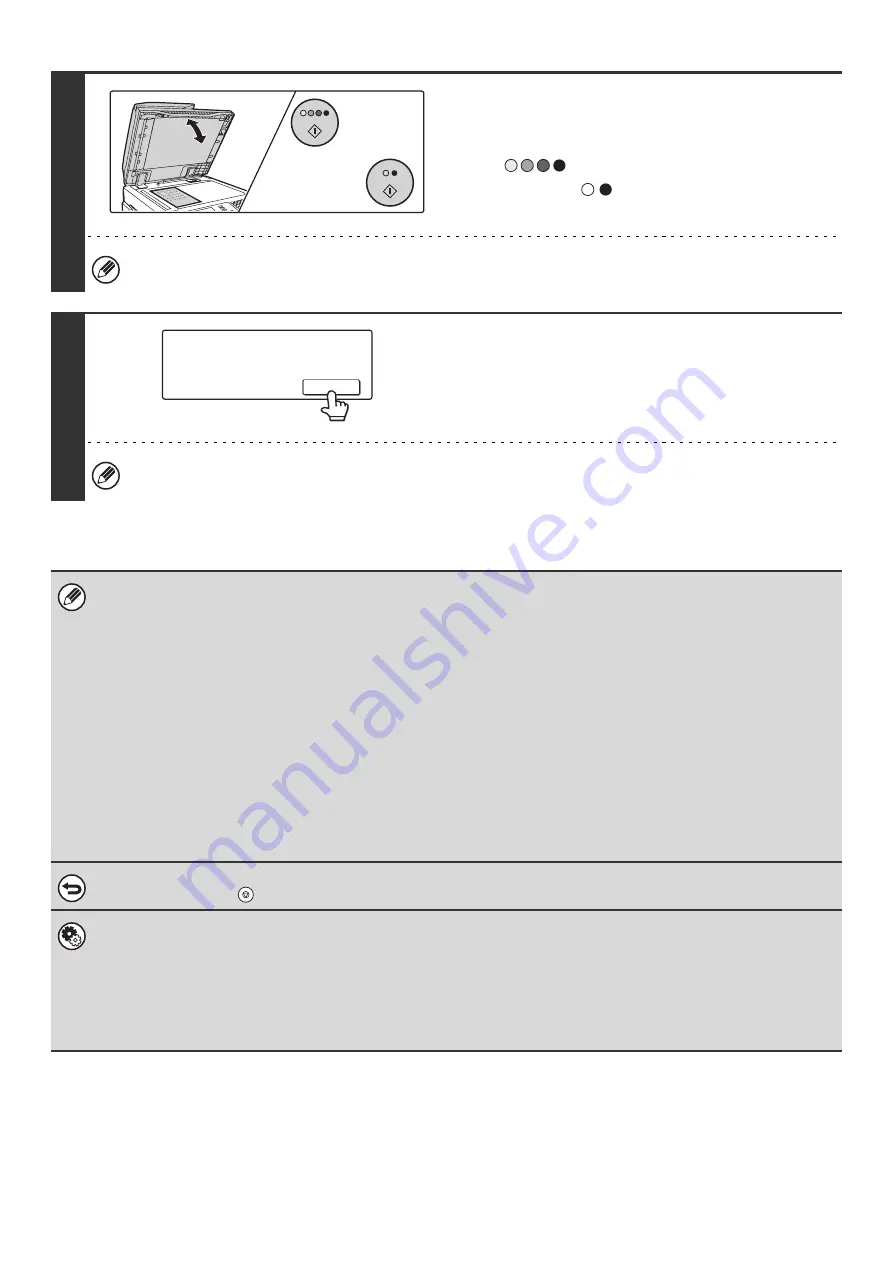
If the original was placed on the
document glass, replace it with the next
original and press the [COLOR START]
key (
) or the [BLACK & WHITE
START] key (
).
Repeat until all originals have been scanned.
The exposure, resolution, and scan size/send size can be changed for each original page that is scanned.
9
Touch the [Read-End] key.
A beep will sound to indicate that the operation is completed.
Open the automatic document feeder and remove the original.
If no action is taken for one minute after the confirmation screen appears, scanning automatically ends and the
transmission is reserved.
• When all originals have been scanned, "Job stored." will be displayed together with a job control number. This number can
be used to locate the job in the Transaction Report or in the Image Sending Activity Report. If the job is a broadcast
transmission, this number will also appear in the key of the job in the job status screen. For this reason, making a note of
the number is useful for checking the result.
• If the memory becomes full while the originals are being scanned, a message will appear and scanning will stop.
• When performing Scan to E-mail, take care not to send a file that is too large. In particular, multi-page files tend to be large.
When sending a multi-page file or other large file, it may be necessary to reduce the number of scanned pages or reduce
the send size.
•
Storing a mail signature
You can have preset text automatically added at the end of e-mail messages as a mail signature. This is convenient when
you wish to have a corporate policy or other preset text appear at the bottom of e-mail messages. To store the text for the
mail signature, click [Application Settings] and then [Network Scanner Settings] in the Web page menu. (Administrator
rights are required.) Up to 900 characters can be entered. (The mail signature is not included in the maximum number of
characters that can be entered in the e-mail message.)
Use "Pre-Setting Mail Signature" in the system settings (administrator) to specify whether or not a mail signature is added.
To cancel scanning...
Press the [STOP] key (
) to cancel the operation.
•
System Settings (Administrator): Scan Settings
Scanner transmission settings can be configured, including the default resolution and exposure settings, the default color
mode and file format, the file compression method for broadcasting, the file size limit for Scan to E-mail, and the default
sender and destination.
•
System Settings (Administrator): Pre-Setting Mail Signature
Use this setting to specify whether or not a mail signature is added at the end of e-mail messages. By factory default, a
mail signature is not added.
or
Place next original. (Pg.No.x)
Press [Start].
When finished, press [Read-End]
Read-End
Summary of Contents for MX 3501N - Color Laser - Copier
Page 1: ...User s Guide MX 3500N MX 3501N MX 4500N MX 4501N MX 2300N MX 2700N MODEL ...
Page 2: ...System Settings Guide MX 3500N MX 3501N MX 4500N MX 4501N MX 2300N MX 2700N MODEL ...
Page 173: ... mx4500_us_ins book 44 ページ 2005年10月31日 月曜日 午前11時57分 ...
Page 174: ... mx4500_us_ins book 45 ページ 2005年10月31日 月曜日 午前11時57分 ...
Page 176: ...Document Filing Guide MX 3500N MX 3501N MX 4500N MX 4501N MX 2300N MX 2700N MODEL ...
Page 223: ...Scanner Guide MX 3500N MX 3501N MX 4500N MX 4501N MX 2300N MX 2700N MODEL ...
Page 354: ...MX4500 US SCN Z2 Scanner Guide MX 3500N MX 3501N MX 4500N MX 4501N MX 2300N MX 2700N MODEL ...
Page 355: ...Printer Guide MX 3500N MX 3501N MX 4500N MX 4501N MX 2300N MX 2700N MODEL ...
Page 415: ...MX4500 US PRT Z2 Printer Guide MX 3500N MX 3501N MX 4500N MX 4501N MX 2300N MX 2700N MODEL ...
Page 416: ...Facsimile Guide MX FXX1 MODEL ...
Page 605: ...MX FXX1 MODEL MX4500 US FAX Z2 Facsimile Guide ...
Page 606: ...Copier Guide MX 3500N MX 3501N MX 4500N MX 4501N MX 2300N MX 2700N MODEL ...
Page 775: ...MX4500 US CPY Z1 Copier Guide MX 3500N MX 3501N MX 4500N MX 4501N MX 2300N MX 2700N MODEL ...
Page 843: ...MX4500 US USR Z1 User s Guide MX 3500N MX 3501N MX 4500N MX 4501N MX 2300N MX 2700N MODEL ...


