13
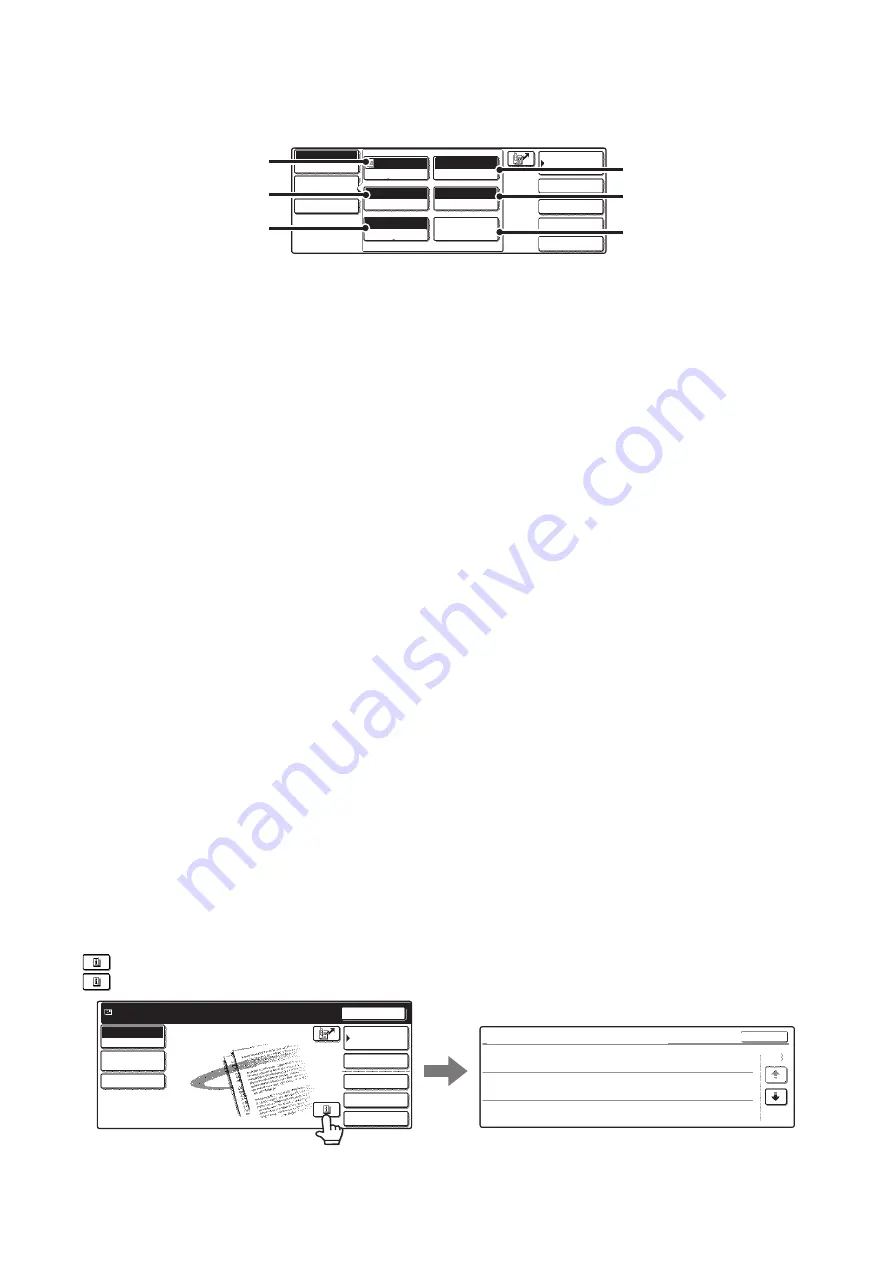
[Image Settings] key
When the [Image Settings] key is touched, the [Special Modes] key and keys for selecting scan settings appear.
The current setting of each scan setting key appears in the top of the key.
(1)
[Exposure] key
Touch this key to select the exposure for scanning.
☞
Scan mode:
CHANGING THE EXPOSURE AND EXPOSURE
MODE
USB memory mode:
CHANGING THE EXPOSURE AND EXPOSURE
MODE
Internet fax mode:
(page 65)
(2)
[Resolution] key
Touch this key to select the resolution for scanning.
☞
Scan mode:
(page 33)
USB memory mode:
(page 52)
Internet fax mode:
(page 66)
(3)
[Original] key
Touch this key to select the original size, the original
orientation, two-sided scanning, and the send size.
☞
Scan mode:
AUTOMATICALLY SCANNING BOTH SIDES OF
AN ORIGINAL (2-Sided Original)
SPECIFYING THE ORIGINAL SCAN SIZE AND
SEND SIZE (Enlarge/Reduce)
USB memory mode:
AUTOMATICALLY SCANNING BOTH SIDES OF
AN ORIGINAL (2-Sided Original)
SPECIFYING THE ORIGINAL SCAN SIZE AND
SEND SIZE (Enlarge/Reduce)
Internet fax mode:
AUTOMATICALLY SCANNING BOTH SIDES OF
AN ORIGINAL (2-Sided Original)
SPECIFYING THE ORIGINAL SCAN SIZE AND
SEND SIZE (Enlarge/Reduce)
(4)
[Color Mode] key
Touch this key to select the color mode for scanning.
This key does not appear in Internet fax mode.
☞
Scan mode:
(page 39)
USB memory mode:
(page 58)
(5)
[File Format] key
Touch this key to change the file format (file type) for the
scanned image file.
☞
Scan mode:
(page 40)
USB memory mode:
(page 59)
Internet fax mode:
(page 72)
(6)
[Special Modes] key
Touch this key to use a convenient special mode. Open
the special modes screen from here when "Customize
Key Setting" in the system settings (administrator) has
been changed so that the [Special Modes] key is not
displayed in the base screen.
Checking what special modes are selected
The
key appears in the base screen when a special mode or two-sided scanning is selected.
The
key can be touched to display the selected special modes. To close the screen, touch the [OK] key.
Quick File
File
Special Modes
Address Entry
Address Book
Scan
Mode Switch
Send Settings
Auto
Exposure
200X200dpi
Resolution
PDF/PDF
File Format
Mono2/Auto
Color Mode
Special Modes
Auto 8 x11
1
/
2
Original
Image
Settings
(1)
(5)
(4)
(2)
(3)
(6)
Quick File
File
Special Modes
Address Entry
Resend
Address Book
Scan
Mode Switch
Send Settings
Ready to send.
Function Review
OK
1/3
Edge:1/2inch
Center:1/2inch
Day of the Week:Monday
Time:21:30
:
:
On
:
Timer
Erase
Job
Build
Image
Settings
Summary of Contents for MX 3501N - Color Laser - Copier
Page 1: ...User s Guide MX 3500N MX 3501N MX 4500N MX 4501N MX 2300N MX 2700N MODEL ...
Page 2: ...System Settings Guide MX 3500N MX 3501N MX 4500N MX 4501N MX 2300N MX 2700N MODEL ...
Page 173: ... mx4500_us_ins book 44 ページ 2005年10月31日 月曜日 午前11時57分 ...
Page 174: ... mx4500_us_ins book 45 ページ 2005年10月31日 月曜日 午前11時57分 ...
Page 176: ...Document Filing Guide MX 3500N MX 3501N MX 4500N MX 4501N MX 2300N MX 2700N MODEL ...
Page 223: ...Scanner Guide MX 3500N MX 3501N MX 4500N MX 4501N MX 2300N MX 2700N MODEL ...
Page 354: ...MX4500 US SCN Z2 Scanner Guide MX 3500N MX 3501N MX 4500N MX 4501N MX 2300N MX 2700N MODEL ...
Page 355: ...Printer Guide MX 3500N MX 3501N MX 4500N MX 4501N MX 2300N MX 2700N MODEL ...
Page 415: ...MX4500 US PRT Z2 Printer Guide MX 3500N MX 3501N MX 4500N MX 4501N MX 2300N MX 2700N MODEL ...
Page 416: ...Facsimile Guide MX FXX1 MODEL ...
Page 605: ...MX FXX1 MODEL MX4500 US FAX Z2 Facsimile Guide ...
Page 606: ...Copier Guide MX 3500N MX 3501N MX 4500N MX 4501N MX 2300N MX 2700N MODEL ...
Page 775: ...MX4500 US CPY Z1 Copier Guide MX 3500N MX 3501N MX 4500N MX 4501N MX 2300N MX 2700N MODEL ...
Page 843: ...MX4500 US USR Z1 User s Guide MX 3500N MX 3501N MX 4500N MX 4501N MX 2300N MX 2700N MODEL ...


