113
9
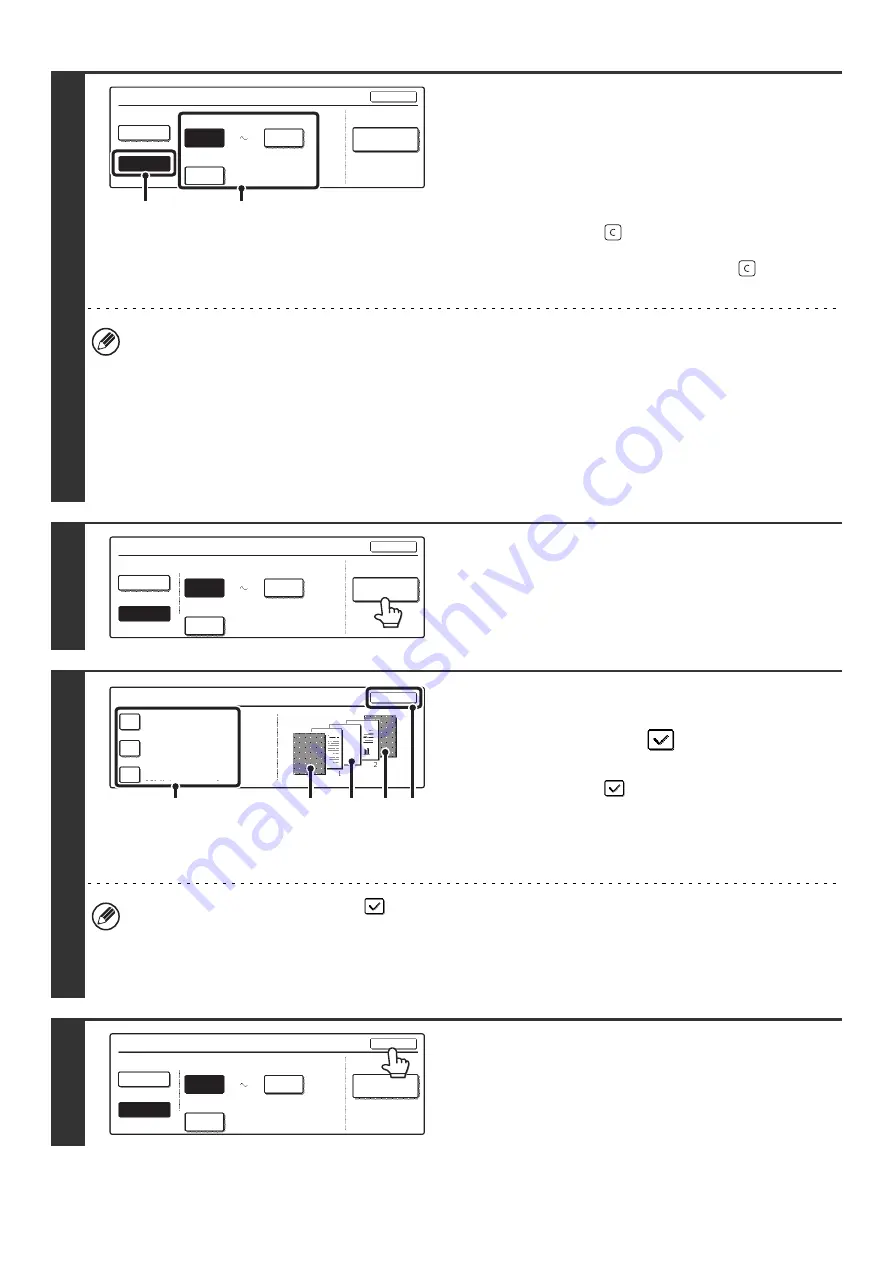
Select page number settings.
(1) Touch the [Manual] key.
(2) Set the first number, the last number, and
the "Printing Starts from Page" number.
Touch each key and enter a number with the numeric
keys. (1 to 999)
The [CLEAR] key (
) can be pressed to return the
setting of the selected item to the default value. If you
make a mistake, press the [CLEAR] key (
) and then
enter the correct number.
• A last number smaller than the first number cannot be set.
• The "Last Number" is initially set to "Auto", which means that page numbers are automatically printed through the
last page based on the "First Number" and "Printing Start from Page" settings.
• If the last number is set to a smaller number than the total pages, page numbers are not printed on pages after the
page set as the last number.
• Set a page number in "Printing Starts from Page". For example, if "3" is set and one-sided copying is being
performed, page numbers will be printed beginning from the 3rd copy sheet (the 3rd original page). If two-sided
copying is being performed, page numbers will be printed beginning from the front side of the 2nd copy sheet (the
3rd original page).
10
If covers/inserts will be inserted, touch
the [Covers/Inserts Counting] key if you
want the covers/inserts to be counted in
the page numbers.
11
Touch each item that you want counted
in the page numbers so that a
checkmark appears
, and then touch
the [OK] key.
Items with a checkmark
will be reflected in the print image
on the right side of the screen.
(A): Front cover image
(B): Insert image
(C): Back cover image
• When the checkboxes are selected
, each inserted sheet of paper (front cover, insert, or back cover) will be
counted as one page in the case of 1-sided copying, or two pages in the case of 2-sided copying. However, when
the body sheets are 1-sided copies and the inserted sheets are 2-sided copies, each body sheet is counted as one
page and each inserted sheet is counted as 2 pages.
• Page numbers are printed on covers/inserts if the covers/inserts are counted and if they are copied on.
12
Touch the [OK] key.
Page Number
Last Number
Auto
OK
Auto
Manual
1
1
First Number
Printing Starts from Page
Covers/Inserts
Counting
(1)
(2)
Page Number
Last Number
First Number
Printing Starts from Page
Auto
OK
Auto
Manual
1
1
Covers/Inserts
Counting
Covers/Inserts Counting
OK
Count Inserts
Count Front Cover
Count Back Cover
(1)
(2)
(C)
(B)
(A)
Last Number
Auto
OK
Auto
Manual
1
1
First Number
Printing Starts from Page
Page Number
Covers/Inserts
Counting
Summary of Contents for MX 3501N - Color Laser - Copier
Page 1: ...User s Guide MX 3500N MX 3501N MX 4500N MX 4501N MX 2300N MX 2700N MODEL ...
Page 2: ...System Settings Guide MX 3500N MX 3501N MX 4500N MX 4501N MX 2300N MX 2700N MODEL ...
Page 173: ... mx4500_us_ins book 44 ページ 2005年10月31日 月曜日 午前11時57分 ...
Page 174: ... mx4500_us_ins book 45 ページ 2005年10月31日 月曜日 午前11時57分 ...
Page 176: ...Document Filing Guide MX 3500N MX 3501N MX 4500N MX 4501N MX 2300N MX 2700N MODEL ...
Page 223: ...Scanner Guide MX 3500N MX 3501N MX 4500N MX 4501N MX 2300N MX 2700N MODEL ...
Page 354: ...MX4500 US SCN Z2 Scanner Guide MX 3500N MX 3501N MX 4500N MX 4501N MX 2300N MX 2700N MODEL ...
Page 355: ...Printer Guide MX 3500N MX 3501N MX 4500N MX 4501N MX 2300N MX 2700N MODEL ...
Page 415: ...MX4500 US PRT Z2 Printer Guide MX 3500N MX 3501N MX 4500N MX 4501N MX 2300N MX 2700N MODEL ...
Page 416: ...Facsimile Guide MX FXX1 MODEL ...
Page 605: ...MX FXX1 MODEL MX4500 US FAX Z2 Facsimile Guide ...
Page 606: ...Copier Guide MX 3500N MX 3501N MX 4500N MX 4501N MX 2300N MX 2700N MODEL ...
Page 775: ...MX4500 US CPY Z1 Copier Guide MX 3500N MX 3501N MX 4500N MX 4501N MX 2300N MX 2700N MODEL ...
Page 843: ...MX4500 US USR Z1 User s Guide MX 3500N MX 3501N MX 4500N MX 4501N MX 2300N MX 2700N MODEL ...


