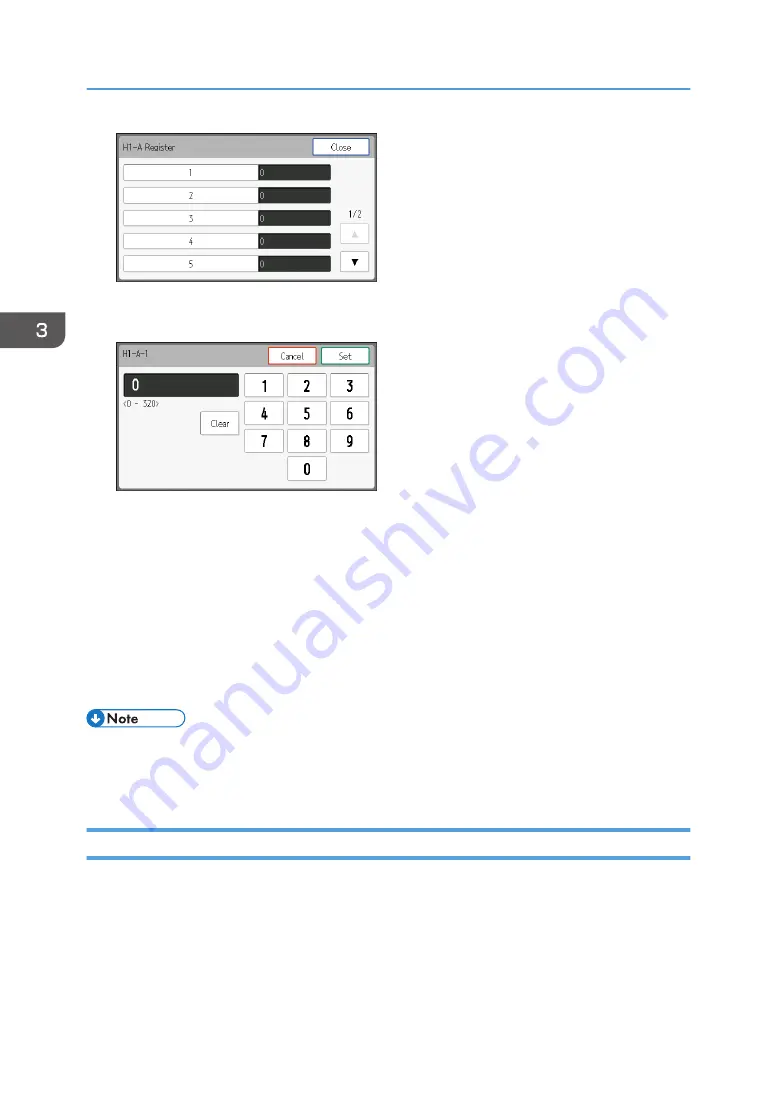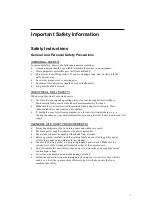
11.
Enter the number of the clogged nozzle that you checked in Step 3 using the number keys,
and then press [Set].
The clogged nozzle is registered.
12.
Press [Close] 3 times.
13.
Press [Nozzle Recovery].
14.
Press [On].
The clogged nozzle is compensated with another nozzle. Prints with the compensated nozzle from
the first printing job after these settings are configured.
15.
Press [Close].
16.
Press [End].
• It is not reflected in the result of the test print even when [Nozzle Recovery] is set to [On]. When
checking the print result in which the clogged nozzle is recovered, print the recovery check pattern
by using the RIP software. For details, see "Functions on the Main Menu", RIP Settings Guide.
Deleting the Registered Clogged Nozzle
Delete the registered clogged nozzle by nozzle column.
When the clogged nozzle is cleared by performing head cleaning, delete the registered clogged
nozzle. Make sure to switch [Nozzle Recovery] to [Off] after all nozzle defects are cleared.
3. Convenient Usage
118
Summary of Contents for Pro L5130
Page 2: ......
Page 8: ...7 Appendix Trademarks 257 6 ...
Page 50: ...1 Getting Started 48 ...
Page 90: ...DWT216 2 Basic Operations 88 ...
Page 132: ...11 Press End 3 Convenient Usage 130 ...
Page 136: ...5 Press Close 6 Press End 3 Convenient Usage 134 ...
Page 154: ... Base line position on the media guide 4 Configuring and Managing the Machine 152 ...
Page 228: ...10 DWT208 11 DWT209 12 DWT210 5 Troubleshooting 226 ...
Page 234: ...5 Troubleshooting 232 ...
Page 261: ...MEMO 259 ...
Page 262: ...MEMO 260 EN GB EN US EN AU M0BY 7564A ...
Page 263: ......
Page 264: ...EN GB EN US EN AU M0BY 7564A 2018 2019 Ricoh Co Ltd ...


