Printing options
2
2-90
d-Color MF552/452/362/282/222
2.5
4
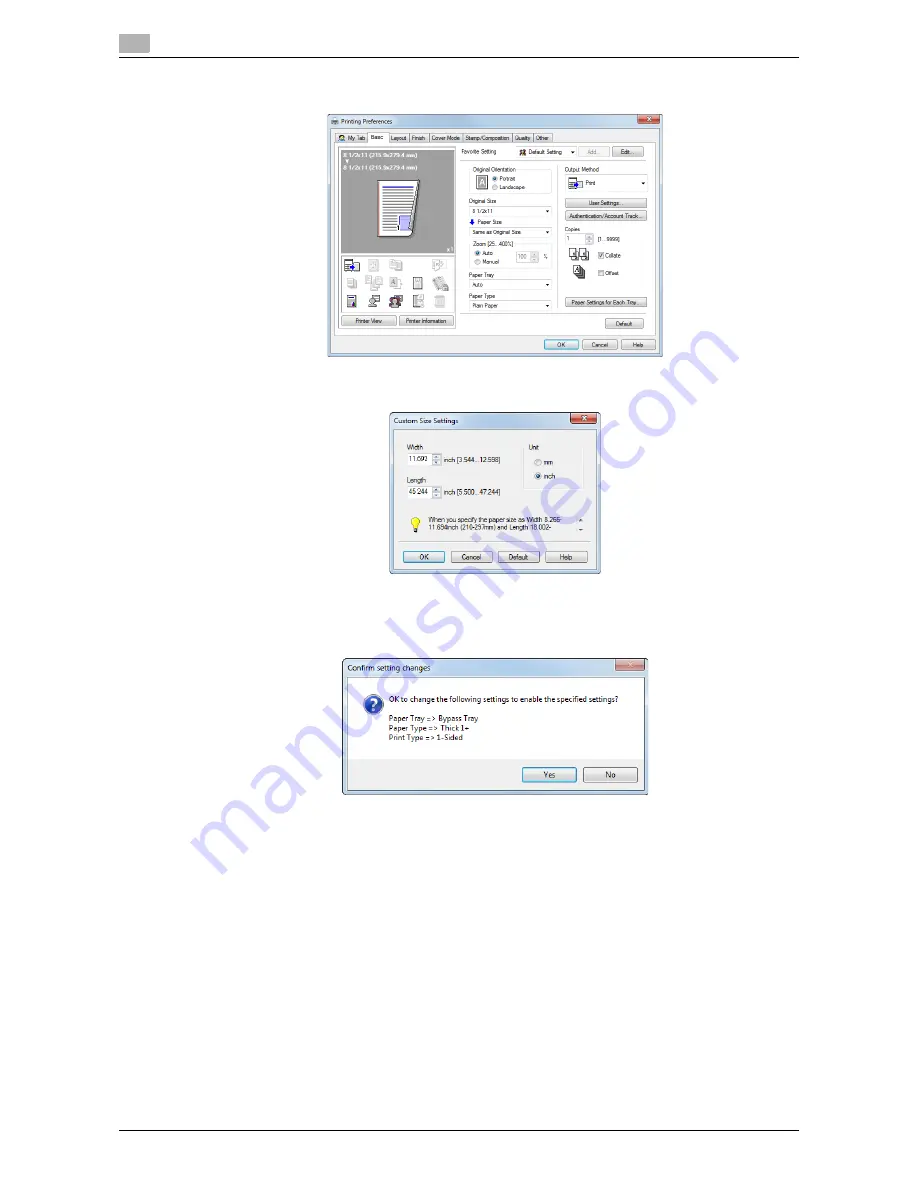
In [Original Size] in the [Basic] tab, select [Custom Size].
5
Specify the width and length of the banner paper, and click [OK].
The [Confirm setting changes] dialog box appears.
6
Click [Yes].
The [Paper Tray], [Paper Type], and [Print Type] settings are switched.
%
Click the [Paper Settings for Each Tray...], and change the type of papers on the
Bypass Tray
ac-
cording to the weight of print papers.
%
If the [Resolution] is set to [1200dpi (High Quality)], it is switched to [600dpi].
7
Execute printing.
A message appears on the
Touch Panel
to prompt you to load papers.
8
Load the banner paper into the
Bypass Tray
.
%
For information on how to load banner paper into the
Bypass Tray
, refer to [User's Guide: Introduc-
tion].
Summary of Contents for d-Color MF222
Page 11: ...1 Printer Functions...
Page 12: ......
Page 16: ...Cable connection locations on this machine 1 1 6 d Color MF552 452 362 282 222 1 3...
Page 17: ...2 Printing in the Windows Environment...
Page 18: ......
Page 147: ...3 Printing in a Mac OS Environment...
Page 148: ......
Page 245: ...4 Printing in a NetWare Environment...
Page 246: ......
Page 250: ...Installing the printer driver 4 4 6 d Color MF552 452 362 282 222 4 3...
Page 251: ...5 Printing without Using the Printer Driver...
Page 252: ......
Page 256: ...Directly printing from a Bluetooth device 5 5 6 d Color MF552 452 362 282 222 5 3...
Page 257: ...6 Description of Setup Buttons User Settings...
Page 258: ......
Page 267: ...7 Description of Setup Buttons Administrator Settings...
Page 268: ......
Page 283: ...8 Index...
Page 284: ......
Page 288: ...Index by button 8 8 6 d Color MF552 452 362 282 222 8 2...


