Using the Configurator
199
If the output devices are both in an output group and correlated to the input zone, they will
activate simultaneously when the input zone activates.
19.49 LED Annunciator
A node can have multiple LED annunciators, but they all share the same configuration.
Therefore, only one LED annunciator appears for each node in the Job Tree.
Add an LED annunciator
1. Click
Insert
in the menu bar, then click
Add Annunciator
.
2. In
the
Type
menu, select
LED Annunciator
.
3. Type a description in the
Tag
field, and then click
Add
.
See the LED annunciator summary
•
Click
LED Annunciator
in the Job Tree.
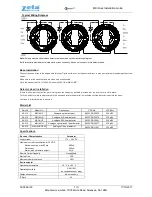
Figure 161 LED Annunciator
•
Double-click in the CPU column to change the CPU address.
•
Double-click in the Tag column to change the tag.
19.50 Loop Details
The loop details displays the hard wired (conventional) circuits or addressable devices in a
loop.
See the loop details
1. In the Job Tree, click the loop that you want to see under the
Loop Adder
or
Audio
Control
.
Table 33 Loop Details
Name
Description
Addr
For regular addressable devices, this address is the same as the device
address. For conventional circuits display adder & circuit on adder.
Abs Addr
In order to accommodate as many device addresses as possible,
advanced addressing uses the absolute address instead of the real
address. Absolute address is unique and fixed for each device address.
Device
Conventional - fixed, depending on the circuit adder. See section 19.20 on
page 165.
Addressable - chosen when adding devices. Can be edited conditionally.
For example, a Photo Detector can be changed to other types of detector,
a Relay Opt module can be changed to a Supv. Opt module.
Other changes can be made only by deleting the device and adding
another.