


48
Chapter 7: Navigation
PRO6 Live Audio System
Owner’s Manual
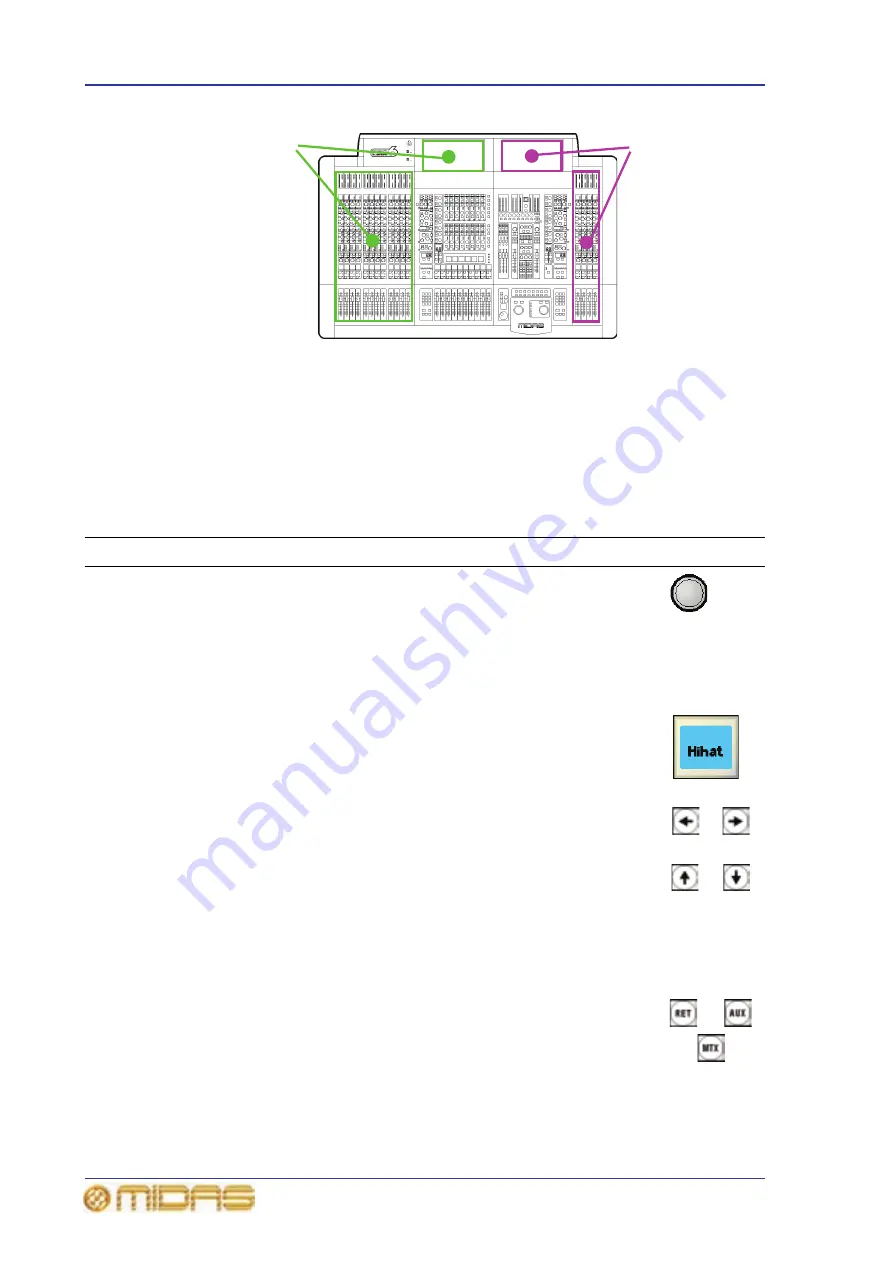
Figure 8: Input channels in the input bays
About the navigational controls
The PRO6 navigational controls can be broadly divided into two main areas: those that
operate the channels currently populating the control surface (quick access buttons and
LCD select buttons) and the ones that navigate channels to/from the control surface
(scroll buttons and output select buttons) — although there may be some overlap.
Table 1: Description of the navigational controls
Type
Description
Example(s)
Quick access
button
Quickly selects the channel, mix bus or processing area you want.
The buttons, which are round and translucent, illuminate (blue)
when active.
The quick access buttons in fast strips select their local channel
and assign their local processing area to the associated channel
strip. The ones in the channel strips select their local processing
area, but don’t affect channel selection.
LCD select
button
Selects the local input channel/group (VCA/POP). The buttons
have a backlit LCD display, which provides useful feedback by
showing you information, such as channel/group name, and by
identifying the group from the user-configured backlight colour.
When selected, the display changes to a ‘negative’ image.
Scroll button
Scrolls through the channels/mixes. The direction of scrolling
matches the analogue convention, where channels are left/right
and mixes are up/down. The scrolling action of the buttons (or
the number of channels/buses scrolled per press) varies according
to location. The buttons are translucent and have a blue backlight
that illuminates when pressed.
The scroll buttons are grouped in pairs in the ‘select’ sections of
the mix and master bays (see Figure 6 on page 27). For more
information, see “About the navigation ‘select’ sections” on page
26.
Output
select button
Navigates its associated bank of outputs to the control surface.
The buttons are translucent and have a blue backlight that
illuminates when pressed; the backlight stays on to show you
which bank of outputs is currently populating the control surface.
Three banks of four
input channels each
(12 channels in total),
which are also shown
on mix bay GUI screen
A single bank of four
input channels,
which are also shown
on master bay GUI
screen
Summary of Contents for PRO6
Page 2: ......
Page 4: ......
Page 6: ......
Page 10: ......
Page 14: ...xvi Precautions PRO6 Live Audio System Owner s Manual...
Page 24: ...xxvi Contents PRO6 Live Audio System Owner s Manual...
Page 25: ...PRO6 Live Audio System Owner s Manual Volume 1 Overview...
Page 26: ......
Page 30: ...4 Chapter 1 Introduction PRO6 Live Audio System Owner s Manual...
Page 42: ...16 Chapter 2 PRO6 Live Audio System PRO6 Live Audio System Owner s Manual...
Page 50: ...24 Chapter 3 About The PRO6 Control Centre PRO6 Live Audio System Owner s Manual...
Page 51: ...PRO6 Live Audio System Owner s Manual Volume 1 Getting Started...
Page 52: ......
Page 59: ...PRO6 Live Audio System Owner s Manual Volume 2 Basic Operation Of The PRO6...
Page 60: ......
Page 64: ...38 Chapter 5 Before You Start PRO6 Live Audio System Owner s Manual...
Page 104: ...78 Chapter 8 Patching PRO6 Live Audio System Owner s Manual...
Page 131: ...PRO6 Live Audio System Owner s Manual Volume 3 Advanced Operation And Features...
Page 132: ......
Page 136: ...110 Chapter 10 Stereo Linking PRO6 Live Audio System Owner s Manual...
Page 144: ...118 Chapter 11 Panning PRO6 Live Audio System Owner s Manual...
Page 148: ...122 Chapter 12 Soloing PRO6 Live Audio System Owner s Manual...
Page 150: ...124 Chapter 13 Muting PRO6 Live Audio System Owner s Manual...
Page 192: ...166 Chapter 18 Copy And Paste PRO6 Live Audio System Owner s Manual...
Page 242: ...216 Chapter 24 User Libraries Presets PRO6 Live Audio System Owner s Manual...
Page 246: ...220 Chapter 25 File Management PRO6 Live Audio System Owner s Manual...
Page 250: ...224 Chapter 26 Using Other Devices With The PRO6 PRO6 Live Audio System Owner s Manual...
Page 267: ...PRO6 Live Audio System Owner s Manual Volume 4 Description...
Page 268: ......
Page 335: ...PRO6 Live Audio System Owner s Manual Volume 5 Appendices...
Page 336: ......
Page 365: ...Audio signal path 339 PRO6 Live Audio System Owner s Manual Audio signal path...
Page 366: ...340 Appendix C Klark Teknik DN370 GEQ PRO6 Live Audio System Owner s Manual...
Page 372: ...346 Appendix D Klark Teknik DN780 Reverb PRO6 Live Audio System Owner s Manual...
Page 376: ...350 Appendix E I O Modules PRO6 Live Audio System Owner s Manual...
Page 400: ...374 Appendix I Documentation PRO6 Live Audio System Owner s Manual...
Page 511: ...Return 485 XL8 Live Performance System Owner s Manual Gate Not applicable EQ Not applicable...
Page 612: ...586 Glossary PRO6 Live Audio System Owner s Manual...


