


How to patch
77
PRO6 Live Audio System
Owner’s Manual
Automatic patching (AUTO)
You can patch a block of source patch connectors, just by selecting a single destination.
This is called “automatic patching”. When using automatic patching, note the following:
• Sources are selected in blocks (see “To select a block of patch connectors in the
• You can only select one block of sources.
• Destinations are restricted to a single type.
• The selected destination forms the start of the automatically patched range of
destinations.
• Sources and destinations are automatically patched in ascending order, the lowest
numbered source and the selected destination forming the first patch.
• Sources will only be patched up to the highest numbered destination of the current
destination type. If there are any sources left over, automatic patching pauses. You
can then patch these by selecting another destination.
>> To automatically patch a block of source channels
1
Click AUTO.
2
In the From section, select the source patch connectors (see “To select a block of
patch connectors in the From section” on page 75).
3
In the To section, choose the destination patch connector that will form the start
of the automatic patching range. For example, input channel 3 (Mic3).
4
Click the destination patch connector.
The sources will be patch in numerical
sequence and in ascending order from
here onwards.
Clearing all current patching
Caution:
The CLEAR function button clears all current patching, and must be
used with great caution. To alert you of the drastic nature of using
this button, a WARNING appears.
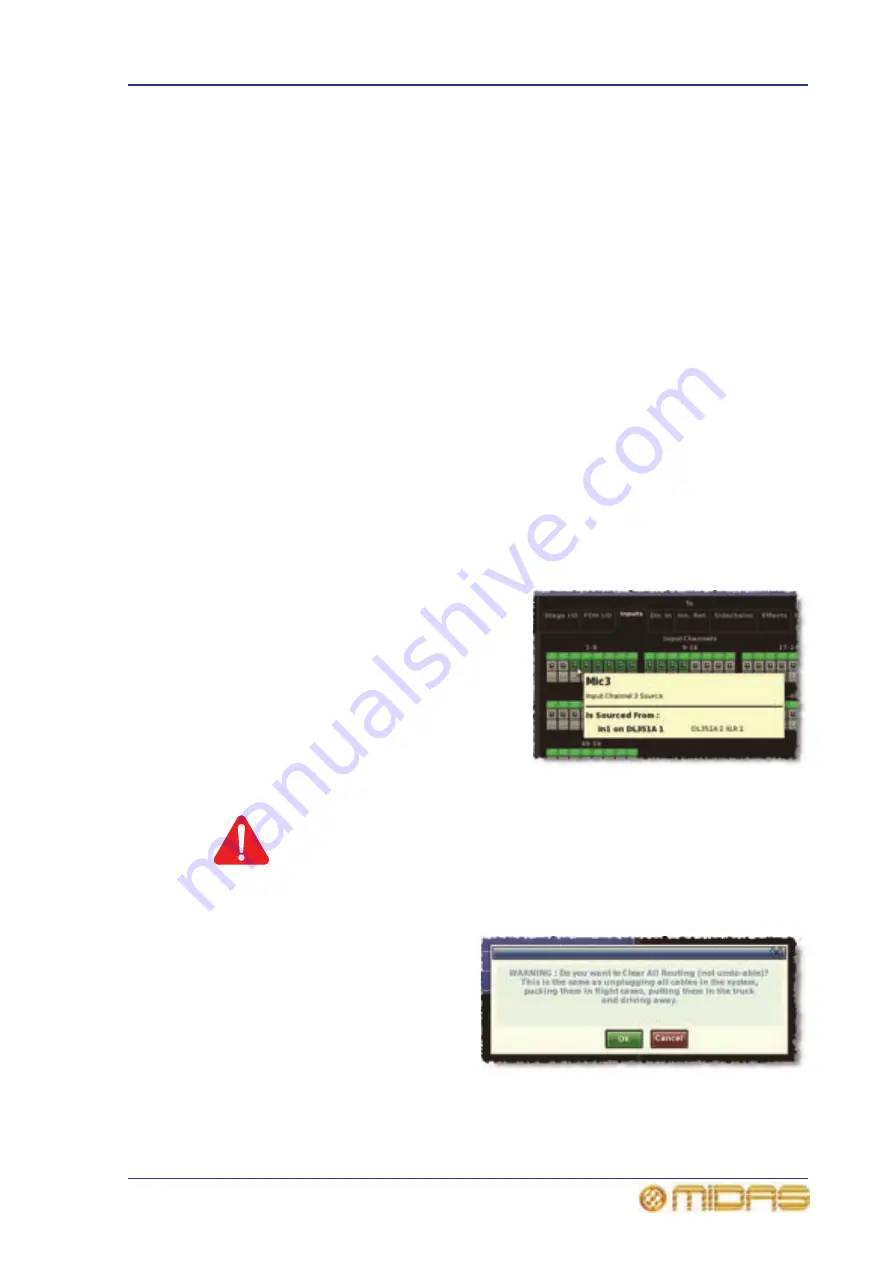
>> To clear all current patching
1
Click CLEAR. The WARNING
window (shown right) will
appear.
2
Heed the warning and do one
of the following:
• If you want to clear all
current patching, click OK.
• To cancel the clear
operation and close the
WARNING, click CANCEL.
Summary of Contents for PRO6
Page 2: ......
Page 4: ......
Page 6: ......
Page 10: ......
Page 14: ...xvi Precautions PRO6 Live Audio System Owner s Manual...
Page 24: ...xxvi Contents PRO6 Live Audio System Owner s Manual...
Page 25: ...PRO6 Live Audio System Owner s Manual Volume 1 Overview...
Page 26: ......
Page 30: ...4 Chapter 1 Introduction PRO6 Live Audio System Owner s Manual...
Page 42: ...16 Chapter 2 PRO6 Live Audio System PRO6 Live Audio System Owner s Manual...
Page 50: ...24 Chapter 3 About The PRO6 Control Centre PRO6 Live Audio System Owner s Manual...
Page 51: ...PRO6 Live Audio System Owner s Manual Volume 1 Getting Started...
Page 52: ......
Page 59: ...PRO6 Live Audio System Owner s Manual Volume 2 Basic Operation Of The PRO6...
Page 60: ......
Page 64: ...38 Chapter 5 Before You Start PRO6 Live Audio System Owner s Manual...
Page 104: ...78 Chapter 8 Patching PRO6 Live Audio System Owner s Manual...
Page 131: ...PRO6 Live Audio System Owner s Manual Volume 3 Advanced Operation And Features...
Page 132: ......
Page 136: ...110 Chapter 10 Stereo Linking PRO6 Live Audio System Owner s Manual...
Page 144: ...118 Chapter 11 Panning PRO6 Live Audio System Owner s Manual...
Page 148: ...122 Chapter 12 Soloing PRO6 Live Audio System Owner s Manual...
Page 150: ...124 Chapter 13 Muting PRO6 Live Audio System Owner s Manual...
Page 192: ...166 Chapter 18 Copy And Paste PRO6 Live Audio System Owner s Manual...
Page 242: ...216 Chapter 24 User Libraries Presets PRO6 Live Audio System Owner s Manual...
Page 246: ...220 Chapter 25 File Management PRO6 Live Audio System Owner s Manual...
Page 250: ...224 Chapter 26 Using Other Devices With The PRO6 PRO6 Live Audio System Owner s Manual...
Page 267: ...PRO6 Live Audio System Owner s Manual Volume 4 Description...
Page 268: ......
Page 335: ...PRO6 Live Audio System Owner s Manual Volume 5 Appendices...
Page 336: ......
Page 365: ...Audio signal path 339 PRO6 Live Audio System Owner s Manual Audio signal path...
Page 366: ...340 Appendix C Klark Teknik DN370 GEQ PRO6 Live Audio System Owner s Manual...
Page 372: ...346 Appendix D Klark Teknik DN780 Reverb PRO6 Live Audio System Owner s Manual...
Page 376: ...350 Appendix E I O Modules PRO6 Live Audio System Owner s Manual...
Page 400: ...374 Appendix I Documentation PRO6 Live Audio System Owner s Manual...
Page 511: ...Return 485 XL8 Live Performance System Owner s Manual Gate Not applicable EQ Not applicable...
Page 612: ...586 Glossary PRO6 Live Audio System Owner s Manual...


