Scanning
Scanning to an FTP address
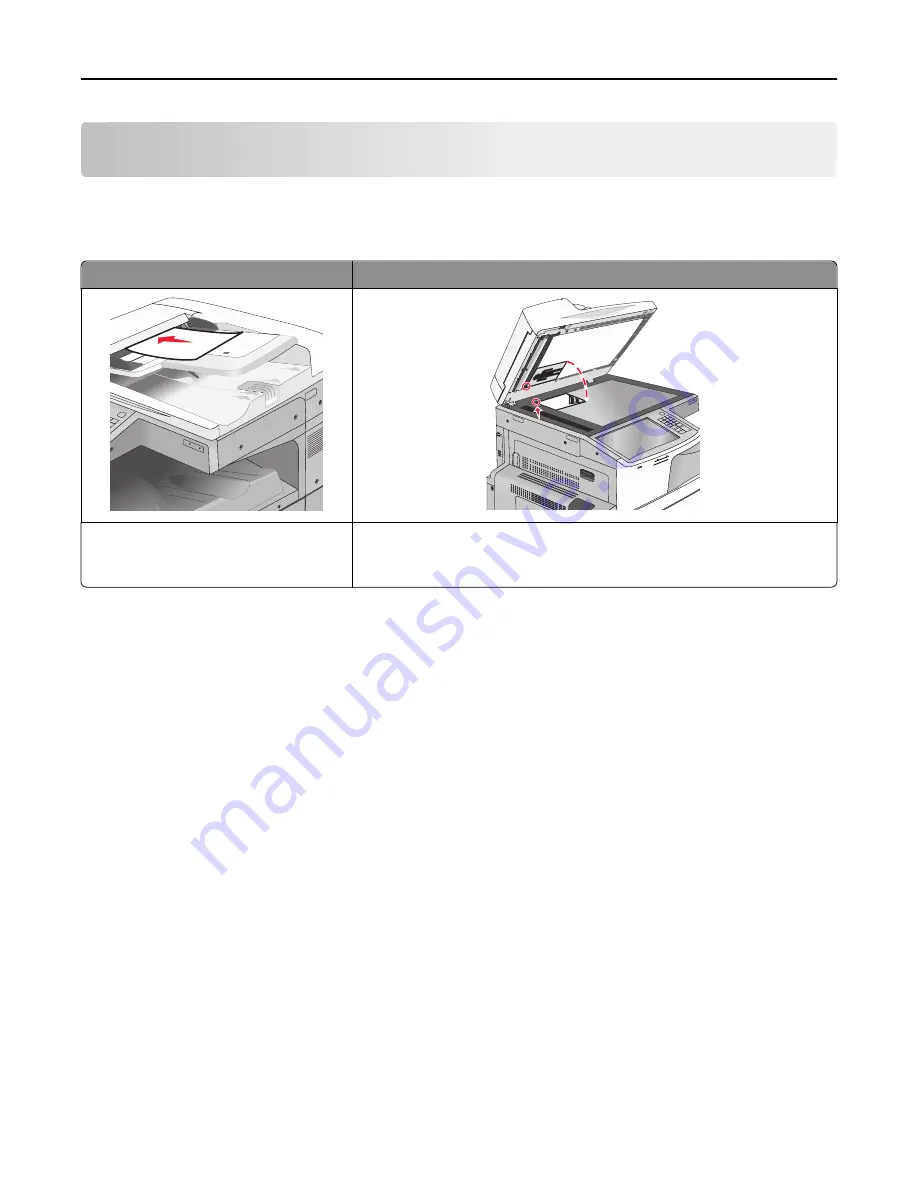
ADF
Scanner glass
Use the ADF for multiple
‑
page documents. Use the scanner glass for single pages, small items (such as postcards or
photos), transparencies, photo paper, or thin media (such as magazine
clippings).
The scanner lets you scan documents directly to a File Transfer Protocol (FTP) server. Only one FTP address may be
sent to the server at a time.
Once an FTP destination has been configured by your system support person, the name of the destination becomes
available as a shortcut number, or it is listed as a profile under the Held Jobs icon. An FTP destination could also be
another PostScript printer; for example, a color document can be scanned and then sent to a color printer.
Creating shortcuts
Instead of entering the entire FTP site address on the printer control panel each time you want to send a document to
an FTP server, you can create a permanent FTP destination and assign a shortcut number. There are two methods for
creating shortcut numbers: using the Embedded Web Server or using the printer touch screen.
Creating an FTP shortcut using the Embedded Web Server
1
Type the printer IP address into the address field of your Web browser.
If you do not know the IP address of the printer, you can:
•
View the IP address on the printer control panel in the TCP/IP section under the Networks/Ports menu.
•
Print a network setup page or the menu settings pages and locate the IP address in the TCP/IP section.
2
Click
Settings
.
3
Under Other Settings, click
Manage Shortcuts
.
Note:
A password may be required. If you do not have an ID and password, get one from your system support
person.
4
Click
FTP Shortcut Setup
.
Scanning
138
Summary of Contents for X950de 4
Page 28: ...Touch To Reset Reset values on the screen Understanding the home screen 28 ...
Page 242: ...4 Locate the printhead wipers Maintaining the printer 242 ...
Page 259: ...7 Lower the cover 8 Slide out the printhead wipers 3x 3x 3x Maintaining the printer 259 ...
Page 260: ...9 Slide the printhead wipers back into place 10 Close the cover Maintaining the printer 260 ...
Page 266: ...3 Hold the tabs on both sides of the staple cartridge Maintaining the printer 266 ...
Page 267: ...4 Rotate the booklet staple cartridge at an angle Maintaining the printer 267 ...


