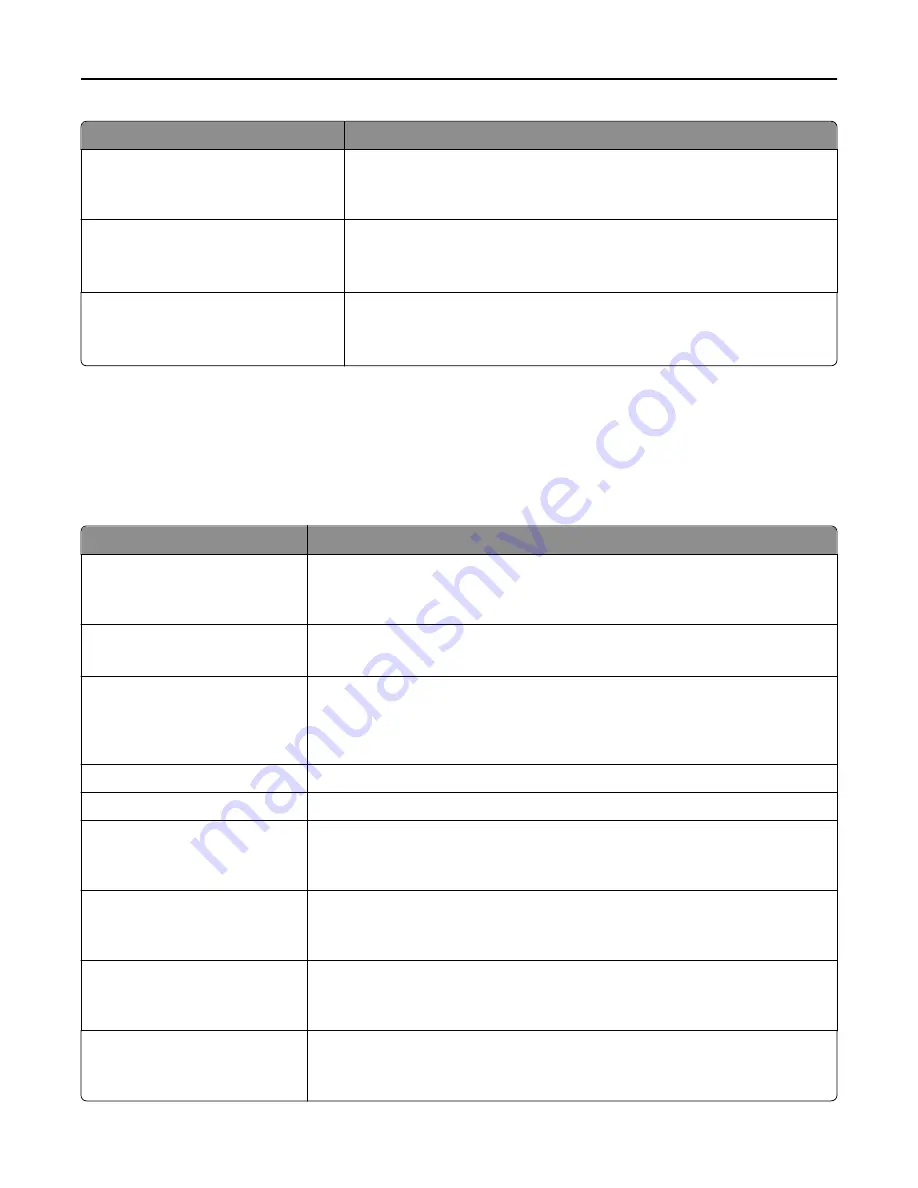
Menu item
Description
Network Address
UAA
LAA
Lets you view the network addresses
Job Timeout
0
10–225
Sets the amount of time in seconds before a network print job is canceled
Note:
90 seconds is the factory default setting.
Banner Page
Off
On
Allows the printer to print a banner page
Note:
Off is the factory default setting.
TCP/IP menu
This menu is available from the Network/Ports menu:
Network/Ports
>
Standard Network
or
Network [x]
>
Standard Network Setup
or
Network [x] Setup
>
TCP/IP
Note:
This menu is available only in network models or printers attached to print servers.
Menu item
Description
Activate
On
Off
Activates TCP/IP
Note:
On is the factory default setting.
Set Hostname
Lets you set the current TCP/IP hostname
Note:
This can be changed only from the Embedded Web Server.
IP Address
Lets you view or change the current TCP/IP address
Note:
Manually setting the IP address sets the Enable DHCP and Enable Auto IP
settings to Off. It also sets Enable BOOTP and Enable RARP to Off on systems that
support BOOTP and RARP.
Netmask
Lets you view or change the current TCP/IP netmask
Gateway
Lets you view or change the current TCP/IP gateway
Enable DHCP
On
Off
Specifies the DHCP address and parameter assignment setting
Note:
On is the factory default setting.
Enable RARP
On
Off
Specifies the RARP address assignment setting
Note:
On is the factory default setting.
Enable BOOTP
On
Off
Specifies the BOOTP address assignment setting
Note:
On is the factory default setting.
Enable AutoIP
Yes
No
Specifies the Zero Configuration Networking setting
Note:
Yes is the factory default setting.
Understanding printer menus
165
Summary of Contents for X950de 4
Page 28: ...Touch To Reset Reset values on the screen Understanding the home screen 28 ...
Page 242: ...4 Locate the printhead wipers Maintaining the printer 242 ...
Page 259: ...7 Lower the cover 8 Slide out the printhead wipers 3x 3x 3x Maintaining the printer 259 ...
Page 260: ...9 Slide the printhead wipers back into place 10 Close the cover Maintaining the printer 260 ...
Page 266: ...3 Hold the tabs on both sides of the staple cartridge Maintaining the printer 266 ...
Page 267: ...4 Rotate the booklet staple cartridge at an angle Maintaining the printer 267 ...


