Replacing
a
PCI
Adapter
Cassette:
Attention:
Perform
this
procedure
only
when
you
are
instructed
to
from
“Removing
a
Non-Hot-Pluggable
PCI
Adapter”
on
page
51
or
“Hot-Pluggable
PCI
Adapter”
on
page
52.
Before
you
replace
the
PCI
adapter
cassette,
check
the
following:
v
Before
installing
a
PCI
adapter
cassette
in
the
system,
an
adapter
or
blank
filler
must
be
installed
in
each
PCI
adapter
cassette
and
the
top
cover
for
the
system
must
be
installed.
v
Check
the
adapter
in
the
cassette
that
you
are
about
to
install,
and
make
sure
that
the
adapter
is
held
firmly
on
all
four
corners
by
the
retaining
arms
and
ratchet
clips.
v
Review
the
procedures
beginning
with
“PCI
Adapter
or
Blank
Filler
Removal
from
a
Cassette
Assembly”
on
page
62
to
make
sure
that
the
adapter
is
correctly
installed
in
the
cassette.
To
replace
a
PCI
adapter
cassette,
do
the
following:
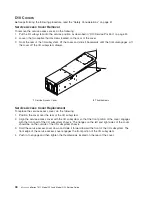
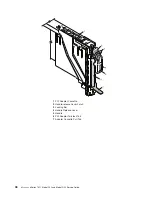
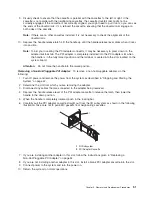
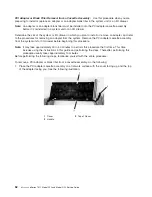
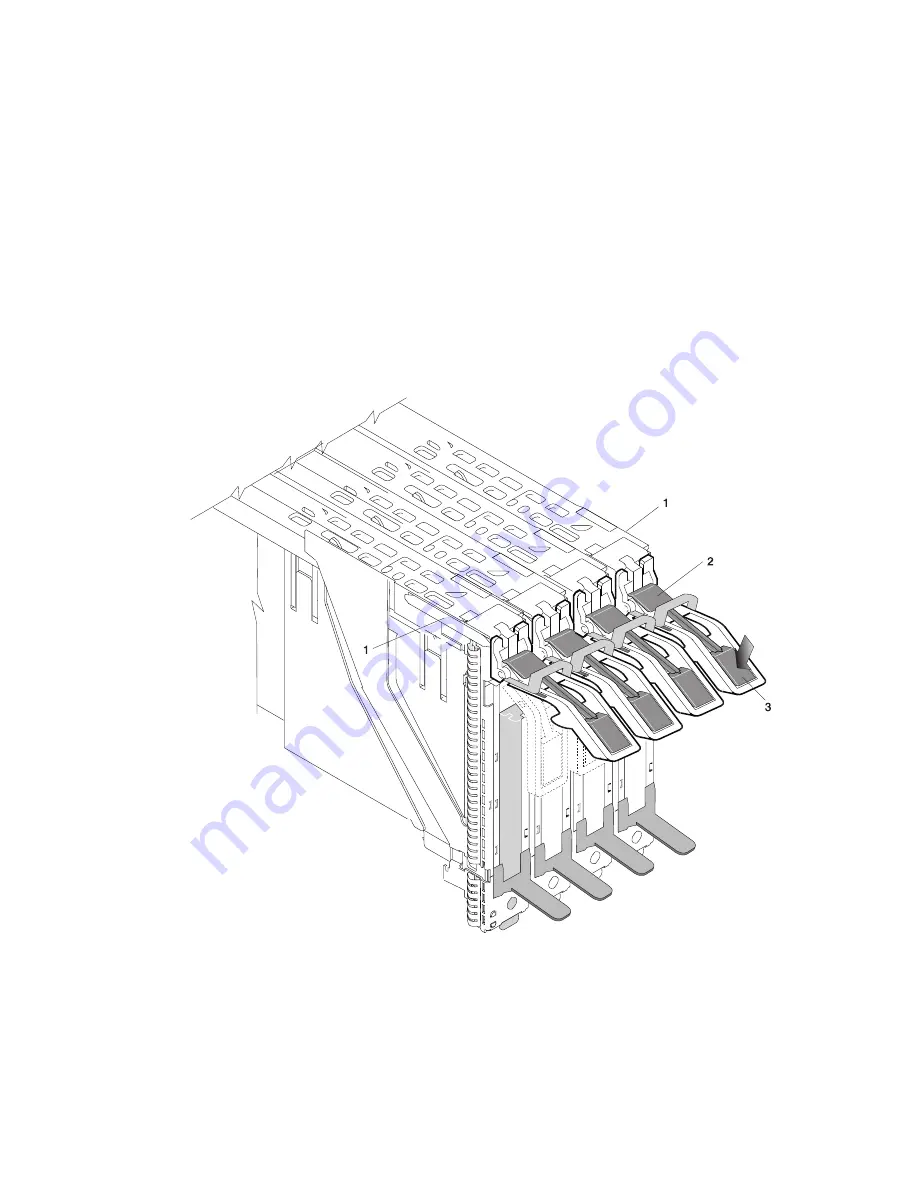
1.
Depress
the
handle
release
lever
located
in
the
center
of
the
PCI
adapter
cassette
handle.
Move
the
handle
down
completely
to
the
fully
down
position.
See
the
following
illustration.
1
Cassette
Dovetail
Rails
2
Handle-release
Lever
Latch
3
Handle
Release
Lever
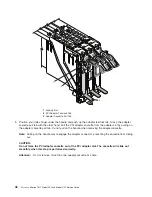
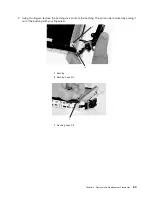
2.
Push
the
top
of
the
locking
bar
in
until
it
clicks
into
the
locked
position.
Note:
In
this
position,
the
locking
bar
locks
the
handle
in
the
down
position
and
prevents
it
from
being
pulled
up
while
the
PCI
adapter
cassette
is
being
removed.
Chapter
3.
Removal
and
Replacement
Procedures
49
Summary of Contents for eserver pSeries 7311 D10
Page 1: ...pSeries 7311 Model D10 and Model D20 Service Guide SA38 0627 01 ERserver...
Page 2: ......
Page 3: ...pSeries 7311 Model D10 and Model D20 Service Guide SA38 0627 01 ERserver...
Page 8: ...vi Eserver pSeries 7311 Model D10 and Model D20 Service Guide...
Page 12: ...x Eserver pSeries 7311 Model D10 and Model D20 Service Guide...
Page 14: ...xii Eserver pSeries 7311 Model D10 and Model D20 Service Guide...
Page 25: ...1 Processor Subsystem 2 I O Subsystem Chapter 1 Reference Information 9...
Page 89: ...Chapter 3 Removal and Replacement Procedures 73...
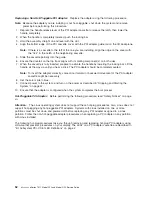
Page 99: ...2 1 1 Top of Cassette 2 Handle Chapter 3 Removal and Replacement Procedures 83...
Page 179: ...D10 I O Subsystem Parts continued 1 2 3 4 5 6 7 Chapter 4 Parts Information 163...
Page 207: ......

