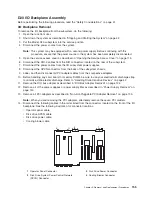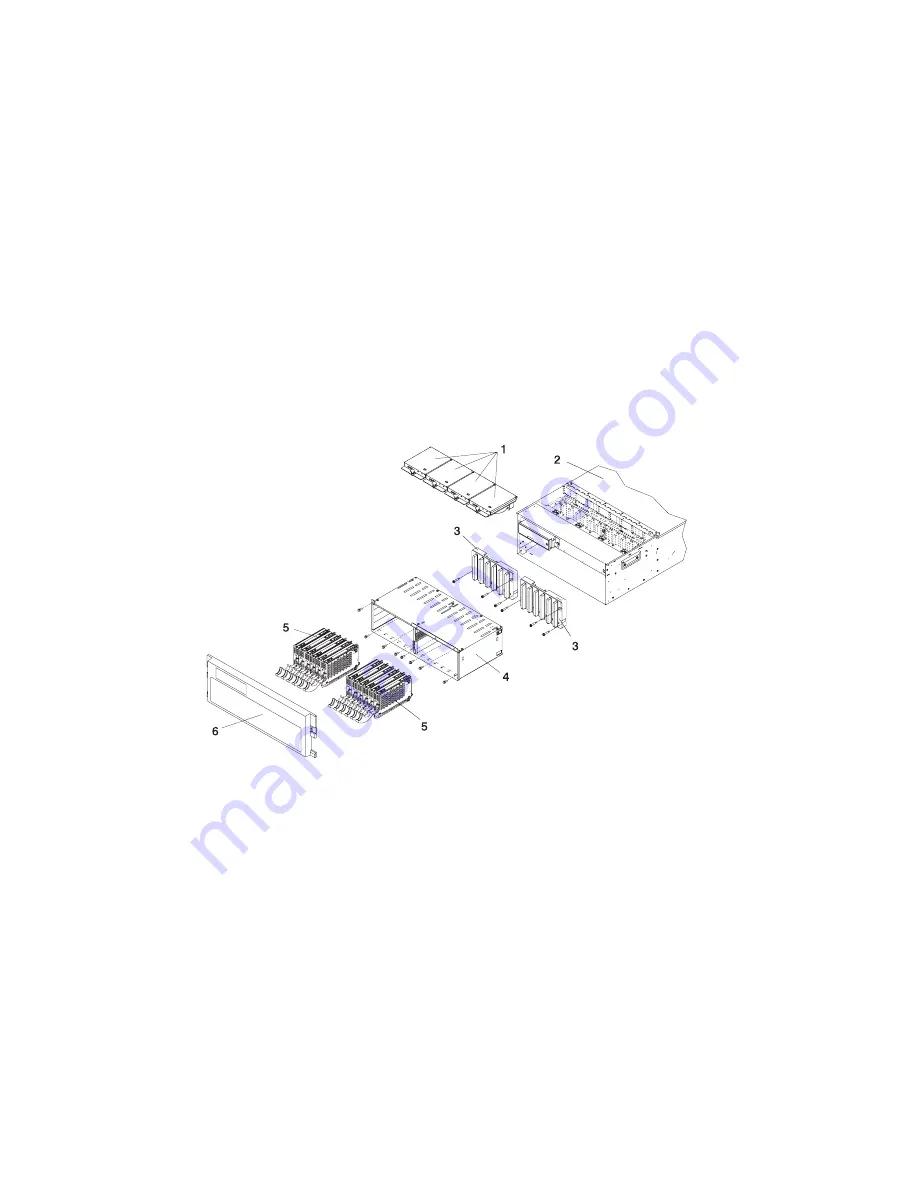
D20
Disk
Drive
Backplane
Before
performing
the
following
procedure,
read
“Safety
Considerations”
on
page
41.
Disk
Drive
Backplane
Removal
To
remove
the
disk
drive
backplane,
do
the
following:
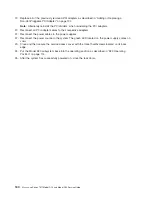
1.
Remove
all
hot-plug
disk
drives
as
described
in
“Hot-Plug
Disk
Drive
Removal”
on
page
143.
2.
Remove
the
four
cooling
blowers
as
described
in
“Hot-Swap
Blower
Removal”
on
page
119.
Note:
Removing
the
cooling
blowers
enables
you
to
view
the
disk
drive
backplanes.
3.
Disconnect
the
cables
connected
to
the
disk
drive
backplane.
4.
Remove
the
8
retaining
screws
that
secure
the
disk
drive
cage
as
described
in
“Disk
Drive
Cage
Removal”
on
page
146.
5.
Pull
the
disk
drive
cage
assembly
out
of
the
system.
6.
Remove
the
2
retaining
screws
that
secure
the
disk
drive
backplane
to
the
subsystem
chassis.
7.
Grasp
the
disk
drive
backplane
from
the
bottom
of
one
of
the
connectors
and
pull
it
out
of
the
chassis,
bottom
first.
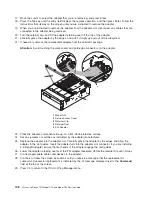
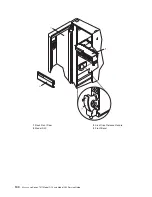
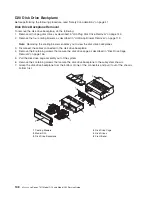
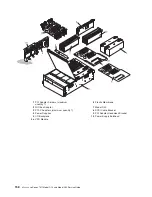
1
Cooling
Blowers
4
Disk
Drive
Cage
2
Model
D20
5
Disk
Drives
3
Disk
Drive
Backplane
6
Front
Bezel
148
Eserver
pSeries
7311
Model
D10
and
Model
D20
Service
Guide
Summary of Contents for eserver pSeries 7311 D10
Page 1: ...pSeries 7311 Model D10 and Model D20 Service Guide SA38 0627 01 ERserver...
Page 2: ......
Page 3: ...pSeries 7311 Model D10 and Model D20 Service Guide SA38 0627 01 ERserver...
Page 8: ...vi Eserver pSeries 7311 Model D10 and Model D20 Service Guide...
Page 12: ...x Eserver pSeries 7311 Model D10 and Model D20 Service Guide...
Page 14: ...xii Eserver pSeries 7311 Model D10 and Model D20 Service Guide...
Page 25: ...1 Processor Subsystem 2 I O Subsystem Chapter 1 Reference Information 9...
Page 89: ...Chapter 3 Removal and Replacement Procedures 73...
Page 99: ...2 1 1 Top of Cassette 2 Handle Chapter 3 Removal and Replacement Procedures 83...
Page 179: ...D10 I O Subsystem Parts continued 1 2 3 4 5 6 7 Chapter 4 Parts Information 163...
Page 207: ......

